How to turn an OK table into the perfect table: Part 1
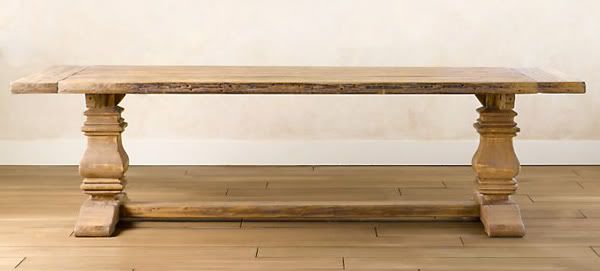 |
| isn't she a beauty? Restoration Hardware photo |
What I REALLY wanted was something distressed looking, like this Restoration Hardware table. What I didn't want is to pay a lot of money for a table.
You might recall that I ended up finding this Camden Table at the Restoration Hardware Outlet, with one smashed in corner and a hefty chunk off the sticker price (plus, RH had its annual Friends and Family sale going on for an additional 20 percent off).
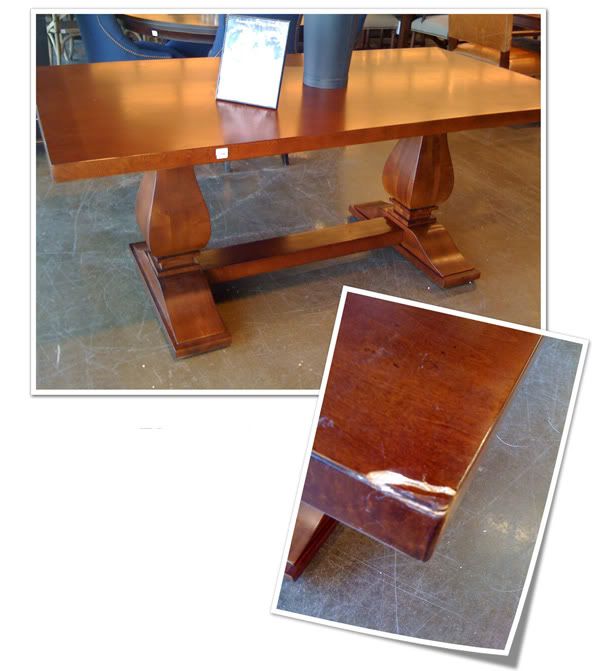 |
| Love the shape, hate the color ... and oh yeah, there's that bashed in corner to deal with. |
In addition to the damaged corner, there were other problems: the table was too long and all the wrong color. Ordinarily I wouldn't be comfortable buying something new and changing it drastically. It just feels wrong to me ... like the only things you should really attempt that kind of makeover on are things you find on the side of the road, in your grandma's basement or at Goodwill. But it became clear to me that I was never going to find the right table for the space at any kind of affordable price.
My husband prefers to stay out of these more complicated DIY endeavors, partly because he's a perfectionist (and I'm not) and partly because he knows that I tend to become obsessed with these projects, staying up to all hours to finish them until I'm happy with them. I can't really blame him.
But this one was way above my DIY pay grade. And it involved power tools that have the capacity to cut off important body parts. So he got involved, if only to make sure we didn't spend the money we'd saved on the table on some sort of emergency hand re-attachment surgery. (For the record, one person in our house has mangled a finger in a saw, and it's not me. I'm just sayin'.)
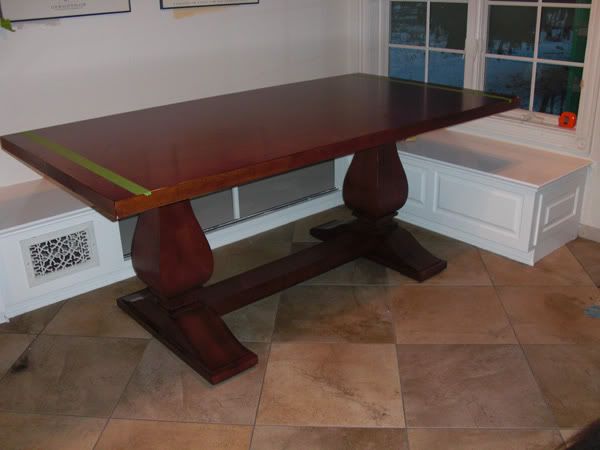 |
| The green tape was my attempt at figuring out how much needed to be cut off the ends. |
Originally the plan was to just cut off and equal amount of table from each end to make it fit the space. This would also cut off the damaged corner. But then it became clear to me that that wouldn't work. In order to allow people to sit at the ends of the table (an important aspect of this table because part of the reason we started this mini renovation of the eat-in area was to be able to seat more than four people at once), there needed to be at least one foot of table overhanging the leg.
 |
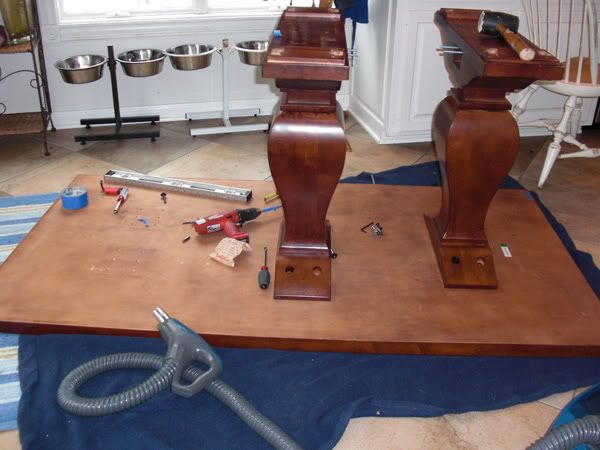 |
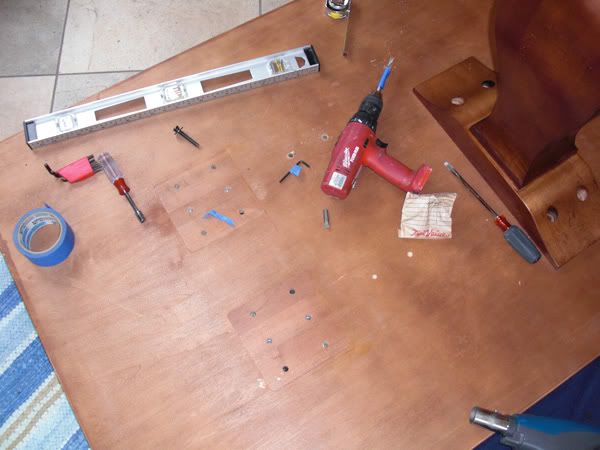
| Here you can see the original holes where the leg was attached and our process of drilling new holes farther in. |
It became obvious we were going to have to move one of the legs and shorten the trestle, then cut off just one end of the table to make it the right length. I wish I could give you instructions on how to properly cut the trestle part, because it involved a mortise and tenon joint, but all I can tell you is that he took it to his dad's house where he used some tools (let's call it a bandsaw) and it came home the right length. Then we drilled holes in the bottom of the table to the same depth as the existing holes (we measured the depth on the drill and put tape around it so we would know how deep to drill) and glued in these cool little threaded inserts. Then we just bolted the leg back in its new place.
At this point, you're probably wondering why we did all this construction in the middle of our kitchen. It's a fair question and the answer is pretty simple: That table was the heaviest piece of furniture I've ever moved. The legs and the trestle were no problem, but the top of that table was crazy heavy. Definitely a hernia-giver. So we just opted to move it as little as possible. Also, it was winter, so it's not like we could just move it out the door and work on it right there.
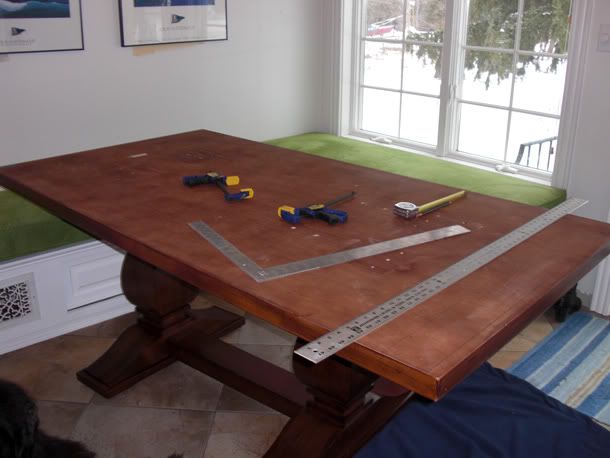
Meanwhile, we cut off the end of the table. Since this is a veneered table, we flipped it over to cut on the underside, and we used painter's tape where we would cut, to make sure the veneer didn't crack or rip on the edges. We also bought a new blade for the circular saw with the largest number of teeth we could find. We wanted a very fine cut. We practiced on the first cut, cutting off only half of the total amount we wanted taken off. This served two purposes: testing to make sure our method would cut the table without destroying it and giving me a sample portion of table to sample finishes on. With the first cut going off as planned, we used a thick metal ruler clamped on as a guide, and cut on our tape line again. Whew. Done.
I lightly sanded the now bare edge of the table and attached some iron-on oak veneer (purchased at Home Depot). And then it was time to do something about the color of that table.
Here's part 2!


3 Comments:
Seriously!!! You just moved the legs in???? I am so impressed... never woulda thought of that!
Am I ever regretting not living within a thousand miles of a Hardware store! I saw that same gorgeous table you had in the first picture and loved it and then glanced at the price...holy smokes!! So much for that.
Christine in Alaska
I just got the new Restoration Hardware catalog yesterday and the table gave me inspiration as well, but I do not have the nerve to redo my trestle table like you. I plan to follow along and maybe, you will change my mind.
Post a Comment
Thank you for taking the time to comment! I appreciate it. I try to respond to comments here or sometimes via email so make sure to check back.
Subscribe to Post Comments [Atom]
<< Home