The Impatient Gardener

22 December 2015

CHRISTMAS CHEER

Christmas is pretty basic at our house this year and I can't tell you why. Maybe it's the unseasonably warm weather we've been having that makes it seem not-at-all like Christmastime. Maybe it's having house projects in the plans and not wanting to have to deal with anything more. Maybe it's the logistics of a lot of decorations with a 135-pound puppy running around. I really don't know.

There will be no Christmas tree at our house this year. Saying that makes me sad. I love having a tree. I love the tradition of bringing out my beautiful ornaments and finding the perfect spot on the tree. I know that I will be very sad about it Christmas morning when there is no tree to turn the lights on. On the other hand, I'm happy to have saved the money we would have spent on a tree, and I'll be VERY happy to not have a tree when it comes time to take it all down and pack it up. But mostly, I've been far less stressed this year than ever before and that's undoubtedly because I scaled everything back. What is the point of going all out for the holidays if it turns you into a miserable person?

Other than the outside, Christmas decorating in our house this year has been limited to the mantel. No garland anywhere else, no bowls of shiny ornaments. In other words, watch out next year because it is going to be holiday crazy in our house!

In the meantime, let's take a look at some of what I did bother to decorate this year. Sadly, as much as I tried, I couldn't get a decent photo with the lights on the outdoor decorations. I broke my tripod a few weeks ago and those kind of shots are pretty much impossible to take without one. (Master of excuses!)

Raindrops, not snowflakes are nature's decoration this year.
The window box isn't much different from last year. I loved it then and I love it this year.


I did some special decoration on each of the garland attachment points on the pergola.

Detail of the wreaths on the garage, which really look horrible in the photo below but I have so many lights on each one that it looks great at night.


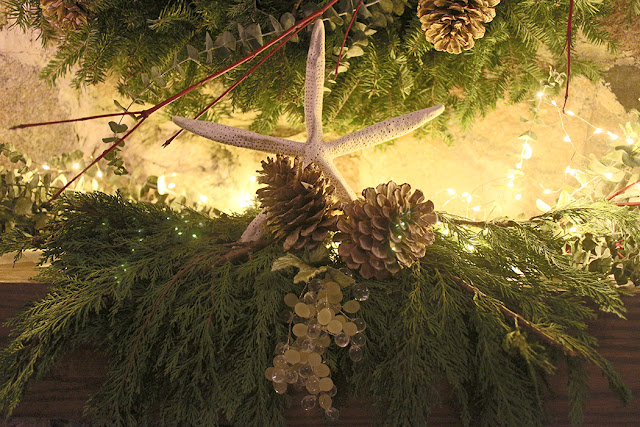
I followed these instructions to make bleached pinecones and I love them.


Maybe not impressive, but simple and heartfelt.

I may not have done much decorating this year but check out some years past.


Labels: , , ,

24 December 2013

Merry Christmas (and what it looks like at my house)

It's Christmas Eve. What's done is done and what is not done will not be. All that's left to do at this point is enjoy the holiday.

The last week and a half has been full of late nights for me as I tried to catch up on getting ready for hte holiday, so it's no surprise that I was running around the house taking pictures at 1 a.m. to show you a bit of the decorating around the joint. So let's get on with it, shall we? Because if you are nice enough to be spending your Christmas Eve looking at this blog, I'm not going to make you sit through a wordy post.


Can you tell I'm a bit enamored with the new mantel?


The Christmas tree is elderly dog friendly this year.  I got a zinc pot (it will be home to a boxwood come spring) and cut down an $8 tree stand to fit inside it, then stuck the tree in there and cut off the bottom branches. The tree is still at least 9 feet tall, maybe 10, but Hudson can walk underneath it with no problem and because it's super skinny it takes up very little room.

Somehow I have lost the star for the tree. I have no idea how that is possible, but I officially stopped looking for it on Sunday. So this year there is just a bow and I'll search the after-Christmas sales for a new one.


I wanted something plaid for a tree "scarf" and the cheapest thing I could find was a set of flannel sheets at Target. I used the flat sheet around the pot and the fitted sheet went on the dog bed so it would match!


I made a felted ball garland this year. It was super easy (I bought the balls on Etsy rather than making them myself), but I think it kind of gets lost on the tree.


I also made gift tags from paint swatch cards. Idea totally stolen from Pinterest.


I hung large plastic ornaments from the beams. Super easy and adds a bit of Christmas without it feeling like the ceiling is falling on your head (which is why I've never liked the idea of putting garland up there).


The old balls-in-glass-container always works well. This year I threw some greens in there as well. This one, which has a fishing float in it, is in the living room.


And this one is on the kitchen table.


I finally took a better picture of the swag this morning.


That's it, folks. If you celebrate Christmas, I hope you have a very merry one. And if you don't, I hope you have a good time at the movies :)

May visions of sugarplums dance in your heads tonight and may you have a wonderful holiday filled with great memories.


Labels: ,

20 December 2013

A new take on an old mantel

Pretty much the whole point of having a big fireplace is to decorate it for Christmas, right? So it was a big relief when last night we finished (for now) a project that will actually allow me to do that. Yes, I know it's December 20. I'm working on it!

I've mentioned before that I have a real problem decorating our mantel. Christmas is generally the exception to this, because if you pile enough greens on a mantel it will look Christmassy. The rest of the year is a challenge though.

While I like the stone mantel, it makes it very hard to set anything on it because it's always crooked so I end up sticking folded up paper under candlesticks and things to avoid having them look like the leaning tower of Pisa. Also, with all that stone in what is really not that big of a room, the whole thing can be a little overwhelming.

The man (who was our neighbor when we first bought the house) who built our house put in stone walls and fireplaces similar to ours in every house he built. You can often spot his work just by seeing them, so I would never do anything that would compromise the integrity of his work.

So I came up with the idea of a mantel "sleeve," which is basically just a box missing a side that slides right onto the existing stone mantel.

So here's the before:


And here's the fireplace with the new mantel sleeve (in not nearly as nice lighting):


The hold up has been in the finishing, which is always an adventure to me. I love paint. If you paint something you know exactly what it's going to look like. But you never really know with stain. It's always a crapshoot. At least it is with me. And as with other stain projects, I probably did a lot of extra steps that I ended up not needing to do.

I'll run it down quickly for you. We used red oak to build it, only because the lumber options for such long pieces were limited. I think life would have been so much easier had we made it out of maple or beech, but I don't mind the oak.


What I was really going for was a finish like this blogger did on a table. Unfortunately the instructions on how to get to that finish were a bit lacking so I did my best to interpret them. I also did a LOT of sampling on cut offs from the boards.

1. Sand the whole thing, making especially sure to sand off any glue that might not have been wiped off.
2. Fill the nail holes, cracks, etc. with wood filler. I'm partial to Timbermate, which I have only found at Woodcraft stores so I always order it online. It smells like Band-aids, but it never dries out and you can change the consistency by adding water to it.
3. By this point, I had decided that the grain on my test boards was just getting too dark in my stain samples, so I made a slurry with the Timbermate to use as grain filler. This helps smooth everything out even more, and hopefully would keep that grain from soaking up too much stain.


Just starting to sand after the grain filler had dried. (Notice the Christmas tree and wreath in the background!) You can also see how we (and by we, I mean Mr. Much More Patient) coped the back to go around the stones.

4. After letting the grain filler thoroughly dry, I sanded the whole thing down with 220-grit sandpaper and made sure to remove all the dust (wear a mask during this part because that grain filler makes dust almost as fine as drywall dust). I made a wash by adding water to Carrington Beige paint samples (I only needed two of the little 2 ounce sample bottles), applied it quickly and wiped it off. The idea was the pull out some of the pink tones that red oak has.

This was the consistency of the watered-down paint that I applied first.
5. Then I applied two coats of Minwax Classic Gray stain.
6.We took the mantel upstairs and tried it out and I didn't like it.

This was try No. 1 on the finish. I didn't care for it. I also changed the bow on the wreath!

7. So I sanded it all down with 220 grit again, and repeated the grain filler step (I don't really know why to be perfectly honest). I wasn't trying to start from scratch, but rather build upon what I already did.
8. Using a mixture of Classic Gray, Special Walnut, Driftwood and Weathered Oak stains (when you don't know what to do just throw 'em all in there and see what comes up, right?), I applied two coats of stain.
9. I did a light sanding, then applied one coat of Minwax Fast-Drying polyurethane in a satin finish.
10. Sand the whole thing with 400-grit sandpaper after the poly is really dry.
11. Normally you'd put on another coat of poly here, but I was running out of time and wanted to make sure I liked it before I really sealed the deal with more poly. After Christmas I'll put on another coat if I'm still happy with the look.


I'm really looking forward to decorating the mantel tonight, all while brainstorming what I'll do there after the holidays. What do you think? Are you partial to the original mantel or do you like the new twist?

Labels: , ,

11 November 2013

New table, even newer color

Sometimes I think about my DIY journey and it sort of blows my mind. Six years ago I was scared to try to improve anything I didn't totally hate for fear of screwing it up. Now I have to restrain myself from NOT trying to improve things that are perfectly fine the way they are.

I think the first time I painted something brand new was when I took the can of spray paint to the speakers. By the way, they still work fine, they totally blend in with the wall and I don't regret doing that for one second.

Now I really have no problem painting something new if I can't find what I'm looking for. I've been wanting to get a new side table for between the chairs in front of the fireplace for ages. I had an overly contemporary el cheapo thing there for the last 10 years or so. What I really wanted to find was an old spindle table or maybe something with some faux bamboo that I could paint a fun color. I looked for a LONG time and found nothing that was the right size or in the realm of affordable. 

I orginally saw this side table on Joss & Main. And then I found it on Overstock for significantly less. Those daily sale sites are not always such a great deal, it turns out. 

Even at a really low price, I have to say I was not happy with the quality of this Safavieh table. It is really cheaply made. The top and the shelf on the bottom are made of luan and sort of feels like glorified cardboard. Still, it was cute and I was sick of looking (of course I found a table at Home Goods two weeks ago that would been equally good and was less expensive). 

It came in this perfectly fine gray color.


But you know it wasn't staying that color. I gave it a good dose of Benjamin Moore Cornwallis Red (which I also wrote about here), which is the most lovely orangey tomato red ever. I really have a thing for this color. 

I'm not going to give you a tutorial on how I painted it because you know the drill: Sand, clean, prime, two coats of paint, sand with 400-grit in between coats. Done.

And here it is in its new spot. With all the blue, white and gray in the living room, I think it's the perfect accent and it since its in the red family it works with the ikat dot chairs on the other side of the room too.

The Impatient Gardener, painted Safavieh table

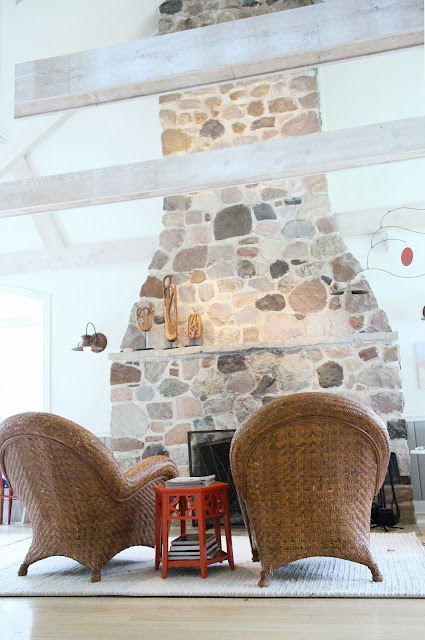
It's hard to get shot of our very long and skinny living room that give you an idea of what it looks like, but with the help of a tripod I was able to get one of this view, which is one I don't think I've shown you before. This is what you see when you walk out of the kitchen into the living room and it's what sold me on our house immediately. The lights you see on the mantle are from the track lights that hide on the backside of that beam. I'm still moving them around to figure out where to point them all. By the way, speaking of that painted speaker, there's one in this picture. Can you find it? Also, I am officially the worst mantel decorator ever. I'm actually thinking about making a temporary wood mantel sleeve to put over the stone mantel because I think it would be a lot easier to accessorize up there.

The Impatient Gardener -- living room fireplace


So have you ever painted or otherwise seriously altered something brand new? It's funny how once you just suck it up and do it once, it's not so hard the next time. Yet another slippery DIY slope.


Labels: , , , , ,

20 December 2011

A tale of two mantels

I did my mantel twice this year. No sooner had I gotten the wreath up than I found out that the newspaper that had featured the house in the home and garden section was interested in doing a special Christmas cover shoot at our house. They were looking for a big fireplace in front which a local group of high schoolers who put on a madigral dinner every year could pose in sort of a celebratory, raucous party scene. They knew I had a bit fireplace.
I had no problem with that. The problem came in when it came to setting a renaissance-type scene. I'm not sure any style could be more opposed to my usual M.O. and frankly I was flummoxed on what to do. And I didn't have a lot of time in which to do it.
I threw a whole bunch of greens on the mantel for starters. I didn't wire them or anything. I literally just stuck them up there. I mostly used the branches I cut off the tree, but I also filled in with cedar and white pine (like I did with the wreath). Then I filled in some lemon leaves (which are NOT lemon leaves. I've seen them called salal tips, but I will have to find the botanical name) to get a different texture in there. After that I threw (again, literally) some oranges and apples on top and borrowed some candlesticks from my mother-in-law (the dear woman let me take them right off her completed mantel). Because the starfish in the wreath would not at all work I just covered them with lemon leaves to obscure them.
To complete the over-the-top look (which is what I associate with that renaissance feel), I added some fresh Casablanca lilies at my good friend's suggestion.
Mantle1
2011wreath2
2012wreath3
The group was supposed to bring props with them; lutes, flutes, goblets, etc. Unfortunately they didn't, so the photographers (two of them: one to take the shot and a second to help set it up) had to get creative with posing. I had NOTHING in the house that would work, although they did end up using the single goblet I borrowed from  a neighbor mid photo-shoot.
Here's the photographer standing on a ladder in the doorway to the living room.
Mantle2
Here's the side few (the chair isn't visible from the front-on angle the photographer was shooting from).
Mantle3

The kids were troopers. They were in those heavy costumes and our fire puts out some serious heat. Even with the windows open it was hot in front of that fireplace (hot enough that I fried one side of those poinsettias in front of it). After they were finished I went back to a more traditional (for me) look. Gone were the candlesticks, fruit and flowers, and in came the stockings, glass bead garland and starfish. It really could benefit from some candles, but I was ready to be done decorating that mantel!
The furniture and mobile are back too.
Mantle4
Mantle5

I'll post a photo of the newspaper cover when it comes out later in the week.

Labels: ,

21 December 2009

Finally, some Christmas decorations!

I     t's been a bit since I've had a post here, but that's because I've been busy Christmas-ing things up at our house. To say that I got a bit late this year would be something of an understatement. Since I'm sure most of you already have done your decorations, I'm not expecting to inspire you at all, but I thought I'd show you what I've been up anyway. I do, however, have a few holiday decorating tips for you that might be helpful to you next year.

1. Wear disposable latex gloves when you put your lights on the tree to keep the sap off your hands. I actually buy these gloves 200 at a time at Costco and use them for so many things beyond just sap prevention. I use them anytime I paint, when I handle mass quantities of raw meat (which I do on occasion in the process of feeding my dogs) and even gardening. I'm a random weed puller but I also hate having dirty fingernails, so if I'm doing a quick garden chore and don't have one of my dozen or so pairs of gardening gloves handy I'll throw on a pair of these.

2. Fishing line is a wonderful thing. I have 60 pound test and 25 pound test rolls in the junk drawer and I use it more often than you would think (and I don't fish). I especially use it at Christmastime. We screwed two small hooks into the beam on the wall on either side of the fireplace (they are so small you don't notice them) and string a length of 60-pound test monofilament line between them, then use a cheapo carbiner to attach the wreath on the fireplace to it. That way I don't have to put a hole in the mortar or the stone of the fireplace. We also use it to tie the Christmas tree up (standard operating procedure ever since 2004 when I had just finished decorating a 14-foot Christmas tree when it fell over). I never want to lose that many ornaments again, and with all the animals we have in the house, a bit of prevention is a very good thing. Lastly, I use lengths of fishing line to attach the beaded garland to the mantel since there are no 3m hooks that will stick to it.

3. Go LED. For about three years now I've been planning to convert to LED lights for our tree but have been avoiding outlaying the cash. Of course that means I've not been replacing our regular incandescent lights as they stop working, so we were pretty short on lights this year. I decided to just go for it, but I bought about half as many LED lights as I usually put on the tree. It was all I could afford for this year and I planned to pick up the rest next year. As it turns out, LEDs are so much brighter (I bought the "wide angle" ones) that I'm not sure I'll have to buy more next year. It was the perfect amount of lights (although this is the smallest tree we've ever had). I really like them and I feel much better knowing that the odds are much better that when I pull them out of the box next year they will actually work.

4. Stuff your stockings. I fill the stockings up with tissue paper to give them some form (before Santa fills them up Christmas Eve, of course). It makes them look so much better.

OK, enough tips. Onto the pictures. Here's the before and (almost) after of the mantel area (I put greens on top of the mantel to hide the cords, etc., some silver pinecones and a hurricane full of silver ornaments after the photo was taken). The before by the way, is not great. I have a horrible time accessorizing and looking at the picture I realize just how boring my everyday mantel is. I'll have to work on that. The after features a clear beaded garland my mother-in-law bought from Pottery Barn several years ago that I've twined rice lights through and then I added a starfish garland from Wisteria (bought on sale earlier this year).

I love our little Nepalese-knitted stockings. I think I got them from an outdoor store (maybe REI) several years ago but I like how traditional they are. A stylized Santa I got as a gift from PB years ago serves his duty holding them up. I have to polish him every year, but he's cute so I do it anyway.


I did much simpler decoration than I normally do on the wreath. I thought there was already a lot going on on the mantel so I wanted it to be a little understated. I also opted for a regular bow rather than the floofly multi-looped variety I've been partial to in past years. I cut three of the starfish off the garland and wired them on and stuck a couple silver pinecones on for balance.


As I mentioned, our tree is much smaller than usual this year. In fact I only put on about 60 percent of the ornaments I have on it, but I still like how it looks.


I have oodles of glass icicles on it (and lots more that stayed in the boxes this year). I love how it looks like it's just dripping with icicles. It adds so much sparkle and shine. My favorites are some that look like real icicles.

Here are a few other ornaments I like:
1. A glass beaded snowflake I made Saturday night at a little crafting night with my girlfriends. None of us are crafters, so it was fairly amusing, but I think we did OK. We were guided, of course, by none other than Martha herself, and after a few glasses of wine we were having a good giggle about her VERY specific directions.
2. My ruby slipper. I always wanted to be Dorothy. This is the closest I think I'm ever going to get.
3. I have a lot of birds that clip onto branches, but this peacock is my favorite.


Labels: , ,