The Impatient Gardener: December 2010

22 December 2010

A great looking wood floor for pennies? You bet!

Since I've done almost no decorating this year, haven't wrapped a single gift or baked a single cookie (yet), I'm lacking in the holiday post department. But that's doesn't mean I don't have a little gift for you. Because I do: An awesome idea for a super cool, great looking and inexpensive floor.

Photobucket


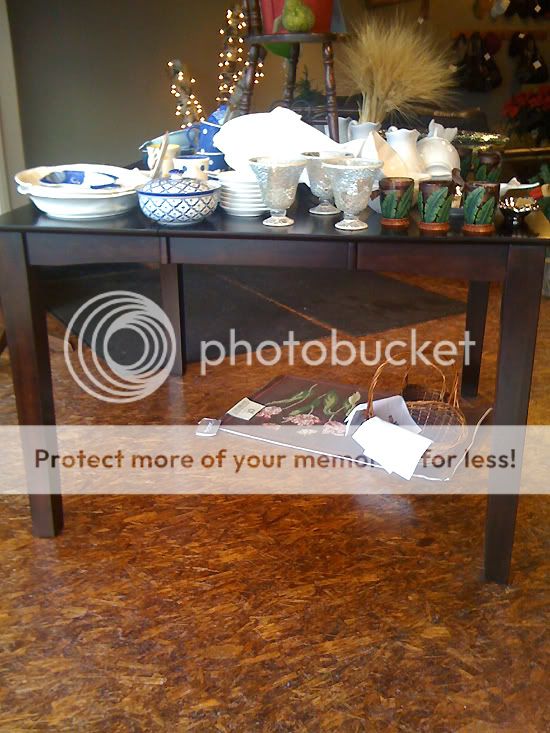
This floor can be found in a great new shop that recently opened in my hometown. It's full of super cute stuff and it's just a lovely space. But what caught my eye from the beginning was the really cool floor. And that's when I took a closer look and realized it was ...

Oriented Strand Board (kind of like plywood, but made with small wood strips all mushed together with wax and resin).

I know, can you believe it?

One of the owners told me the story: As they were fixing up the space (which had been an antiques store, appliance store and a bunch of other things in its past life) they realized it would be very expensive and time-consuming to try to rip up the layers of flooring to get to the original wood floor in the old building. Looking for an inexpensive solution for this large space, they came up with the idea to use OSB. They figured they had little to use: If it didn't work, well then they had a great subfloor all set for whatever they decided to do on top of it.
Photobucket
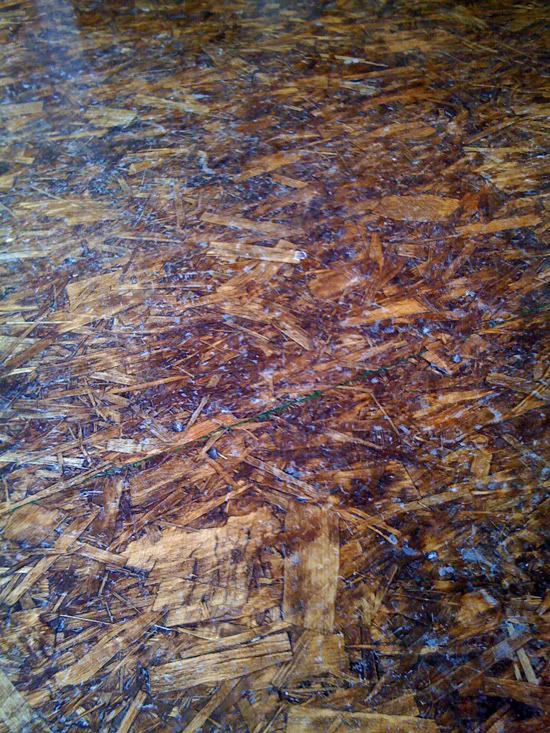
The only way you can spot the seam in this photo is because some of the green paint that comes on the edges of sheets of OSB is left. If it weren't there I bet you'd never spot it.


They set the OSB sheets down on the floor and kept the joints super tight (I can't remember if they offset the seams or not, to be honest but I think you could do whatever you wanted), and nailed them down as you would with any subfloor. The trick is to line the joints up really carefully to keep them tight. I think if you wanted to get really picky about it you could use wood filler or caulk to fill them but really, the OSB is so busy that it hides a lot of evils.

Then they rented a floor sander and sanded it all twice: With 30-grit and then 60-grit sandpaper. Then they applied stain just like you would with any wood floor. What I love about the floor is how the stain sticks to different orientations of the strands in different densities. Then they followed it all up with three coats of polyurethane.
Photobucket


I think this floor is brilliant. It looks great and was inexpensive. And in the midst of this beautiful store, with it's charming displays, fun products and wonderful windows, wanna guess what I'm told gets the most reaction? You guessed it: The floors.

What do you think? Would you ever try something like this in your house? I'm wondering if you could do something like this below grade because I think this could be a perfect flooring solution for the finished part of our basement.


P.S. Sorry for the cell phone pictures on these. I thought it would be too weird to take the camera in the store and start snapping photos of the floor. 
Labels: ,

16 December 2010

Construction Update No. 11: Down to the finishing touches

I'm happy to say that we are actually to the point in this renovation where I don't want to share too much in terms of updates, lest I ruin the big reveal. That, folks, is a good thing.

There's actually a chance we could be done (OK, probably not with all the painting, but maybe) by Christmas New Year's. I hesitate to even SAY it because it seems too good to be true. In fact it probably is. I probably just jinxed it.

But I thought I should catch you up on what's been happening.

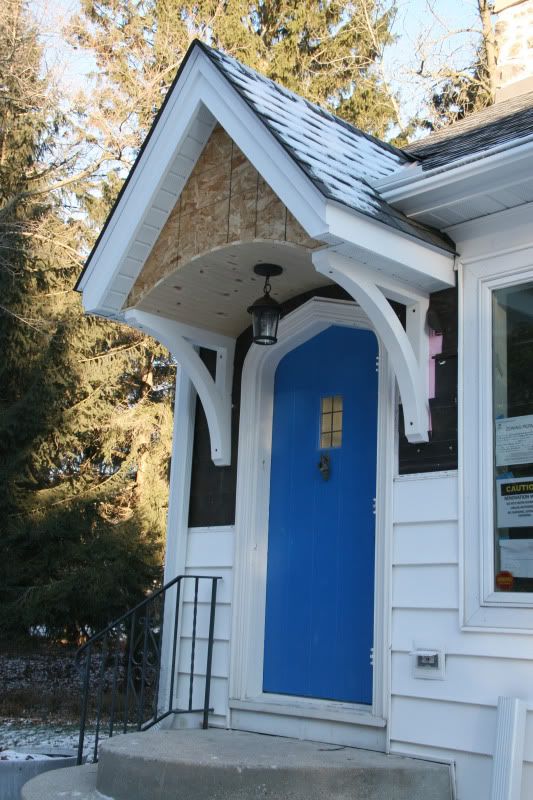
The 2x4s that held up the little gable over the front door have been removed and the brackets were installed. I'm very happy with how they turned out. We designed them and the GC had them built for us. The siding around them has since been replaced and the siding on the front of the gable is also finished. We've not stained the beadboard ceiling in it yet, because it's just too cold for staining. We are actually thinking about going with a mid-to-dark stain vs. a solid white stain. What do you think? I'm thrilled with the new light there too, which was a pretty economical find.

Photobucket


The decking, stairs and posts are all finished. Right now I think the posts look sort of ridiculous, but I'm hoping once we get the top rail on they will look better. We'll be doing cable railings as well, but Mr. Much More Patient and I are doing those ourselves (we've had all the parts and pieces and two huge rolls of stainless steel cable sitting in our garage for about four months now), that may have to wait until spring to be finished.

Photobucket
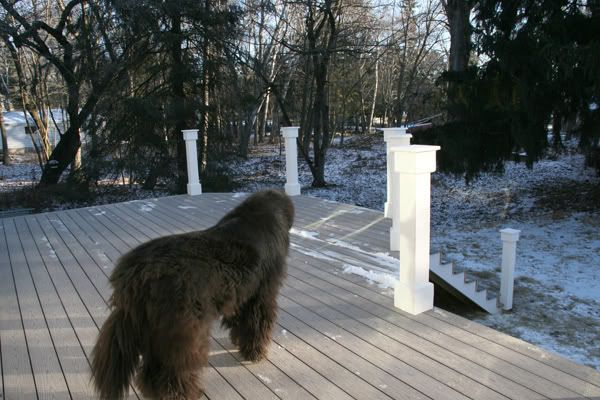
Hudson surveys the scene from the deck. The stairs he's looking at go into the yard but he doesn't like those. We had the stairs that go to the patio purposely made with a short rise to make it easier for our aging four-leggeds.

Speaking of the top handrail, this is a good remodeling lesson. We really fell in love with the idea of a dark hardwood top rail similar to what you might find on ship. Unfortunately those suckers are expensive. The one we liked the most (ipe) was $10.50 a linear foot. Another one (garapa), which wasn't the right color but we figured we could stain it, was $7.50 a foot. Another option (cumaru) was $5.50 a foot, but only came in a 4-inch wide version and we really wanted something beefier. Then our GC was at a local lumber store and he came across some handrail parts in a remnant bin. Turns out they were leftover from a large project and they had many more. Because we only need relatively short sections (the railing will go between each post, which is a design I'm sort of regretting, but it is what it is and hopefully it will look great), he was able to cobble together enough to do our smallish deck, for just $3.70 a foot. Score!

Photobucket
The stairs into the yard ended up much longer than any of us expected, but once we graded the yard, things changed a little. The skirting for the bottom will be cedar lattice (square, not diagonal) that we're staining gray.

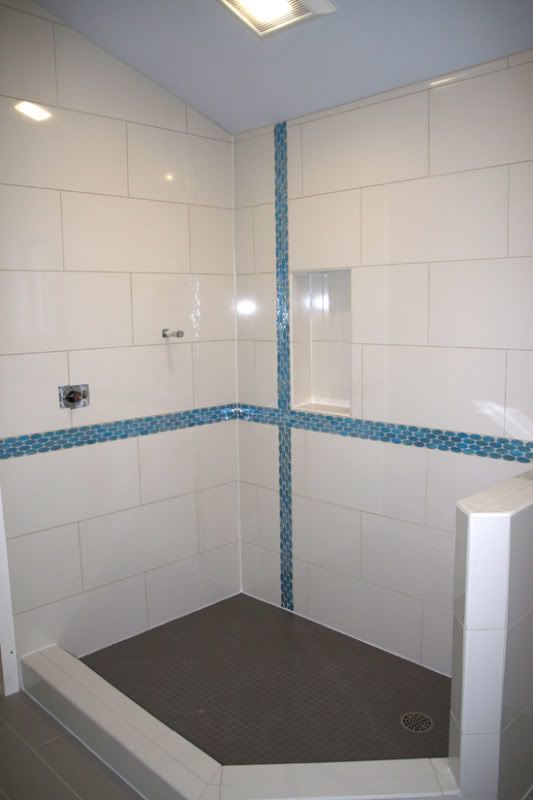
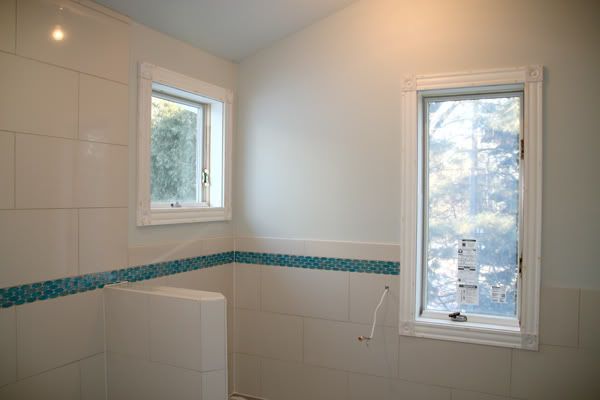
Perhaps the most exciting progress to report is in the new bathroom. The tiling is almost complete (there's some that can't be finished until the vanity counter is installed). Don't pay attention to the paint colors in these pictures, because it's all been changed ... AGAIN!

Since these photos were taken the toilet and shower fixtures have been installed. Tomorrow the vanity and linen unit go in and as soon as that's in we can finish up all the light fixtures (I really hope I measured where to put the pendants over the vanity correctly because there are some big holes in our ceiling), mount the mirror and work on getting the towel warmer up (I have a feeling that's a complicated project). The glass for the shower has been measured and it MAY show up between Christmas and New Year's but I'm not betting on it. And the vanity countertop seems to be but a distant hope at this point.

Photobucket
The finishing touches for the shower will be a teak dividing shelf in the niche, a teak floor grate and a frameless glass enclosure.

Photobucket
The wall color has changed since this photo (the BM Healing Aloe was way too light, but I ended up using it on the ceiling) and the toilet has been added in the corner.

We are clear to move back into the bedroom as soon as I finish touching up the paint and can eat enough Wheaties to get the mattress back up there, so we're definitely down to the finishing touches at this point.

Want to see where we've come from? Here are all the old house renovation updates:

Construction Update 1
Construction Update 2
Construction Update 3
Construction Update 4
Construction Update 5
Construction Update 6

Construction Update 7
Construction Update 7.5
Construction Update 8
Construction Update 9 
Construction Update 10

Labels: ,

15 December 2010

Winter window box

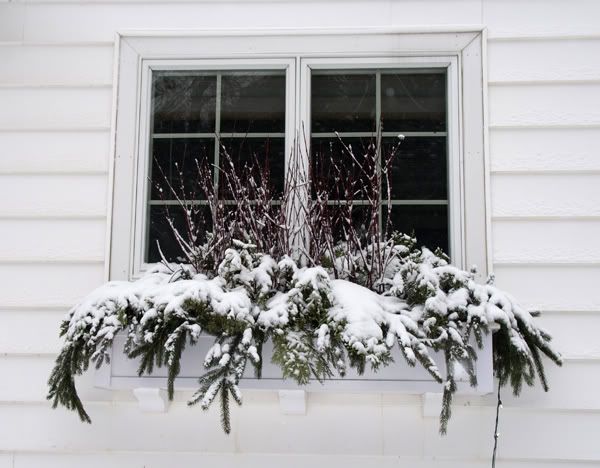
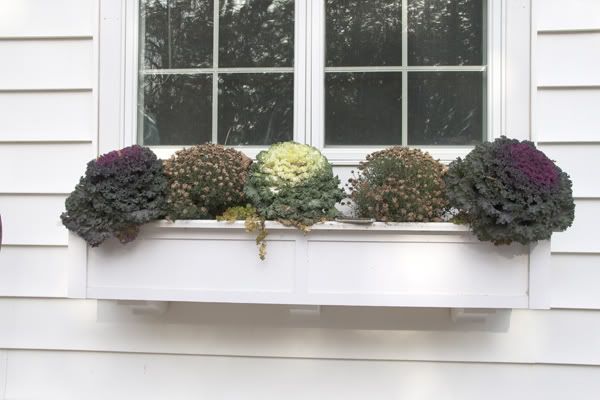
I pulled out the  fall planting of the window box (which wasn't looking all that bad other than the mums which were DOA) and wintered it up on Saturday. And just in time, I guess, since I didn't even get a chance to snap a picture until Sunday when it was covered in snow.

 It's not exactly gorgeous, but it was completely free and it took me about 20 minutes, including the, um, pruning.

Photobucket


Here's what it looked like a week earlier:
Photobucket


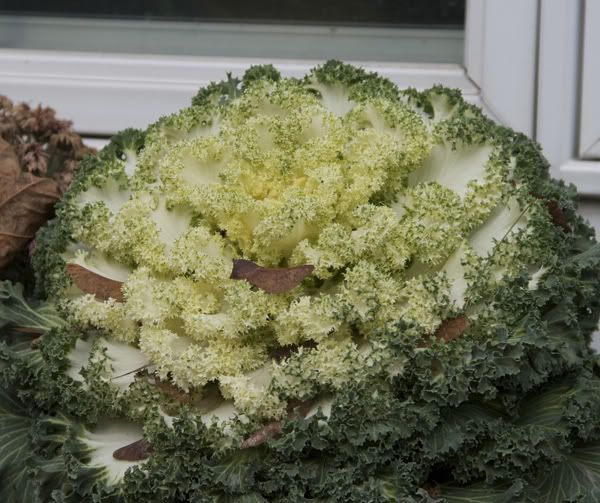
The ornamental cabbage was finally getting really beautiful:
Photobucket


Photobucket


Check out how the window box looked in warmer days.

Labels: ,

08 December 2010

Finding REAL cottage style

Cottage style is very in these days. That cozy, coastal vibe is why entire magazines devoted to the style, not to mention blogs and even furniture lines continue to thrive. In fact, I'm a devotee of the style myself. But anyone who has ever had the chance to stay in a real cottage, I think, has a better understanding of what cottage style is all about. It's a feeling. It's about being lived in and cozy and genuine.

And when you've partially grown up in a place like that it's easy to fall in love with it, as I have of our family cottage. Located on the shores of Lake Michigan, this is where my father, his four sisters and their parents lived during the summer in impossibly small bedrooms and a bathroom the size of a closet (all of which didn't matter because they lived outside). It is where my beloved grandmother summered, where I spent almost every summer day of my childhood, and where my family celebrates every summer holiday. Now owned by an entire generation, it is decorated by committee, which means it's a mishmash of furniture that's been there from the beginning, collected items and things moved from my grandmother's house. Probably no one in the family would claim it is their style, but collectively it incompasses an entire family's style.

We were lucky enough to be able to stay at the cottage during the more destructive phases of our home renovation and it made me appreciate all the little things that I love most about the place. And I realized all those things are the things that have been there since I was kid. None are fancy, but all are genuine. Here's a peek.

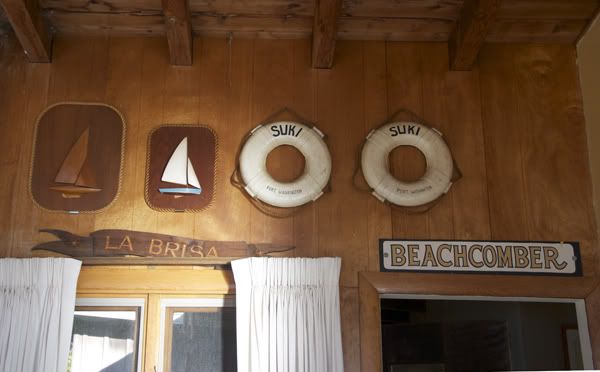
It's not uncommon to see life rings and signs used as home decor and I think they're very cool. But they are much cooler and far more special when they are all real. All of the life rings and name plates came off of boats owned by family members.
Photobucket


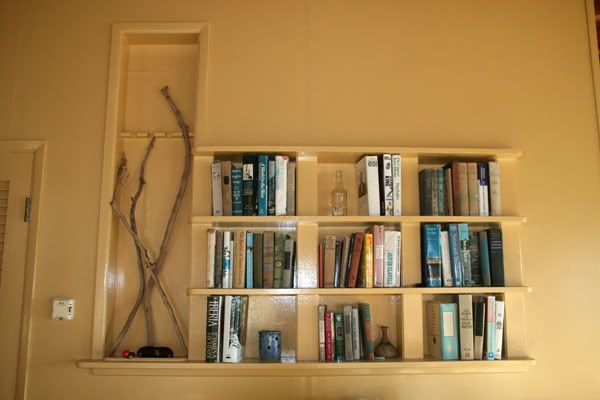
The cottage is very small and cute built-ins are all over the place. I love this built-in bookshelf on the back side of the kitchen wall (the kitchen counter wraps around the wall to make for a perfect place for serving buffet style). The bookshelf is filled with books, some have been there since I was a kid and others have rotated as people read them and bring another to replace it. I'm not sure what the tall cabinet on the left was originally for, perhaps a gun cabinet or maybe for fishing poles, but I like it's current use: driftwood. I'm not keen on the color this wall and the built-ins have recently been painted, but that's what happens when you decorate by committee. Sometimes you like the color, sometimes you don't, and in a few years you'll have an opportunity to paint it a color you like better for the price of the paint and your labor.

Photobucket


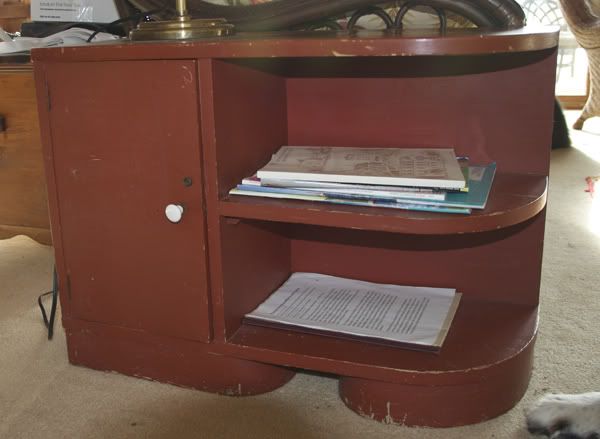
This side table is my single most favorite thing in the entire cottage. Someday I'll build myself a side table just like this.

Photobucket


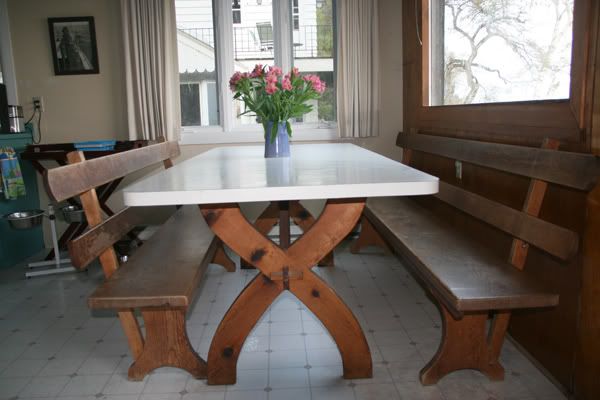
Dinners are eaten family style here, and when we can't all fit at this long table with two long benches, we flow out onto the deck or the floor in front of the fireplace. This table and the two benches are perfectly rustic and original to the cottage. A couple years ago a refinishing incident (I wasn't involved) damaged the table so it was covered with laminate but the bones are still there (and it's super easy to clean).

Photobucket


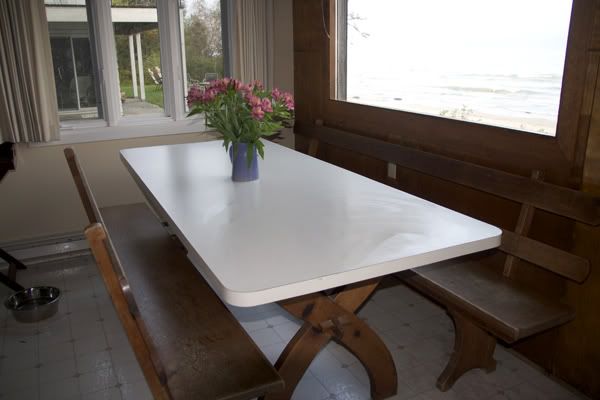
Can you see what's out the big picture window behind one of the benches? That's the lake right there. There's obviously a better side of the table to sit on!

Photobucket


Of course the best part of any cottage is found outside and that certainly holds true here.

The dogs loved having the beach in their back yard.

Photobucket


And even when the oven had burned dinner again, my feet were freezing (no real heat) and the stress of the renovation had hit a new level, a glass of wine and a sunset like this melted it all away.

Photobucket

Labels:

07 December 2010

Gifts for gardeners

You remember gardeners, right? They are the people who play in the dirt. You know, like I did before the house project sucked me up? Well, let me tell you, I intend to make up for my decreased amount of gardening this year 10-fold in 2011. I can't wait to spend part of the winter planning some new landscaping.

But in the meantime, why don't we dream about the holidays a little and come up with a few gift ideas for gardeners. Some are practical, some are just pretty and a couple are a bit outlandish, but hey, you never know what someone's budget is, right?

Photobucket


1. This hori hori knife is my go-to gift for gardeners. I've yet to give it to someone who didn't absolutely love it, even if when they first opened it they looked at me like I was nuts. I didn't know about hori horis until I read about them on North Coast Gardening and now I wonder how I lived with out it.
2. This reproduction Frank Lloyd Wright Allen House vase is so lovely. If I had two short stone columns at the entrance to my house I'd want a pair of these to flank it with and I'd fill them for every season.
3. Compost bin brackets aren't the most romantic gift in the world, but I think most gardeners would really appreciate them.  I've been loving the new bin I built using them (and it was so easy since I had the folks at Home Depot cut the boards for me).
4. I think every gardener likes some objets d'art for their space, and I really like these highly textured zinc leaf spheres. They're classy and interesting and well, not bowling ball-like.
5. The Bahco pruners are another can't-live-without item in my gardening arsenal. And another thing I found out about at North Coast Gardening. These are particularly great for women, as they come in different sizes. I never realized that the pruners I was using were too big for my hand and therefore causing a lot of hand fatigue until I got a pair of Bahcos. They felt small in my hand at first, but I could prune all day with these.
6. One of these stainless steel buckets would be a perfect accessory gift to the compost brackets. There are a lot of countertop compost buckets out there, but I like these because they are simple, classic and have a lid.
7. The best stocking stuffer on the planet, at least if you're a gardener, is a pair (or more) of Atlas nitrile gloves. Unless you're into pruning roses or something else equally thorny, these inexpensive gloves are perfect for gardening. Because they are priced right, you can have several pairs (as I do) so there is always a pair around that is dry and standing by. I also wash mine in the washing machine (lay them out to dry) and they are as good as new.
8 and 9. This is sort of a dream gift, but wouldn't it be nice to hire a professional garden designer to decorate your favorite person's home for the holidays? These designs are by the talented Deborah Silver (who is in Detroit), and I'd love nothing more to come home to a house decorated as beautifully as these. 

So what's on your list for Santa this year?

Labels:

02 December 2010

Getting back in the garden

We had pretty typical Wisconsin November weather this year. Several days of temperatures in the 60s followed by two in the 30s. Rain, a snow flurry or two, a little bit of sleet and the occasional dose of sunshine.

But it's December and when Sunday's weather was in the upper 40s, I thought I better make the most of it while I could. And since the garden has been almost completely forgotten about this year I took the time to do a couple of garden chores that I've been putting off.

First of all, I cleaned up the vegetable garden. It was really a mess and I never should have waited this long. I pulled out about a dozen overgrown frozen cucumbers (which one of the dogs ate and then promptly threw up on the lawn), tomato stalks, the occasional onion that had been missed. This is not good for your garden people. In fact it's a really good way to have diseases live in your soil, not to mention a bunch of volunteer seedlings pop up in places where you don't want them. I'll be paying for this next spring, I can assure you.

I was also planning on mixing in some green sand at this time, but the top of the soil was already frozen, so that too will have to wait. So do as I say, not as I do, and clean out your veggie gardens before they freeze, people!

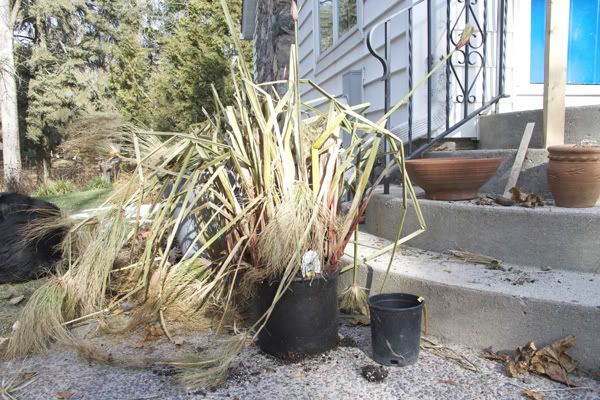
I also hadn't dealt with the giant pot containing the Papyrus 'King Tut.' I keep this enormous fiberglass container out year round and fill it with red twig dogwood and evergreen boughs in winter, but of course it's difficult to do that when a frozen, dead, enormous annual is residing in it.

Photobucket
Once I got King Tut out of the larger container, you could see how big it had gotten in one summer. The smaller container next to it is actually a little bigger than the container I bought it in and I have no doubt it would have filled whatever container I put it in over the course of the summer.


As I've mentioned before, I grew King Tut in a two- or three-gallon nursery container and sunk it in the larger container and after removing it, I recommend that even more. I'm positive this thing would have taken over the whole pot had it not been contained.

Even getting out the nursery container was a trick, although I did myself no favors by waiting until the top layer of soil was frozen. I had to dig through that and through a rather laborious process of pushing, pulling, levering and prying, I finally got it out. And because I wanted to put it in the compost bin, I also needed to get it out of the plastic pot. And that's where my hori hori knife came in, because there was no way that sucker was coming off without some serious persuation of the sharp blade variety.

Photobucket
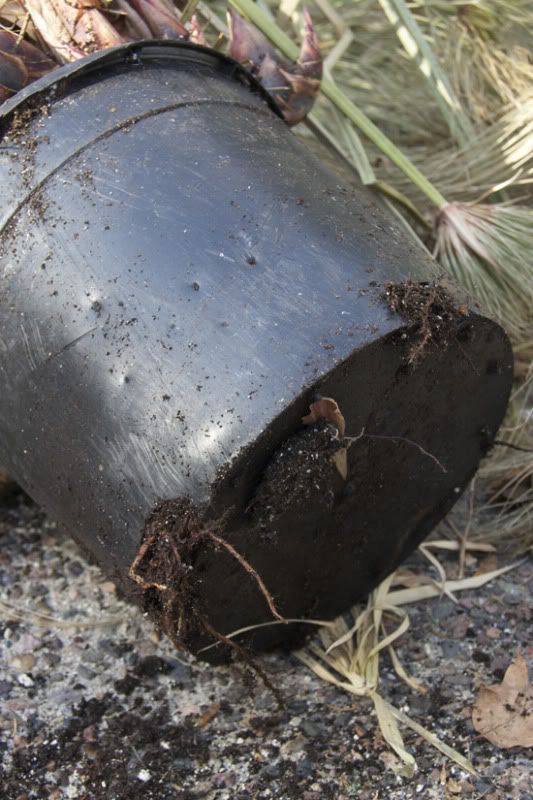
The nursery pot was bulging and roots were coming out the bottom.


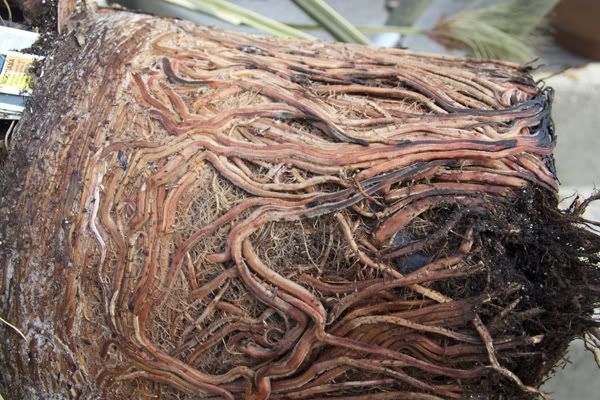
And check out what it looked like in there. Pot bound much? Those are some serious roots. I'm surprised it didn't look at me one day and say "Feed me, Seymour!"

Photobucket
That's a lot of roots!

So now the pot is all empty and ready for some winter decor. And yeah, I'm a little late on that too, but it won't be the first year that I've had to drill holes in frozen soil in order to put greens and branches in.

Labels: