The Impatient Gardener: November 2011

30 November 2011

Fleeting color

I was downloading some photos from the weekend Tuesday night and realized there were a few I'd taken just a couple weeks ago that I've not posted. One of the amazing things about living up north, where the seasons mean business, is how quickly things change. Although we've not had any snow yet (which is pretty surprising), it's been plenty cold and the color is gone from the yard. Even the grass is taking a decided turn for brown.

But I had to share a couple of these from just a couple weeks ago.
I don't think you could ask for anything more from a tree beyond what Acer japonicum 'Acontifolium' gave me this fall.

Leaves

And Hakonechloa 'All Gold'  has grown into a beautiful, bushy little mound that turned even brighter yellow this fall and got great seed heads on it. This is one plant I love to leave standing all year because it adds great interest even in winter.

Leaves2

Sigh, I miss it already.

Labels: ,

28 November 2011

Happy Cyber Monday!

I'm a champion online shopper. In fact it's the main way I buy things now. Last year, I bought what I could locally from small merchants but everything else was purchased online. And it being Cyber Monday (really, they couldn't think of a better name than that?) there are a lot of great deals out there. So here's a quick round up of some of the deals I found. I'll add to this later if I find others. And a lot of these deals last beyond today so if you can't get to them today, don't give up hope.

First off, if you haven't already, sign up for Ebates and then go to stores through Ebates and you get a percentage back (depending on the store). I've gotten $275 back since I started using Ebates about a year and a half ago. And every little bit helps. In order to get the cash back you have to sign up and then follow the link to the store from Ebates. Many stores are offering "double" cash back for Cyber Monday through the website.

You can sign up for Ebates here (in the interest of full disclosure, that's a referral link that should give me a small referral credit if you sign up through it) or here (just a straight link—no referral credit for me).

Just about every website (other than Pottery Barn, what gives?) has some kind of deal today, but here are some noteworthy ones. I'll update this later in the day if I find more great deals later in the day. Happy shopping!

The Container Store: Use OHJOY for free shipping through Dec. 4 (Plus 4% cash back through Ebates)

Athleta: Use HUGECYBER for 30% everything plus free shipping over $50 (Plus 2% cash back through Ebates)

Banana Republic: Use HUGECYBER for 30% everything plus free shipping over $50 (Plus 2% cash back through Ebates)

Gap: Use HUGECYBER for 30% everything plus free shipping over $50 (Plus 7% cash back through Ebates)

Old Navy:  Use HUGECYBER for 30% everything plus free shipping over $50 (Plus 7% cash back through Ebates)

* Athleta, Banana Republic, Gap and Old Navy all share a common checkout, so if you buy from either Gap or Old Navy plus one of the other two, make sure you go to the site from Ebates through the Gap or Old Navy links and you should get 7% back on your Athleta and BR stuff too.

The Tile Shop: 20% off mosaic and accent tile and in-floor heat (no code needed)

Z Gallerie: 10% off furniture (GIVE10), 15% off furniture sets (GIVE15), 20% off everything else (GIVE20)

Lands End Canvas: use DRUMSTICK (PIN 1121)  30% off everything + free shipping (plus 2% cash back through Ebates)

Cabela's: Use WGIFTS for free shipping on orders over $99 (plus 2% cash back)

Sephora: Assortment of samples with code MYSTERY; free shipping on a $25+ order with SHIPNOW (plus 8% cash back through Ebates)

Ballard Designs: 10% off + free standard shipping

Van Dyke's Restorers: Use CM20 for 20% off everything

Altrec: Use CYBERMONDAY11 for an additional 20% off select items

Lamps Plus: Use invitation code BLCKFRIDAY to save up to 50% (plus 10% cash back through Ebates)

Eddie Bauer: Use CYBER40 for 40% off everything + free shipping with $49+ (plus 6% cash back through Ebates)

Fair Indigo: Free shipping on everything, no coupon required.

West Elm: Use BEMERRY for free shipping on everything except furniture and rugs

Loft: Use SHOP50 for 50% off everything plus free shipping (plus 6% cash back through Ebates)

Crate & Barrel: Use SAVE15 for 15% off + free shipping (plus 6% cash back through Ebates)

World Market: 20% off plus free shipping (plus 8% cash back through Ebates)

Gardener's Supply: Free shipping (no code needed) (plus 9 % cash back through back)

Wisteria: Use ESAVE25 for 25% off everything

Layla Grayce: Use THANKS-GIFTING for 20% off everything

Guest posting today

Hi everyone!

I'm more than a little excited to be guest posting on one of my favorite blogs today.

House of turquoise header final

House of Turquoise is one of my daily reads and it serves as a daily source of inspiration for me. If you're not already reading it daily, you should be. And if you are a House of Turquoise reader visiting The Impatient Gardener for the first time, welcome! I blog about a little bit of gardening, a little bit of DIY and little bit of everything else. I hope you enjoy it and become a follower. And if you're so inclined you can also find me on Facebook and Twitter.

I'll be back in a bit with a listing of some of the best Cyber Monday deals around. Aren't you glad it's not another counter update?

Labels: ,

23 November 2011

Things that would have been good to know 3 weeks ago


So help me God if I have to end up making a "countertops" label on this blog.

My e-mail to Waterlox (by the way, I underestimated, it has happened way more than twice and technically the countertops are doing OK, but I had the problem again with the desktop):


Dear sir or maam,

I hope you can help me figure out what is going on with an ongoing issue with a Waterlox project. The same problem has now happened twice.

I'm working on a butcher block-type counter (new). I used a wood conditioner, then stained it (General Finishes water-based stain and conditioner). After allowing the stain to dry for 24 hours, I applied a coat of Waterlox. I am using a natural bristle brush. I allowed the first coat to dry for 72 hours (didn't have a chance to get back to it before then). I very lightly sanded (1000 grit) a few areas that had some dust issues, cleaned off all the dust with a dust-free rag with mineral spirits, and applied a second coat of Waterlox original (low VOC). As soon as I was putting it on, it became clear that some areas were finishing quite differently from other. There is a large swatch (1 foot by 2 or more feet) plus a few other patches, where the finish is almost sandpaper-like. Like I said, this showed up while putting on the coat, not just when it dried. 

This is the same thing that happened with my first attempt, but in that case I thought perhaps I had applied it wrong (I used a staining pad) and didn't allow it to dry enough in between coats (I allowed 24 hours). I sanded the counter down to bare wood and started over, but the same problem seems to have happened again.

What can be going on? More importantly, is there any way to salvage this? If I have to start from scratch again, I'd rather do it now than after I spend a lot of time and money applying more Waterlox. I just wish I knew what was going on so that I can make sure it doesn't happen again.

Thank you for your help.

Erin


Waterlox's reply:

Erin,

Thank you for using Waterlox and for writing to us today.

My guess would be that all the spots that you sanded lightly are the spots that have the film wrinkled. With the VOC compliant product, if you spot sand or sand any areas of the surface, you will need to wait a minimum of 12 hours to 24 hours afterward to let the oil under where you’ve sanded dry out / harden / cure. What happens when you “open up” the film is that it opens up and gets attacked by your next coat of finish.

You will want to scrape off the areas that had the affect and let the areas dry out for 24 – 48 hours, then re-coat.

Kellie Hawkins Schaffner
Vice President
Waterlox Coatings Corporation

Well, that explains what's been going on. But I have to say, I read a LOT about Waterlox and never once saw this mentioned before. Oh well, now I know. 

22 November 2011

The 2011 Garden Awards


I spent part of the weekend officially putting the last of the garden to bed for the winter. The new or sensitive plants have been caged and covered with shredded leaves, some of the perennials have been cut down (the others will be cleaned up in spring) and the spring bulbs have all been planted. Since it's officially the end of the season, as well as the beginning of awards show season, I thought it would be a good time to give out a few garden awards for 2011.


Since Ricky Gervais was not available to host The Impatient Gardener awards, there will be no host. So let's just get to the awards.

Best performance by a newcomer


It was a great year for plants in the 2012 Proven Winners introductions that I had the opportunity to trial for the summer, so this category was a tight race. In the end it came down to sister plants Superbena Royale Peachy Keen and Superbena Royale Iced Cherry, both of which have officially turned me into a verbena lover. In the end the nod goes to the cherry red version of this plant only because the almost neon red color, which bloomed all season without fail, is unlike any I've seen before.

Best performance by a veteran


The Stargazer lilies were fantastic this summer. Why I never liked this plant before, I'll never know, but whatever my hang-up was, I'm officially over it. 

Best out of the box


Superbells Cherry Star looked great from Day 1. The intensely colored flowers covered the plant for months. I did have to cut it back in late July or early August to refresh it a bit, but it came back within a couple weeks.  

Best 'Leap' year


Acer japonicum 'Acontifolium' is starting to come into its own and it put on a great show this autumn as usual. There are so many wonderful trees out there that it would be hard to justify having two of any one kind, but this tree is charming enough that I could be tempted.

Most likely to be felt up


I couldn't resist throwing this one in. Not only is hydrangea 'Limelight' a great performer, but it doesn't even mind a little squeeze every once in a while. 

Highest hopes


I didn't expect to fall in love with Gingko 'Gnome' but I am totally head over heels for this diminutive charmer. Unfortunately Gnome had a rough first year and I'm crossing my fingers that it got a chance to get established before the winter weather came around. I have caged it (to protect it from both wild critters as well as the ones I share my house with) and given it a good layer of shredded leaf mulch so hopefully it will appreciate the babying.

Best performance by a vegetable


I love 'Bright Light' Swiss chard not only for its taste, but also because it is beautiful. I like it enough that I think it would be worth growing as an ornamental. It gave me great leafy greens all season long and I can't get enough of the array of colorful stems.  I love it cooked with a bit of shallots or garlic and a little chicken stock with a piece of grilled salmon on top. Best of all, it grows great from seed and seems to be relatively free of bugs interested in munching on its leaves. 

Best overall


If I had done these awards last year I would have named papyrus 'King Tut' best newcomer, and this year the statuesque annual gets my top award. Topping out at about 6 feet tall in my yard, I not only grew King Tut in this large container by the front door for the second year in a row, I also planted a trio of them in the garden in front of the deck. They softened the edge of the deck and could be pulled out for the winter where a lot of snow is bound to pile up. Give this plant enough sun (the two I planted at the pool at the family cottage in part sun/part shade didn't do very well) and enough water and King Tut will impress like few other plants can. 

What are your award winners from the gardening season?  


18 November 2011

Counters …. yada, yada, yada

Yep, I yada, yada'd the counter topic. Frankly I've not provided an update because I'm SO bored with the whole project.

Here's the good news: things are going better (I think, but I'm a paranoid kind of girl so I'm not declaring victory yet) and I think I've identified the problem.

Lest this blog turn into "Wood Finishing for Morons, from a Moron," I'll keep it brief. Basically, I wasn't letting each coat dry long enough. Waterlox says to wait 24 hours between coats, and in most cases that would probably work just fine. But Waterlox's dry time is directly related to the flow of oxygen, and there isn't a whole lot of airflow in the basement. So the finish wasn't dry enough, and then I made the situation worse by sanding it (also not recommended by Waterlox; instructions are really interesting to read halfway through a project), which schmucked up the not-quite-dry finish and then I plopped more finish on top of that.

Anyway, I'm trying very hard to be a more patient person and just let the stuff dry before moving on and I hope it will work.

In the meantime, the incomplete state of the office is driving me more than a little mad (or maybe it's just the Waterlox fumes) and I'm hoping to wrap it up soon. I have the upper cabinet doors back on (although they need some touching up and I have to put the hardware on them) and it's an amazing change so it will be a good thing when I can get this all finished.

Anyway, thank you all for the encouraging comments. And I promise not to write about these stupid counters again until they are all finished.

How about some photos?

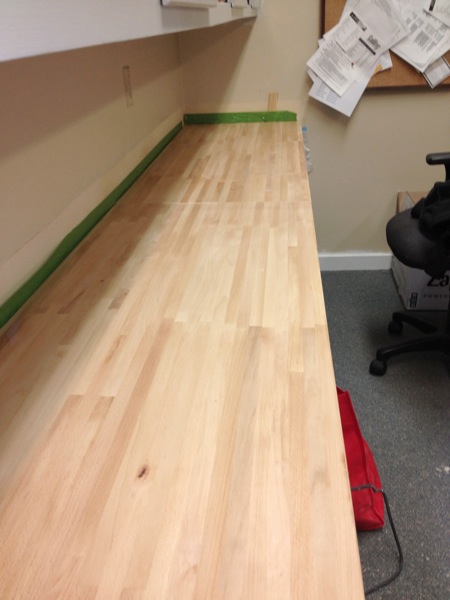
Ah … virgin counters. A chance to redeem myself.

Counter1


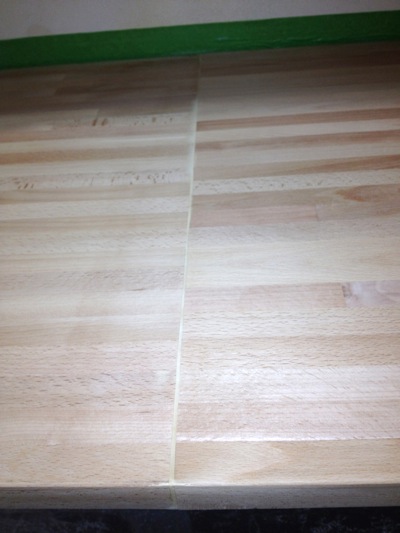
I filled the seam with Timbermate wood filler.

Counters2


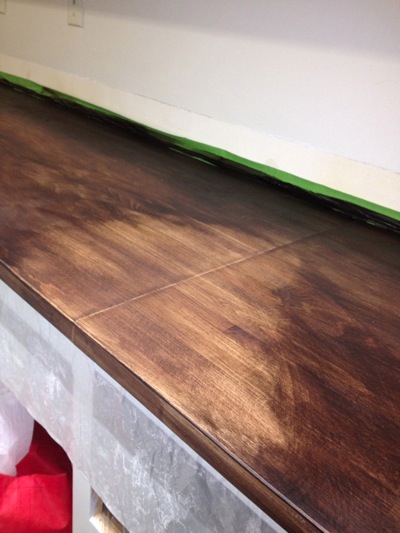
But all was not well in counterland. Seems I sanded the wood filler seam more than the rest of the counters and this is what happened. I wiped off as much stain as I could, and went back with 120-grit over the whole thing. Ironic that I sanded TOO much.

Counters3


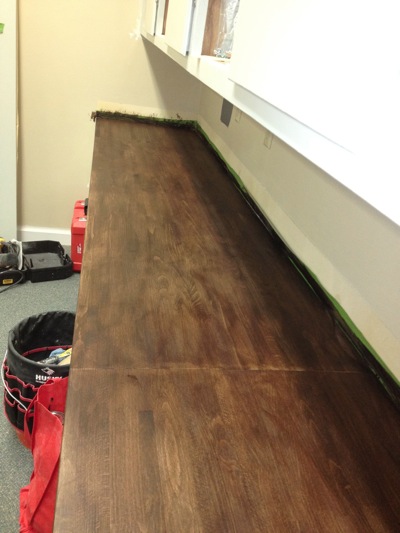
Here's what they looked like after staining. This time around I used a mixture of mahogany and walnut stains (General Finishes brand) because I felt like they were too dark and a bit too red the first time around.

Counters4


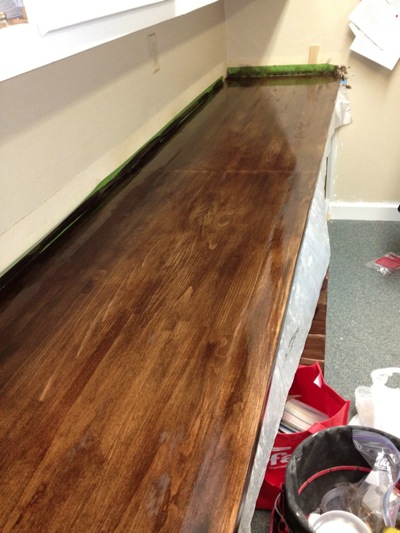
Right after applying the first coat of Waterlox:

Counters5


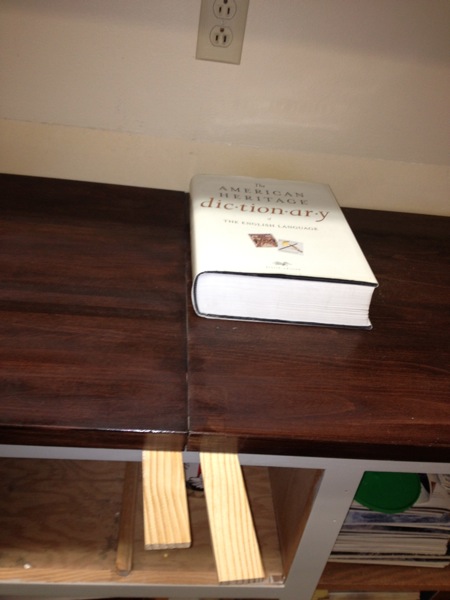
Twenty-four hours later you can see that the Waterlox wasn't totally dry yet. The following day it was dry but some spots were shiny and others were dull. I just applied another coat instead of trying to overthink it again. You'll notice that the wood filler (as expected) didn't take the stain evenly. I'm OK with it. Last week I might not have been. This week I am. We're calling it rustic. Plus, I figure that's a good place to keep my dictionary.

Counters6

Labels:

14 November 2011

You can't make this stuff up

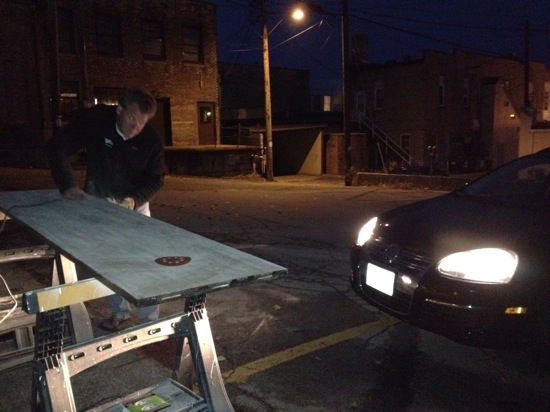
With a spare piece of window trim serving as a makeshift saw guy and a pair of clamps squeezed to within an inch of their lives, Mr. Much More Patient wielded the whirring circular saw. I stood by doing what every good carpentry assistant does: repeatedly hit the home button on my iPhone to light up the saw's path.

I have several observations to make about that:

  1. Hand-me-down el cheapo Black & Decker circular saws may not be up to every job.
  2. Circular saws that have been launched 20 feet in frustration may no longer have a blade that is 90 degrees to the guide. You may want to check that after throwing and before cutting again. Subsequent launches are not recommended.
  3. Mobile phone home screens don't really provide that much light. Everyone should download a Flashlight application for their phone in case of an emergency. Like cutting countertops in a unlit parking lot.
  4. Headlights provide very little useable light for carpentry purposes.
  5. Mr. Much More Patient and I will probably not be getting a commendation from the Woodworkers' Safety Association anytime soon.
Night2

I hadn't intended to write about the counters for the office again so soon but as they say, you can't make this stuff up.

Here's where we left off on the counters on Friday (this post).

On Saturday, we picked up the counters to move them down to the office and as soon as I picked it up I saw the underside. The virgin underside. The underside that I could have sanded and stained and started from scratch on when everything went south on the finishing (regular reader Linda was way ahead of me on this one and asked about this after my last post). The prudent thing to do would have to been to cancel the plan for the day and start over on the other side. You can probably guess that's not at all what we did.

So then we set to installing them. I should preface this by saying that I cannot get my head around the concept of things being square. I mean I know you want them square, but when they aren't square through no fault of your own, I just cannot grasp how you make them that way. And you know what? I don't think I want to know.

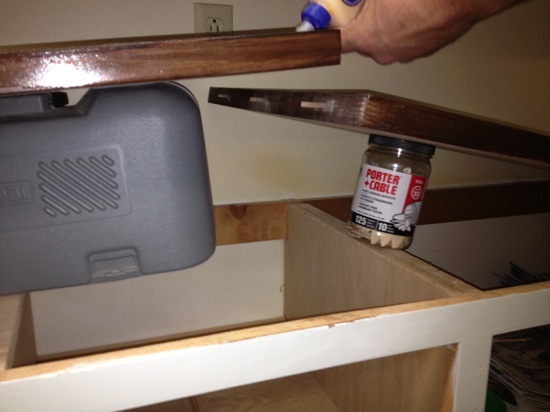
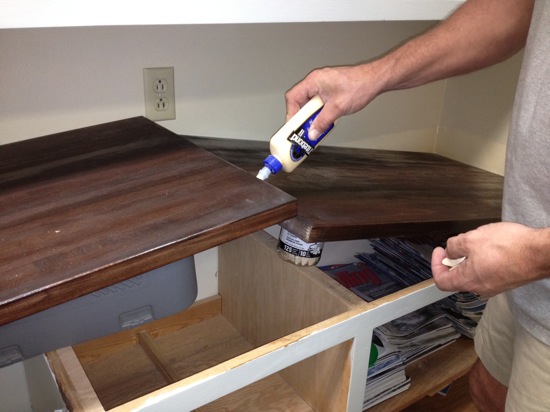
I'm going to gloss over this next part because it's really too painful to relive in detail. We needed to joint two sections of countertop together. The walls in the office are WAY out of square. The cabinetry below the counters is way out of square. And Ikea's counters aren't really all that square either. We spent five hours fitting the counters together with a butt joint. The only good thing that came out of this is that I got to use the biscuit maker. It's not called that, but it's what I call the thing that makes the holes for the little biscuit things that you glue in joints and I get to call it that because I had a crappy weekend and calling it a biscuit maker makes me happy.
Night4

Night5

Night7

This was the process of gluing the joint together (the first time). The dictionary was weight to help level the top, but it might have been better served looking up words like "frustration" and "debacle."

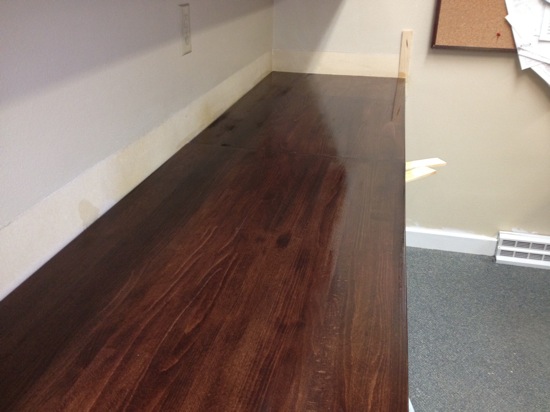
The butt joint was ugly. The countertops, when in place, were even uglier. Well I thought they were anyway. Here's what it looked like and actually looking at the pictures it didn't look that bad.

I threw on one more coat of Waterlox, cracked the window, turned on the high powered fan and left.

Mr. Much More Patient wasn't happy with the joint. He was kicking himself that he hadn't thought of a scarf joint (cutting both pieces at an extreme angle that gives you a lot more area to glue and makes for a much more seamless  joint). I wasn't happy with the finishing. But we slept on it, and decided to go down today to see if it was really so bad. The joint wasn't horrible. It could have been better, but it wasn't awful.

The finish was another story. My little fan trick served the purpose of blowing the finish across the counter. So one area had ripples of finish that was sticky, weird and, oh yeah, white. In other words. I screwed up. Bad.
Night6

Night

Here's how the counters looked after Attempt No. 1. Half the cabinet doors are up as well. We didn't get around to putting up the other doors because we spent so much time monkeying around with the counter. Looking at it now, it really wasn't all that bad.

Onto the next plan (I lost count of what number/letter we were on by this point). We decided to gently pull it out (we hadn't screwed it in yet, thank goodness) and attempt to flip it over to start the finish over again. But of course our glued joint broke.

The good news is that we had a large piece of spare countertop left over (and we obviously cursed ourselves by bringing it with "just in case"). And Mr. Much More Patient was happy to have a shot at doing his scarf joint.

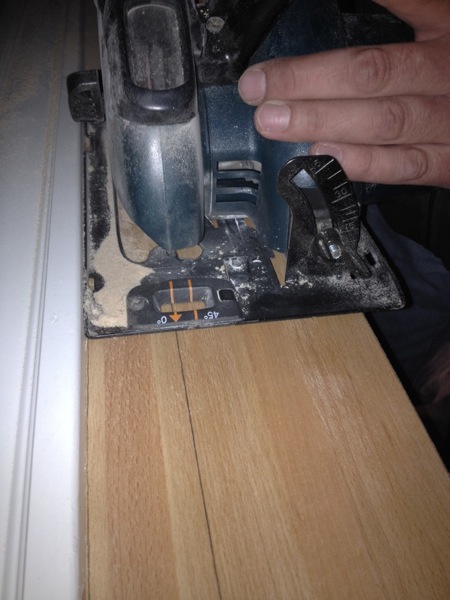
The circular saw had different ideas. By the way, that's not really the right tool to be making that kind of cut. I have about a foot of countertop, cut in a quarter-inch increments, to prove it. (Somewhere in there is when Mr. Much More Patient did something very out of character and tossed the saw halfway across the lawn behind the office.)
Night3

Window trim as a guide and a cell phone as a flashlight, the saw, having survived a 20-foot launch, makes the final cut. Hopefully for a very long time.


Right around the time the sun set is when we scrapped the scarf joint and went back to the butt joint.

And in record time we cracked off three cuts (carefully measured and squared about 10 times over before saw went to wood), sanded the tops and used the biscuit maker on each end. In the parking lot. In the pitch black. With the headlights of the car and my phone providing the light. Bob Vila my butt. Let's see him do that in the dark.

So we're back to square one again. But it's a good square one. It's probably the square one we should have started with from the beginning. The butt joint isn't great. In fact, it's worse than the first one because the blade wasn't at a perfect 90 degrees for the cut so the bottom of the joint is tight but there's a healthy gap on the top (i.e. the important side). But since the counters are unfinished I will be able to use wood filler to mask the seam. And I get another crack at finishing. And having learned two serious lessons about the Waterlox finish, I stand a better chance at getting it right this time.

We can only hope.

I didn't have an ounce of energy or brain power left to take a photo of what the counters look like now, so I'll post another picture from work today. Check back later for an update.


11 November 2011

One step forward, two steps back

In the interest of "keeping it real" I'm going to share the progress of working on the countertops for the office project well before I was planning to. I was hoping to go through this whole project and be able to show you the photo of the gorgeous countertops installed, and hopefully I will get there eventually but there's been a bit of a hitch in the plan.

Here's how they started. These are the Lagan countertops from Ikea which we cut down to size (we'll have to join the two pieces together so there will be a seam when they are installed). This is also your first look at my lair. Can you believe what a disaster the basement is? I need to stop doing projects just so I can clean the place up. Oh and the blue thing in the back (conveniently serving as a horizontal surface on which to set anything and everything) is an iceboat (you may notice it is the same color as the blue door was originally ... leftover paint). The iceboat is sitting on a table saw. Handy, huh?


After I lightly sanded them to remove the factory-applied finish, I applied a wood conditioner and then followed that up with mahogany stain. Here's what they looked like after I stained the smaller section.


Things were going pretty at this point. The stain was a bit darker than I wanted, but I knew that the Waterlox I was applying next would lighten it up a little.

The next night I applied the first of four coats of Waterlox. From what I read online, it sounded like a lambswool applicator was the way to go. So I bought a cheap one from the hardware store and cut it into sections (it was meant for applying finish to a floor so it was quite large) and I applied coat No. 1 of Waterlox after getting the surface as dust free as possible (I sanded VERY lightly with a 3m sanding pad with 220 grit after each step up to this point just to knock down the raised grain). And this is where the wheels feel off the bus (just like those wheels in the background of the picture).

When I was done doing all three pieces (I'm also working on a desktop at the same time), I took the shop light and looked at the surface to make sure I hadn't missed any spots and what I saw was horrifying. Bumps all over the place. Bumps caused by lint from the el-cheap fake lambswool applicator which shed all over my counters. Looking back what I probably should have done at that point was remove as much of the Waterlox as I could with mineral spirits. Instead, I opted to let it dry, thinking I could just lightly sand the fuzz out. Now, I had read the Waterlox instructions carefully and it specifically said not to do any sanding of a stained surface with Waterlox on it, but I thought, "Oh, a little light sanding won't matter."

Famous last words.

As soon as I started sanding with 220 grit, the finish started coming up, even though I hadn't sanded all the way through the Waterlox. It's almost as though the Waterlox absorbs some of the stain or something. Anyway, I ended up with a very blotchy mess. So I made a tough call and decided to start over. Almost.

So last night, I sanded it down. Wanna know what failure looks like? Something like this:


On a promising note, I think I figured out how you make that sort of worn Belgian finish that is so popular. Anyway, I restained last night and I'll start the Waterlox process over again tonight. It puts me behind schedule, but since I bought the low VOC Waterlox, I think I'll be able to do a couple coats after it's installed in the office.

Let's hope it's smooth finishing from here on out.

08 November 2011

Leafy bits

I'm working on so many projects right now that sometimes I can't remember which one is which, but I took a bit of time off this weekend to help Mr. Much More Patient with some leaf removal. It's the least I can do seeing as how I have a very specific way in which I like the leaves to be handled and he's nice enough to appease me.

It's taken me awhile to come around to it, but I'm now firmly in the camp of those have an unnatural love of leave mold. And you know, it only makes sense. Anyone who has ever dug into the dirt on the forest floor knows that it is rich, black, loamy goodness and that's partly because there are no anal suburbanites in there raking (check that, blowing) all of the leaves out. And all those leaves break down into really good stuff.

Of course whole leaves are no good on our lawns and gardens because they tend to form a mat that chokes out anything living below it. Good for forests (fights weeds), bad for gardens (kills your precious plants/grass).

Leaf mold, which is just decomposed leaves, is great for all kinds of things, not the least of which is a natural, good-for-the-soil mulch. Like everything, leaves break down much quicker if they are smaller. Which is exactly why my husband spent the better part of the weekend walking back and forth on our lawn.

I stuck my hand in the wheelbarrow of leaf bits to show you the rough size we chop them up to. This pile of brown bits will turn into a lovely soil amendment or mulch with time.


The system we have figured out is that you take the mulching mower we have (a walk-behind model) and chop up the leaves once and let them lay on the ground. Then you engage the bagging feature and mow over them one more time, which cuts them up nice and small and bags them for you. With a lot of leaves on the ground, I bet he only gets about 75 feet before the bag is full, so my job is to continually dump the wheelbarrow as it fills with leaves dumped from the mower bag.

Lots of the leaf pieces go in the compost bin, but even with the relatively small amount we added I'm sure our brown-to-green ratio is heavy on the browns. I also make a pile next to the compost bin. I can add these to the compost in spring or summer when I have a lot of greens or, more likely, I can use them as mulch on the garden beds next spring or summer. They won't be completely decomposed by then, but they don't tend to tie up the nitrogen in your soil as much as some wood mulches can. And if all that doesn't convince you, let me tell you that since my mom starting mulching with chopped up leaves about four years ago her mostly clay soil has become pretty amazing.

So that's one thing I learned from my mom. Here's another:

For the past several years I've been heeling in all the plants I didn't get around to planting for whatever reason, caging them with chicken wire to protect them from critters and then filling the wire up with chopped leaves for some additional protection from the elements. Usually I do this in an out-of-the-way corner of the garden or on the edge of the woods. This year my mom asked why I didn't do it in the raised veggie garden. After all, it's already caged in and therefore protected from critters, it's much easier to dig into because the dirt is nice and soft, and I unearth my plants well before it's veggie planting time. Chalk one up for mom. Not sure why I didn't think of that.

Can you see the plants sticking up out of the leaves? They are all snug in their (veggie) bed for the winter. I also filled up the auxiliary raised bed in the background with leaf bits because that dirt needed some help and I figured they can break down just as well in there for the winter.


Anyway, the handful of plants I had sitting around (maybe eight or so), got plunked in the dirt in the veggie garden and I covered those too with a healthy amount of chopped up leaves. Next spring I'll just work the leaves into the soil. Win. Win.

Labels: , ,

03 November 2011

House tour: Guest bedroom and hallway

We're finally at the end of this rather prolonged house tour. `There are a couple rooms not worth sharing at this point, but maybe in the future if they get a little sprucing up I'll share them with you.
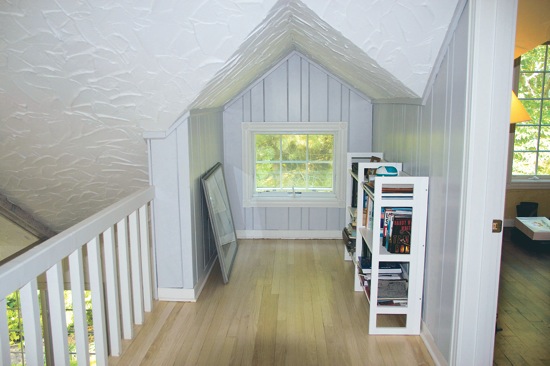
You've already seen the new bathroom, the kitchen, the living room and the master bedroom. Today we'll finish up the upstairs and show the hallway and the guest bedroom. Although the hallway got a bit smaller to allow for room for the bathroom on one end and the master bedroom closet on the other, it was important to us to preserve the character of it. We had several pieces of paneling custom made to match the existing panel so we could fill in the areas that were taller due to raising the roof.
It is open to the living room which helps the whole house feel bigger as well as allows the light streaming through all the new windows on the east wall of the bedrooms into the living room.
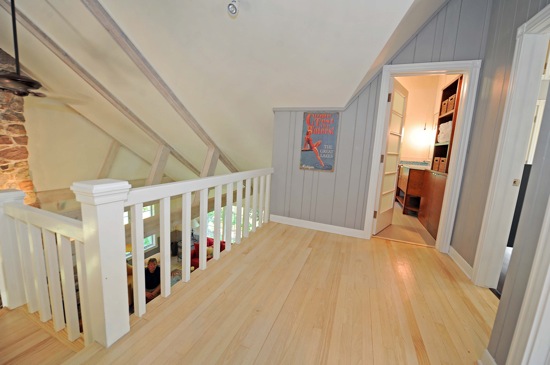
Here's what it looks like now (looking at the bathroom).
Hallway1

And here's what it looked like before:
Reno1 101011

And the new view of other end of the hallway:
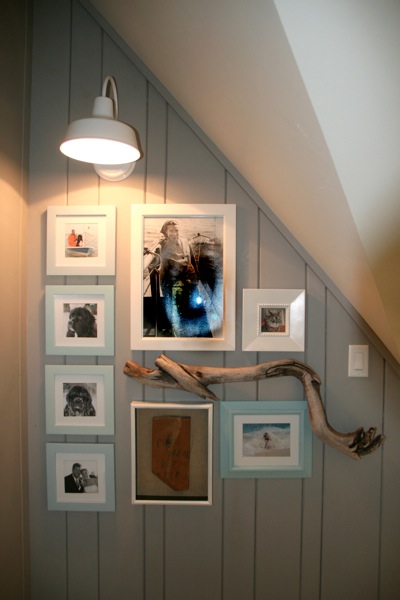
Gallerywall
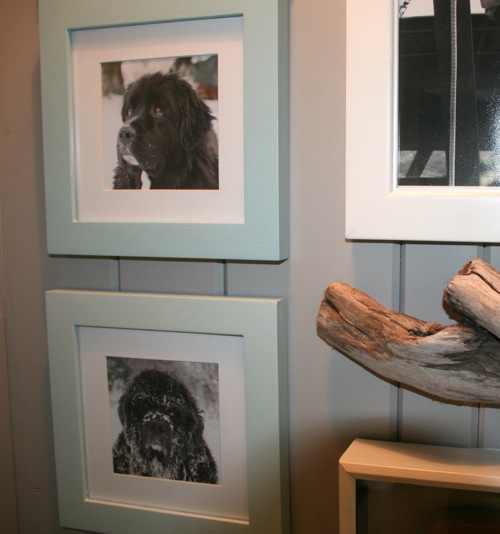
The gallery wall probably deserves a post of its own because in typical form, I made it far more complicated than necessary. But for now here is a close-up that shows some of the different blue colors I used to paint the frames.
Gallerywall2

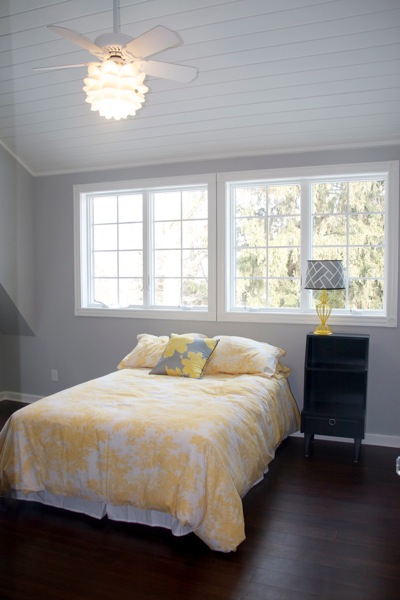
From here we move into the guest bedroom, which is admittedly a bit sparse these days. I can't seem to get the furniture placement right in this room, so for now I've sort of plunk the bed under the windows. At a minimum, it needs a headboard (do I see a DIY project in my future?) and some art to cover the large expanses of gray walls, but it needs more than that too. But, I'll get there when I get there.
Guestbed

Many of the features are the same from the master bedroom. Same floors and plank wood ceiling. The nightstand and matching dresser (not shown) were custom made for my the girls' room in my grandparents' house. Four girls, two beds. It was a good thing they had cool furniture.
Anyway, onto the details. Let me know if I miss anything that you have questions about.
Paint
  • Trim, ceilings, staircase: Benjamin Moore Mascarpone
  • Hallway paneling: Benjamin Moore Gray Huskie (and yes, it is spelled like that, but if you try to buy it as Gray Husky, they won't find it)
  • Guest bedroom walls: Benjamin Moore Stonington Gray

Floors
  • Hallway: Original red oak floors (bleached)
  • Guest bedroom: Teragren bamboo Synergy Porfolio Brown Sugar

Bedding: Pottery Barn
  • Throw pillow: Target (but you knew that because everyone has that pillow, right?)

Lighting

Labels: , , ,

01 November 2011

The short and the long of a trip to Ikea

Fair warning: After writing this post I realized it has what we call a "niche" audience. So for those of you who don't give a rip about shopping, or Ikea or what I did this weekend, allow me to summarize. We went to Ikea. It was a long drive. My husband got real cranky. I got what I needed but didn't get to do any of that fun stuff women call "browsing," and I got a lot stuff to do more projects with. 

If you follow the Facebook page, you knew that on Sunday I borrowed the company minivan (back seats permanently removed), loaded up the iPhone with music, grabbed Mr. Much More Patient and headed down to the Ikea in Schaumberg, Illinois. It's only the second time I've been to Ikea and the first time was pretty much a disaster, so I was hoping for a better result this time around.

I did a little bit of homework this time around, asking Ikea-savvy friends for tips and printing out my shopping list online prior to leaving (and I definitely checked to make sure the main items I wanted were in stock). Obviously it wasn't optimal to go on a weekend, but you have to go when you can.

It was about a two-hour drive, although we certainly made good time on the way down with Mr. Leadfoot (previously known as Mr. Much More Patient) at the helm. In fact we owe a debt of gratitude to the driver of this car, who paved the way at speeds in excess of 80 mph for a good portion of the drive.

We actually happened upon a pretty good parking spot, considering that we arrived at 11:45 a.m. on a Sunday morning. That was key because a bit part of my plan was multiple trips to the car.


The two big items I needed were two sections of Lagan beech countertop for the back counter in the office and a Vika Byske table top for the desk. We made our way straight to the ground level warehouse/check-out area and picked up the items after a lengthy discussion of what the inventor of a cart with four wheels that all rotate (meaning that the odds of taking an unsuspecting shopper out with a 96-inch long piece of countertop was not just possible, but probable) was thinking. We had to pick up the countertops in the large furniture area so that was an additional wait but they played HGTV in the waiting area so who cares.

Then we loaded those up in the van and came back inside for the rest of the items on the list, which were mostly cabinet pulls and a handful of accessories. I have to say, with all the renovations we've done in our house, I've become something of an expert at cabinet hardware shopping and the prices at Ikea are really pretty amazing and the quality is far beyond what I was expecting.

Then we ate lunch. I think this is where things started to really go downhill. The cafeteria area was basically crippled with a lot of people walking around not really knowing where to go (like we were) and not knowing what they wanted to eat. I was shocked at how many different languages I heard being spoken. It's a pretty amazing thing that Ikea is probably the most multicultural place I've been in the U.S. other than the international terminal at O'Hare.

Sometime in between the first and last meatball on the plate it became clear that I was running on borrowed husband time and I had better made quick work of getting whatever else I needed. We were whipping through the floors so quickly that the only thing I had time to grab was a couple bundles of hangers. At one point, as we were making our way through the maze that you must traverse in order to find a way out of the store, we passed a mother telling her children, "OK, kids, we're almost finished here." And Mr. Not Very Patient Anymore (previously known as Mr. Leadfoot and Mr. Much More Patient) turned to the woman and her kids and deadpanned, "There is no 'almost finished.' We're all trapped." I figured it was time to hightail it out of there before some Swedish security guard intervened.

Back in line. 
Look how much room we have left. I could have bought so much more!


Anyway, we made our way through the checkout one more time and headed back to the car for a rather exciting drive home, thanks to Mr. Get Me the Heck Out of Here. This week we'll get the counters fit to size and hopefully I can start the staining process soon. I hope to end up with something that looks like this.

Oh, and on the way home we stopped here. Mr. Totally as Impatient as I Am insisted.

Labels: ,