The Impatient Gardener: May 2013

31 May 2013

What's brewing for the weekend

Ha! A second post on a Friday. That pretty much never happens here. Still, I thought I'd just do a little catch up on random goings-on and a bit of talk about the weekend.

First off, last week I was on a radio show talking about my crown molding fail. I'm not sure Frank (the host of the show and former designer on HGTV's "Design on a Dime") really understood what had happened (the picture in the post was perhaps unclear because we were putting the new crown over the top of the old molding), but suffice to say, his advice in the end, which was basically that sometimes it's best to leave some projects to the professionals, was right on.

If you want to take a little listen, you can do that here. I honestly have not listened to it yet because I can't stand my voice and I'm still cringing a little bit about declaring myself "a cheddar girl" but if you want to listen, you can do that here or you can actually watch a video segment (of them in the studio, pretty much) here.

The good news about the crown molding is two-fold. First, it's finished! We actually ended up hiring our neighbor, who is a contractor, to do it for us and he got it up in a couple hours. I spend all of Memorial Day caulking it and filling nail holes (that took longer than our neighbor actually spent putting it up) and painting the kitchen walls (I actually changed the color) so the kitchen is officially finished. This, folks, is cause for massive celebration. The second part of the good news, which is not really all that much related to the crown molding, is that I ordered a new wide-angle lens for the camera which should arrive today, so I hope to take great pictures of the kitchen this weekend to show you next week. But here is your official cellphone camera sneak peek.


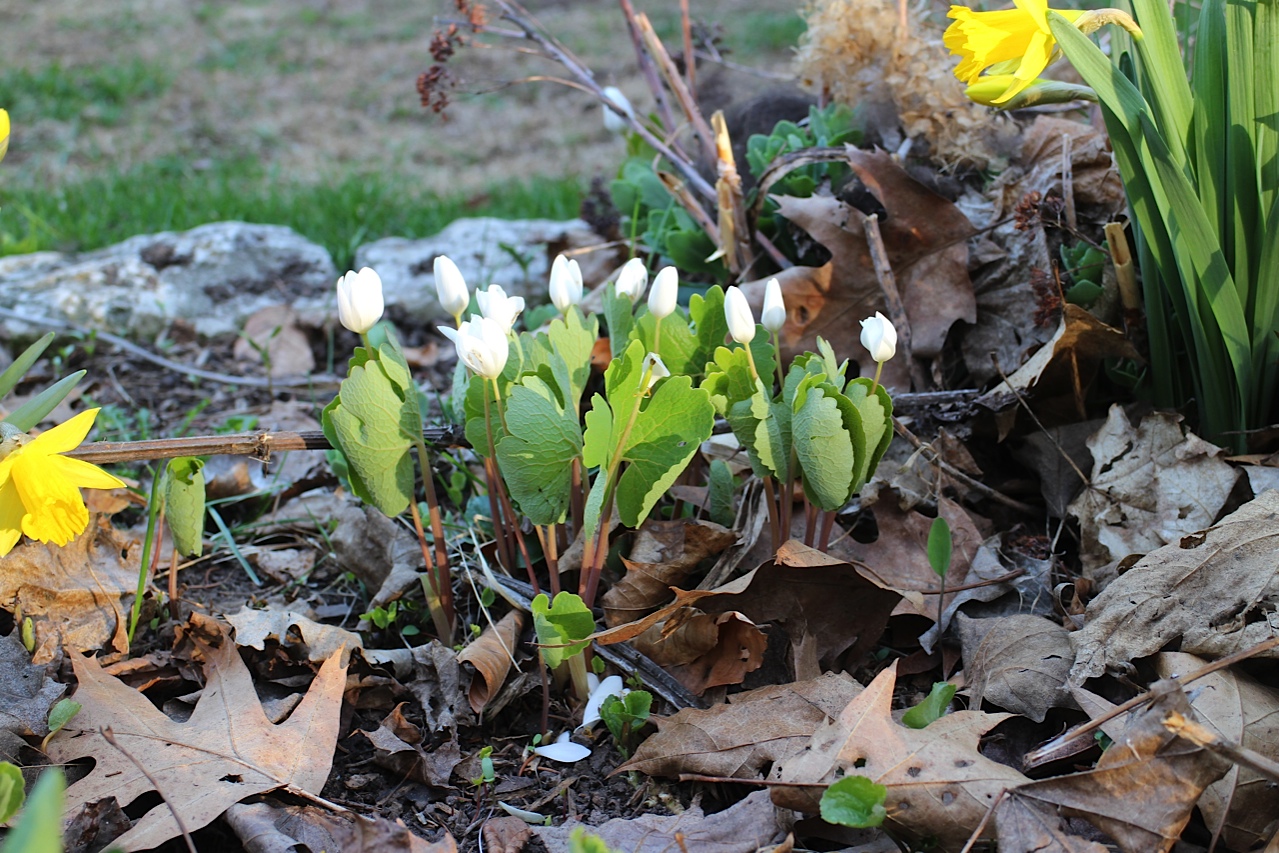
Despite last weekend's cold weather I did get a lot of the containers around the house planted. I'm trying to remember to take photos of all of them when they are first planted so I can share how they grow this year.

I was on the ladder planting the window box when the grasses I put in it must have caught the attention of a certain someone trapped inside. Desi seemed to be quite frustrated with the face that I refused to open the window for her so she could ransack the window box.

Kitty in the window

Speaking of planting things, I am determined to garden like a mad woman on Saturday. I need to finish top-dressing the beds with compost and in order to do that I need to finish weeding. Seems like the weeds are the only thing growing right now. I also want to get everything edged, which I find to be one of the more gratifying tasks in the garden. Let's hope the weather here cooperates finally.

So that's where things are at in my world. Hopefully I'll have lots of great things to show you next week. Don't forget to link up with week 3 of The Garden Appreciation Society (if you haven't already). I'll launch Week 4 next Tuesday. Unless a lot of stuff starts blooming at home it could be another week of foliage for me.

What are your weekend plans?

Labels: , ,

Coming in for a landing: one big ol' obelisk

Normally I am not one to rush through projects. I really believe in the adage that anything worth doing is worth doing well. But I recently threw that aside and just went for it on a little building project for the garden.

I got a couple of goji berry vines recently and I am so excited for them. Not just because I'm anxious to try goji berries (which are hailed as the new antioxidant superfood) because they are said to be delicious, but also because the photos I've seen of the plants are gorgeous.

When I read that they can grow to 10 feet tall, I knew I'd need a sturdy structure to support them and I'm always looking for fun garden structures. Have you priced sturdy garden structures lately? Egads, they are pricy. And when I started looking at wooden obelisks (also search for tuteurs, as the two words seem to be used interchangeably) on the Internet I realized that they didn't look too complicated.

So that's how I ended up building an obelisk/tuteur in half an afternoon. Let me preface this by saying that unless you are a very proficient woodworker, this should take you much longer than it took me. But the fact of the matter is that this is the craziest time of year. Work is nuts, the garden demands more time than I can fathom (I would be in good shape if I could take a week off of work and garden 14 hours every one of those days, so dividing that up into nights and weekends equals a lot of days) and, as you know, I have more than a few other summer hobbies I like to do. And, as usual, there is an underlying pressure to get it all done so I can hurry up and enjoy summer.

I found this great tutorial for building an obelisk. The directions aren't lengthy, but they aren't hard to figure out. So here's where I tell you to FOLLOW THE DIRECTIONS. Because I didn't. Even though they were there, plain as day, spelled out in English and everything. But oh no ... I had to improvise. Do not improvise on this project.
You'll notice that this great blogger was extremely precise about how to cut the wood. In many cases it involves cutting with a bevel and an angle (the bevel is tipping your saw blade one direction and the angle is sliding the cutting surface to a certain degree), flipping the wood over and then cutting again. But we have a lousy saw and no table extension for it, so it is really hard to cut long pieces of wood without a second person helping to hold them. I actually put one leg up on the wall to support the end of the wood to make some of the cuts. And I did not wear eye protection. It is a wonder that I still have 10 fingers and two eyes. So don't do that. Please. I don't have enough readers to start losing them to eye and finger injuries.

Anyway, I ended up flipping the boards any which way was easier to cut, which meant I totally screwed up the cuts, but I didn't realize it until it came time to put the frames together.

Yep, not supposed to look like that.
If I had been in "Anything worth doing is worth doing well" mode, I would have stopped, bought more wood and started over, actually following the directions. But I was in "Dammit, this has to get done today" mode. So I just screwed it together as best I could. You can see that it wasn't right. These should be laying nice and flat and square.

You definitely need a second person when it comes to assembling the whole thing and even then it's a bit of challenge. We found it to be helpful to attach the bottom frame (the biggest one) first and then attach the top piece. The rest of the frames didn't exactly land where they were supposed to according to the measurements, but they look pretty well spaced to me. For the frames that were completely out of whack because of my miscuts, I literally jumped on them a few times to flatten them out and then we bent them when we were screwing them on the legs to make them sort of level. 


Ok, this all sounds like super shoddy work, and I'll admit that it mostly was. But honestly, this isn't one of those things that is meant to be appreciated up close and hopefully it will be covered in plants before too long. Also, wood doesn't tend to last too long in the garden so it's not like this a permanent structure. Do I sound like I'm justifying my less-than-stellar workmanship? Yeah, I am.

Anyway, we got the whole thing together and honestly I didn't think it looked too bad. I had a really hard time figuring out what color to paint it though. I wanted to stick with spray paint because, again, this was about fast, and spray paint is so much faster than a brush. That meant I was limited to spray paint colors (you can of course, seek out special spray paint at Michael's or even have spray paint matched to any paint color through www.myperfectcolor.com, but those are expensive options). I would have loved a light orange, but the oranges I were finding were a bit hunter orange for my taste. I actually bought a lovely teal and then returned it. In the end I settled on Key Lime green which turned out to be neon green. Of course I spray-primed it first, but I didn't bother sanding it or filling any screw holes or anything.


Also, did I mention that this is a BIG obelisk? And it looks even bigger when I stuck it in a raised bed. Mr. Much More Patient has mentioned that we may need to put a light on top of it to warn passing aircraft. There is a chance he is exaggerating. 

In any case, yes it's big. But hopefully it will soon be covered in lush green leaves and not be so imposing. Time will tell. 


Labels: , , , ,

29 May 2013

The Garden Appreciation Society Week 3

Sorry this is late this week! The holiday weekend got me all cafloogered. Speaking of the long weekend, we had relatively horrible weather but I was still able to plant several containers. Honestly with as cold as it's been, it was probably too early but at last count I had more than 120 containers of plants sitting around and I really needed to start doing something about that.


Anyway, welcome to Week 3 of The Garden Appreciation Society (click on the link to find out what it's all about if you're new. In general, the idea is to learn to appreciate your garden in new ways but bringing some of the beauty you grow outside, inside).

It's a strange time in the garden right now. The daffodils have pretty much bloomed themselves out and most of the (very small number of) tulips are also spent but nothing else is really in bloom yet. So I was forced to get a little creative with my Garden Appreciation bouquet this week and I'm glad I did because it's one of my favorites yet.

I used the only two tulips that still look like anything and then filled in with hosta leaves. I got this hosta from a plant sale so I'm not positive which one it is, but I believe it is Tilt-a-Whirl. Even though I bought it mostly to fill a hole in the garden, it has become one of my favorites. I love the tri-color leaves of dark green, chartreuse and white and I think it really became the start of the show in the bouquet.


I can't wait to see what you all come up with this week. Remember, you don't need to have a blog to participate. You can link to any image, including one on facebook or a photo site. Just make sure you have your permissions set to public so we can see it. Also, some folks reported having problems with the link widget last week. I've noticed that it can seem to spin for ages, but it does actually work. Let me know if you continue to have issues and I'll see if I can't get the widget people to work on it.


Check out Week 1 and Week 2 to see the beautiful bouquets people came up with.

Labels:

22 May 2013

What do to with your plants after you get them home

Poor little plants go through so much in their lives. They are coddled and grown in the cozy confines of a greenhouse where they get the perfect amount of light and water. And them BAM! they are are thrown into garden or a container and left to the whims of the weather and the gardener.

Most plants can handle a good amount of stress until they give up the ghost, but they'll never flourish to their full potential if they are stressed. Annuals, in particular, will seem to freeze in the state in which you buy them (or even decline) during periods of stress.

There are things you can do to help your plants through that transition, decreasing their stress and making sure that they get on with the growing as soon as possible.

If you are shopping for perennials and they were already outside at the nursery, you don't have to do anything special for them. You can plant them as soon as you get home, but the best days for planting are overcast (and if there is some rain in the forecast for later that's even better). A hot, sunny day is not the best for planting.

Annuals are almost always grown in greenhouses so they will be very unhappy if they are immediately thrown in the garden to fend for themselves. They need a few days to acclimate to being out of the cozy greenhouse before they are thrown in the garden or a pot to essentially fend for themselves. This is called "hardening off" plants and it is the single best thing you can do to ensure that you get the most out of your precious plants.

There are a few ways to harden off plants and a lot depends on the weather when you're doing it. If cold is a problem (and I would say it is if nights are dipping into the low 50s or below), you're probably going to want to move them into a garage at night and then pull them back out during the day. In a pinch you can also cover them at night with an old quilt or maybe several layers of burlap, but you'll want to construct some kind of makeshift framework so the covering isn't laying directly on your plants and crushing them.

During the day, the last place you want your new plants is in the blazing sun, even if they are plants that thrive in full sun. It's quite bright outside, even in the shade, so start them in a shady spot. You can gradually move them into the sun. If you have no choice but to leave them in a spot that is shady part of the day and sunny at others, you can buy some shade cloth or row cover at any garden store or most hardware stores. This is white plasticy "fabric" that comes on a roll that has little perforations in it. You can cut a piece and just drape it over your plants (make sure it doesn't blow away). It is light enough that it won't damage them unless it rains on top of it.

Speaking of rain, it goes without saying that it's really important to keep your plants watered during the hardening off period. That doesn't mean soaking wet ... just damp. Don't let them dry out in between waterings, especially if you have a flat of small plants. Those can be nearly impossible to rehydrate.

Because I have so many plants (I buy annuals as I see them once I know what I need and keep them for up to three weeks before I plant them) to manage, I bought a mini greenhouse a few years ago. I got it at a local garden store for about $35. It's just a set of shelves with a plastic tent, basically, but it acts as a less insulated greenhouse for all my annuals. I can vent the zipper as much as I want and close it completely at night to keep the heat accumulated during the day in. I have it in a relatively shady but bright spot outside the garage. I also employ the garden wagon for whatever doesn't fit in the greenhouse.
Hardening-off greenhouse
My hardening-off greenhouse filled to capacity.
Other plants, mostly perennials, go in a garden cart that I can easily move in and out of the garage when it is cold.

The trick with hardening off is to gradually expose your plants to the conditions they will be living in. You can probably accomplish this in a week, but if you don't have that much time, even a few days will help.

A close up of just how jam packed the green house is. In case you're wondering the pretty red flower is Proven Winners Superbells Pomegranate Punch and the light pink below it is Supertunia Flamingo, both of which are 2014 introductions for PW that you should be able to find in nurseries next year. I'm loving the Pomegranate Punch!
You might be thinking, "I buy plants and stick in the ground an hour later and nothing bad has happened." That's probably true. But I bet your plants didn't do much growing for awhile and you might have even had a few crispy leaves. In other words, they survived but did they thrive?

So, yes, you CAN plant annuals (ones that are purchased, not ones you've grown from seed, which will most certainly croak if you don't harden them off first) without hardening them off and yes, I've done it a few times myself. But for the next two weeks, when those plants seems completely frozen in time at best and pathetic looking at worst, I kick myself when I think that if I had just waited a few days to properly harden them off before I planted them, they'd be looking a heck of a lot better.

I'm always happy to provide an example of what NOT to do and here it is. These are plants I picked up over the past couple days that didn't make it past the patio, which is blazing, hot sun most of the day. After I took this photo I did dutifully move them to a more appropriate holding area to harden off until I plant them.


Labels: , , ,

21 May 2013

The Garden Appreciation Society Week 2

Welcome to Week 2 of The Garden Appreciation Society. Sounds like everyone made it through Week 1 without any emergency visits to their therapists, so I'd say we're all doing a good jog at easing ourselves into bringing our flowers inside to enjoy in a whole new way.


So tell the truth, especially if you're reluctant to actually cut any blooms in your garden to enjoy inside: Did you love seeing your beautiful bouquet last week? Did it bring at least one smile to your face?

The Garden Appreciation Society Week 2

We're still fully ensconced in daffodil land here these days so this week's bouquet features more of them. I only picked yellow ones this week and the one featured front and center—the double bloom with the orange center—is a favorite. It's either Cheerfulness or Tahiti (I can't remember which), and it smells amazing. I combined it with Virginia bluebell blooms, which are the most intense blue for that totally classic combination of yellow and blue in a favorite vase.

The Garden Appreciation Society Week 2
How are you appreciating your garden in new ways this week?

New to The Garden Appreciation Society? You can read more about it here, but the general idea is that gardeners need to break the habit of only appreciating their hard work and their gardens in their "natural habitats" and bring a small part of their garden inside to appreciate in a new way. It doesn't have to be a huge bouquet. It's not about flower arranging and it's not about photography.

The Garden Appreciation Society Week 2

So make a bouquet from your garden, bring it inside and appreciate it! And if you feel like it, link it up below. You can link to it on your blog, a photo site (like Flickr) or even Facebook (just check your settings for that photo so you make sure we can all see it).

Here's a link to Week 1. If you haven't already, check out the great links there.

Labels: ,

20 May 2013

Whoosh! There goes the weekend

Sometimes when I disappear from the blog for more than a few days it's because I have nothing to write about and I never want to bore you. But other times it's because I'm so darn busy there is just no time to write.

That's been the story for the past week. I promise you posts on almost all of these things, but I just haven't had a moment to take more than an iPhone photo or write any words.

But just so I don't completely leave you out of the loop, here's what's been happening.

On a total whim this weekend I decided to try to create a "hedge" of chives along one section of the circle garden. I started pulling up all the little chive volunteers and plunking them in along the edge and then I ended up pulling up one plant and dividing it for the rest. I think chives are so pretty in and out of bloom so I thought why not. I already had the plants and there's no harm in trying it. If I don't like it, I can just move them.

Chive hedge

It was a weekend of go-go-go trying to get some gardening tasks finished up. I didn't even come close, in case you were wondering. It is amazing how much time it takes to move six yards of compost. I'm not sure what takes more time, the weeding of the beds before I put it down, or the moving and spreading of the compost once I do. In any case, I'm looking at at least one more weekend of it before I'm finishing.

I did want to do one little construction project this weekend. Apparently I failed direction-following in kindergarten because the directions on how to make the cuts for this tuteur (or obelisk, whatever you want to call it) couldn't have been more clear but oh no, I had to do my own thing, which is how I ended up with this.

All chicken-winged up

I have a friend who likes the phrase "all chicken-winged up." That, dear readers, is all chicken-winged up. Since I was throwing this thing together in record time though ... I just torqued it enough to screw it on somewhat straight and went with it. It's not exactly the most beautiful thing I've ever made but once I slap some paint on there, it will work out just fine.


The Serviceberry is about a day away from full bloom. Of course rain is predicted all week. I shot a quick photo of it this morning on my way out the door just in case that's as good as it gets before the flowers collapse.

Serviceberry almost in full bloom


And in the most exciting thing that happened all weekend ... the backsplash was installed in the kitchen. I love it more than I even thought I would! We are so close to finished on that project (thank goodness).  I just have to paint the walls and we have to get someone to finish that damn crown molding (speaking of that, I'll be on the radio on Wednesday talking about it, believe it or not). Lots of photos to come of that! I can't wait to show you.

Tile closeup

 Thanks to everyone who participated in the first week of The Garden Appreciation Society. We'll do it again tomorrow so get your bouquets ready!


Labels: , , ,

14 May 2013

The Garden Appreciation Society -- Week 1 (Join in!)

First of all, congratulations to Edie who is the winner of the DeWit bonsai tool kit. Edie, check your email!

I have to say I loved all your comments so much. So many great stories of sentimental houseplants!

 photo GAS-LOGO_zpse4bdf51a.gif

And now, onto a bit of fun. Last week I told you about what I envision The Garden Appreciation Society to be about. Check out that post for the full details, but here's the gist of it: Too many of us are "tight" with the beauty that our gardens produce. We only allow ourselves to enjoy it in situ. The goal of The Garden Appreciation Society is to allow ourselves to enjoy the fruits of our gardening labor in more places.

I won't make you take a pledge, wear a funny hat (unless that's your thing) or take hours away from your weeding gardening time. All you have to do is snip a few flowers or a few leaves, or SOMETHING from your yard and bring it inside to enjoy in a different way. Snap a picture of it, post it on your blog, a photo site (i.e. Flickr, etc.) or even Facebook (make sure you have that photo's settings on public so we can see) and then link it up.

It's not about floral design or photography. It's about enjoying our gardens in a new way.

Here's my first contribution. A few random daffodils (I bet there are five different varieties in there), some wonderfully unfurled ferns (I think they are prettiest in this state) and a few stems from the not-yet-blooming Virginia bluebells to fill it out.

Garden Appreciation Society, daffodils, ferns, Virginia bluebells

The Garden Appreciation Society, daffodils, ferns, Virginia bluebells


Now it's your turn! Link up here (make sure you link direction to the URL of the photo or specific blog post, not a general blog/photo site URL):


Want a button for your blog? Grab the code below to link back to this page.

 photo GAS-LOGO_zpse4bdf51a.gif

Labels:

10 May 2013

The Garden Appreciation Society

As I've mentioned in the past, I'm extremely tight with my flowers. I rarely cut them and bring them inside to enjoy. But on the rare occasion I do, I absolutely love seeing them displayed in the house.

Last year I went out before the first hard freeze and cut all the leftover flowers I could find. Without so much as a thought to arranging them, I threw them in a vase and stuck them on the table. Even though some were past their prime, it brought me immeasurable joy to see that little haphazard bouquet brightening up the kitchen.

I'm not the only gardener I know who does this. I was amazed how many people told me they do the same thing.

So here we are, this group of people who love our gardens so much that we spend countless hours (not to mention money) working in them and yet we get tight about allowing ourselves to enjoy the fruits of our labor in some of the places we spend the most time in.

Well I say enough is enough. Gardeners deserve to be surrounded by the beauty they create in spaces other than their gardens. And I refuse to believe that the beauty of a garden will be greatly diminished by moving just a tiny bit of that beauty somewhere else.

An Instagram picture of the last flowers cut from the garden last year. There is no rhyme or reason to this bouquet but it brought me immeasurable joy.

I give you the Garden Appreciation Society.

The idea is to appreciate our own gardens in different ways. To have a daily reminder of the bounty that our gardens provide. To catch a glint of beautiful color out of the corner of our eye while standing in the kitchen, or the bedroom or the living room. We all have plenty of flowers growing outside. OK, I  know that there is no such thing as too many flowers, but all of us can spare a bloom or two.

So I'm challenging you all, whether you are an experienced gardener with a yard full of beautiful flowers, a new gardener just figuring it all out or even a balcony gardener making the most of a small space, to appreciate your garden more this year.

A bouquet I whipped up three years ago after some delphiniums broke off. 

And here's how you're going to do that. Every week (or so) you are going to go out in the garden and cut a few flowers or interesting foliage and bring it in your house to display. It might be an extravagant bouquet, but it could just as easily be a single bloom, or even a lone hosta leaf. And then you're going to take a photo of it and link it up here.

It's not a flower design competition and it certainly isn't a photography competition (phones take perfectly good pictures). It's just about bringing in a little piece of your garden to enjoy inside.

I'll come up with a linky tool early next week. I hope to find one that can link to a blog or a Facebook page so if you don't have a blog (or don't want to put it on your blog), you can just put it on Facebook or Flickr or whatever and we can all see it. If it takes off I'll come up with prizes or something down the road, but for now we'll keep it simple.

So when you're out in the garden this weekend, enjoy the flowers, and then pick a few to enjoy inside.

Appreciate your garden.

Labels: , ,

08 May 2013

What is the sound of spring springing? Sprong?

Funny how spring goes. One day you're belly-aching about the horrible weather and wishing you could  do more in the garden and then the next day you turn around and the garden has come alive, bringing with it all the good (flowers!) and bad (weeds!) bits.

Silly me, I was feeling pretty good after two weekends of garden cleanup. I had raked out most of the leaves, cut back any perennials that weren't dealt with in fall or late winter and spot weeded as necessary. The next step was to top dress everything with a nice layer of compost, a pile of which is waiting for me by the veggie garden.

And then last night as we were re-hanging bird feeders (which were displaced when we removed some trees), I looked around and saw that somewhere along the line, the garden had sprung to life. More daffodils had opened. Perennials are sending up shoots out of the ground. Spring ephemerals are popping up everywhere.

And the weeds. Oh my, the weeks. Dandelions the size of dinner plates are appearing overnight in the garden. I SWEAR they were not there on Sunday because certainly I would have pulled them. The first round of garlic mustard weed is threatening to flower already. I just want to tell the whole garden to just wait a cotton-pickin' second for me to catch up a little!

Instead of dealing with any of it last night though, I grabbed the camera to get a few "golden hour" shots of just what is happening.

The Virginia bluebells are thinking about flowering.


Bloodroot, one of my favorite spring ephemerals is popping up. I love everything about this plant. The leaf shape is amazing, the white flower is gorgeous and of course there are those red stems.


Is there a flower that is happier than a daffodil? I think not.


I planted a couple of new plants this weekend, including two Victoriae ferns. Looking at this photo I see that someone has already been taste-testing it on the right side. Seriously, is nothing sacred with deer?


Labels: , ,

06 May 2013

Bring beauty inside with Indoor Plant Decor + a giveaway

I have only two indoor plants that I really care about. One is a spider plant I bought at the farmer's market the day I moved into my freshman year college dorm, making it, well, old enough to be at college itself. The other is a large ficus tree I got from my grandmother's house after her death. In her later years it also served as a Christmas tree of sorts, bedecked with red ribbons and a set of lights.

I have other indoor plants, but they take a back seat to these other two, and I have no doubt that were it not for their annual vacation outside during summer, when I actually take care of them along with the outdoor containers, they would have been goners long ago.


 Still, for a long time I've known that there was a whole other world of indoor plants out there. And that's where Indoor Plant Decor comes in.

The new book—a "design stylebook for houseplants," according to the subtitle—by Kylee Baumle and Jenny Peterson spoke to me from the first line of the introduction. "It used to be that indoor gardening meant a ficus tree in the corner of the living room, a pothos plant trailing from the top of the entertainment center and a row of African violets in the kitchen window."

Plants, Indoor Plant Decor proves, can be just as much a part of your home's decor as a throw pillow or decorative vase but with far more style and the benefits that come from plants, including some that actually purify the air in your house.

The book is unlike most gardening books, possibly because it straddles an interesting line between gardening and home decor. Although small in size, the book is big on information, and the size seems well suited to the layout. Each chapter starts with a scrapbook-style series of photos setting the scene for  a design aesthetic and finishes with a DIY project to create plant decor in that style.


The latter is where the book shines. Too often, projects spelled out in books are excessively complicated, but Indoor Plant Decor hits the right note with its easy-to-understand, step-by-step instructions. Several projects are approachable enough that I found myself wanting to dig into them right away. Mini succulent cork planters are adorable and would be the ultimate in table decor-turned guest gift and the "planted book" is a creative take on plant design that you're not likely to find elsewhere.


While the front of the book is dedicated to inspiration and how-to, at the back of the book is an easy reference guide to houseplants. A list of houseplants ranked from "easy breezy" to "design divas"  is alone worth the book's cover price. Following that is some information on common houseplant ailments and basic care information. None of it is overly extensive or mind-numbing, instead it is the right amount of easy-to-access information.

Sentimental houseplants are great and Indoor Plant Design doesn't discount the importance or beauty of fiscuses like mine, and in fact the tips contained in the book will only help those plants thrive in my house. But the book leaves you looking at houseplants in a completely different way; one that makes you want to explore just what you could do for your home with a few plants.

••••••••••••••••••••••••••••••••••••••••••••••••••••••••••••••••


I have a great giveaway to make indoor gardening even more fun. The Bonsai Tool Set by DeWit Tools  is just the right size for maintenance of your Bonsais or other small plantings. Don’t let the size (6-7 inches) fool you, these tools are made with the same quality materials as the larger DeWit tools.

All four tools have blade made of Swedish boron steel and fitted with an ash hardwood handles from FSC Certified forests. The set comes with wood storage case and is guaranteed for life.

DeWit Tools has been producing hand forged Dutch garden tools in the north of Holland since 1898. Every DeWit tool grew out of a need to solve a gardening problem and today, 3rd and 4th generations run the DeWit factory. 

To enter, just use the Rafflecopter widget below and leave a comment telling me if you get sentimental about your indoor plants (or just tell me about your favorite indoor plant). You an also get an extra entry by following The Impatient Gardener on Facebook.


I was so excited to be part of this blog book tour happening all over the gardening blogosphere today. Everyone who has reviewed the book is also giving away a great prize, so make sure to visit these bloggers and enter to win a great prize.

I was provided a copy of Indoor Plant Decor by St. Lynn's Press for review purposes. All opinions are my own. Indoor Plant Decor is available at Amazon.com and at booksellers throughout the country.

Labels: , ,

03 May 2013

Something finally planted


A new raised bed is in  and the onions are planted. I plan to grow some kale on the other side of it, but most other things will be off limits as this bed is not protected from the overactive deer population in our yard.

It feels great to have something in the ground (I did finally get the peas planted too, but I'm so late on those thanks to frozen solid soil in the raised bed that I don't expect much production out of them) but beyond that I'm mostly still in early-spring clean-up mode. That doesn't make for great photos or inspiring blog posts, but the good news is that I have a few things planned for next week that are exciting.

I'll have a very cool giveaway on Monday and later in the week I hope to launch something that I've had waiting to go for months.

Have a good weekend in the garden, everyone!

Labels: ,

02 May 2013

A new view

As I mentioned a couple weeks ago, we've been waiting for the tree guys to remove a few trees from our yard. I wanted to get rid of them sooner rather than later so I didn't have to worry about protecting plants near them and we had some more time to figure out what to do to replace them.

Many of you have commiserated with me about having to remove trees. It's not something we take lightly and it's clear that I'm not the only person who has a connection to their trees.

Taking down the big birch in the back yard was a very difficult decision to make. I remember being in awe of that tree when we first saw the house, but it was clear that it was in failing health and the thought of a very large, sick tree that our house and garage happen to be in the direct path of was making me lose sleep.

It was the first tree they tackled when they got there at 7:30 a.m. (sorry, neighbors) so I watched them remove some of it before I realized some things are better not watched and I went to work. So I looked out the window and saw this:


This tree guy is amazing. He climbs up the tree free hand, ties a few ropes to a couple of branches, rappels  down (using just a knot, no fancy climbing gear other than his harness) and cuts off the branches while the guys below manage them. He doesn't wear a helmet or chainsaw chaps and his eye protection is a pair of sunglasses. It's a little scary but he does amazing work and his crew leaves the yard spotless. And he's always willing to do a couple extra little things if time permits, like cut off a random branch on a tree or grind a small stump.

We had to pay extra to have him grind the massive stump for this birch tree because we hope to plant another three nearby in the future. Yes, you can rent a stump grinder, but having gone that route once because I can tell you it is well worth paying for that service.

Here's a picture from March of the tree:

And here's what that area looked like when I came home:


We have never seen that house from our yard before. Well, at least not that we noticed. We were also surprised about how much shade that tree was providing even without being leafed out. The kitchen is much brighter, which is something I never expected. I think I will probably have to edit a few plants from the new bed off the deck, but I'll wait and see how things do as spring progresses.

The other major change came in our bedroom. One of the reasons we loved that tree so much is that we looked at it from bed, watched birds and squirrels frolic in it and watched it sway (a little too close to the house) in the wind.

This was the view from bed Tuesday morning before the tree cutters arrived.


And here's what it looked like yesterday afternoon:


That's quite a difference, view-wise, and I think it will be even more of difference light wise. I don't think it will still be enough to get me to put window coverings up, but it might help me get out of bed a bit earlier. That's not a bad thing.

The cedar that was badly damaged in the March snowstorm also came down. It was right outside the living room window. We were concerned we would be exposed to the road and our neighbors on the other side when it came down, but I'm actually pleasantly surprised by the view.

Here's what it looked like out the window before:


And here's the after:

One thing we've learned is that projects beget projects, and taking down these trees is no exception. For one thing, there is this little issue to deal with:


That would be the massive pile of wood from the birch tree waiting to be split and stacked. The wood revealed that we weren't premature in taking down that tree. This is what some of the logs looked like inside:


The other project is that the back yard, which is a main view from the deck, is in need of some serious sprucing up. 

Here's what it looks like now. The large viburnums I planted last year haven't leafed out yet, so that will help when they do (and hopefully they will grow quickly to 8 feet tall or so). But there's plenty more to do beyond that.


Here's a little sketch of what I'm thinking needs to happen. First and foremost, we need to relocate the wood pile, or at the very least find something other than bright blue tarp to cover it up. That looks awful and I can't stand it.


In the sketch, the emerald green represents what's already there, including the three virburnums I planted last year and the small island garden bed there. The yellow shows the future, including the full-grown size of the viburnums, the addition of one more to the left of the first three and an expansion of that island bed (that I've never really been happy with). I think we'll had a spruce, maybe a blue one, to fill the gap between the existing cedars and then in the future we may plant a new large tree, but we're going to take our time deciding on the if, what and when of that. Part of the problem is that the enormous spruce to the left, which is maybe the biggest tree in our entire yard and must top out at about 80-100 feet tall and easily 40 feet wide, now looks completely out of place with nothing to balance it. Somehow it actually looks much, much larger without the birch there.

Amazing what a difference a few trees (or the lack thereof) make. Has your yard gone through major changes when you've lost trees?


Labels: , ,