The Impatient Gardener: February 2013

26 February 2013

Let's get bold

Slowly but surely the living room transformation from a warm modern French country feel to a more casual, slightly nautical feel has come together.

I showed you the new main seating area (our living room is long and narrow so we have three seating areas). I also showed you how I reupholstered the set of chairs by the game table over near the front door. In between those two areas is the fireplace.

We've had two Pottery Barn Malabar chairs there since we bought the house. PB stopped making those chairs after everyone in the world bought them and there was no one left who didn't own one. I don't care if they are ubiquitous, I still like them and they are one of the few wicker chairs on earth that is actually comfortable.

Here's what the living room has looked like for the last 10 years. 

When I redid the main seating area of the living room I was hoping that the old rug in front of the fireplace would still work, but it quickly became obvious that was not the case. Fortunately I've found a good home for it (I really loved that rug) at my brother and sister-in-law's house. With all of the pattern happening between the striped rug and the navy chair and ottoman I was looking for a rug that was a solid color but with lots of texture to keep it from looking boring. Jute or sisal would be my first thought but our light floors rarely look good with natural fiber rugs. When I found this chunky braided wool rug (at rugsusa.com at a really nice price thanks to a good coupon) I loved that it picked up the off-white from the stripe of the main rug and reminded me a little of a fisherman's sweater.

The chairs before with the great cushion covers my mom made for me, on top of the new braided rug. It just doesn't work.

So the rug was a keeper but then it became obvious that the yellow large-scale floral on the chair cushions wasn't going to work. That made me sad too because my mom made those covers for me out of leftover fabric from her family room couch and I still really like the pattern. Also, as you can imagine, even though I got pretty good deals on almost everything new in the room other than the sofa, the "budget" (I use that word loosely because I never really set an amount to spend on it) for this room was pretty much used up. Fortunately I remembered that I still had the original cotton canvas cushions that came with the chairs.

But off-white canvas on an off-white rug? Boring. So a little cushion sprucing up was called for.

I really liked the racing stripe pillows from Serena and Lily, but at $64 a pop, I wouldn't exactly call that budget-friendly.

Serena and Lily racing stripe pillow


I've painted a few strange things (including speakers and hinges), but I have never been really keen on painting fabric. But I couldn't possibly add another sewing project to my rapidly growing list of things that need to get done when I finally pull the sewing machine back out.

So paint it was. I sampled some fabric paint on a canvas drop cloth (I figured that was close to cotton canvas) but I hated how crispy it was. Plus I was not satisfied with the colors I could find in true fabric paint, so I bought acrylic craft paint that I mixed to a color I liked and fabric medium, which is sort of liquidy white stuff you mix with paint so it stays somewhat pliable on fabric and doesn't crack like a bad 1980s T-shirt.

I marked the center of the pillow and then measured 4.5 inches on either side for a 9-inch stripe. Later on I got smarter and put a piece of tape vertically down the center and drew the centerline on it to make it easier to get the lines straight all the way down.
After washing and air-drying the covers just to make sure they were clear of any kind of coating that might keep the paint from sticking, I used 3M high-adhesion painter's tape and after I figured out how to keep the line straight and centered (the hardest part of the project by far), I used a flat wooden spoon to run over the edge to make sure it was really stuck down. For the most part the line stayed pretty crisp, but there was a little creep under the lines where I couldn't push it down as well, such as where the box cushion covers curved. You can't really see it unless you look very closely.

I mixed together three different colors of blue Martha Stewart craft paint to get a navy I liked, then followed the instructions on the fabric medium and mixed it in 1-to-1 with the paint.
Although I've read about a lot of people rolling paint on fabric, I used a broad cheap artist's brush I picked up in a three-pack at Michael's.

I let everything dry overnight just to be extra safe, then I just followed the directions on the back of the fabric medium bottle and ironed everything at medium for 3 to 5 minutes. To be extra sure that the color was set, I also threw the cushion covers in a hot dryer for about 15 minutes.

When I pulled them out of the dryer they were soft and you couldn't even tell that there was paint on the fabric, but as they cooled they stiffened up a little. If you run your fingers across the pillows you can tell its paint, but it's not an unpleasant crunchiness like I was worried about. And you can't tell at all when you sit in them.

Before
After (P.S. When am I going to learn to pick up the house before I start taking pictures? Yes I iron in the middle of my living room.)
All in all I'm really happy with how they turned out and even more happy that I was able to transform those chair for about $15 in supplies and maybe 90 minutes of work. Everything is looking a little too neutral to me now so I really need to get on my pillow making projects and get some pillows sewn for on those chairs (as well as a few others).

Have you ever painted fabric?


Labels: , , ,

20 February 2013

Expert garden bloggers share their favorite shrubs

When I first started creating the garden at our house, my first garden as before I just had a balcony to put containers on, I ran out and got every perennial I thought looked interesting. Of course I've learned so much since then and the beautiful thing about gardening is that you can correct your mistakes. One of the most valuable things I've learned is the beauty of a mixed border combining perennials, shrubs, annuals and even, occasionally, trees.

Shrubs are so key to good garden design because they offer structure and interest that you just can't get with perennials.

I love asking fellow gardeners what their favorite plants are. Last year I asked some great garden bloggers about perennials, but this year I tried to pin them down on shrubs. Here's what they had to say.

Kylee writes the excellent blog Our Little Acre and gardens in northwest Ohio. She has a handful of garden cats who hang around, chickens and an adorable new granddaughter. And in April, the book she co-authored with another fantastic garden blogger, Jenny Peterson, will be published. Indoor Plant Decor is going to be the bible of indoor gardening.

Here's what Kylee picked (see what a good job I did nailing her down to one? I'm such a pushover):


Just like last year, I've had a difficult time paring my favorite down to just one. Erin wants to know my favorite shrub and I just couldn't come up with just one! So, I narrowed it to these three: 

Proven Winners photo
  • Physocarpus opulifolius 'Coppertina' - I wanted this from the moment I first heard about it, but had to be patient, because I didn't find it locally until a few years ago. It was every bit worth the wait! Its foliage color is beautiful when mature, stunning when new, and it always looks good, you know?  It's hardy in Zones 3-8 and it's not picky about soil pH.
Monrovia photo
  • Fothergilla 'Mt. Airy' - When spring comes,  it shows up with bottlebrush white blooms that remain while its corrugated green foliage finishes leafing out. Then in fall, it turns an absolutely thrilling shade of orange.  When the sun hits it then, it fairly glows. This shrub was discovered here in my home state of Ohio by the great Dr. Michael Dirr, whom I had the opportunity to meet last month! Oddly enough, it likes acidic soil and we have alkaline, but it does just fine for me. (Rhodies, azaleas, and blueberries don't do well here, as a rule, since they too, like acidic soils.) Hardy in Zones 5-8.

  • Magnolia x loebneri 'Leonard Messel' - Though it's pretty nondescript for most of the year and can be susceptible to powdery mildew, I would still be sad if anything happened to it.  What it does in spring makes up for all the rest of the season.  Its blooms are the most heartbreaking shade of pearly pink and the centers are real works of art if you look closely.  In time, it will grow quite large, unless you keep it pruned so it can remain a large shrub. Ours is currently very much in shrub form. It likes a fair amount of water, so we planted it in the wettest part of the yard and it seems happy there. It's very showy when blooming and is hardy in Zones 5-9, as well as being deer-resistant.
•••••••••••••••••••••••••••••••••••••••••••••••••••••••••••••••

 Anyone who has read this blog for long knows that I love Genevieve's blog North Coast Gardening. Even though she gardens in a very different part of the country from me, she always manages to speak to gardeners in any zone and she is always my go-to source for gardening product reviews.

Here's Gen's pick:
Photo courtesy of Genevieve Schmidt

Parrot's beak, or Clianthus puniceus, has been making my heart flutter for the last few years. I mean, just look at those blooms! They're a solid 2-3 inches long, come in large clusters, and you can choose from the regular coral or go for red (pictured) or white varieties.

A lot of plants with such splashy flowers have lackluster foliage or a rangy habit, but parrot's beak shines here, too. The leaves have a lush, fern-like appearance that fits in around water features, tropical-style plantings, or really, nearly anything. And while it makes a great stand-alone shrub, it's also a natural to espalier. I have one growing against my chicken coop that only sticks out about 2 feet, and I don't need to prune it much - just a little pinching to direct the growth. They'll grow about 5 feet tall and around if left to their own devices.

Obviously, since they're from New Zealand they need full sun, good drainage, and not too cold of a climate - they're happy in zones 8-11.


•••••••••••••••••••••••••••••••••••••••••••••••••••••••••••••••


Debbie is an expert garden designer and garden coach (which is so cool) in Connecticut's zone 6.  She is also a member of the Garden Designer's Roundtable, which is an incredible source of inspiration and information. She blogs at a Garden of Possibilities.

Here's Debbie's beautiful pick:


Photos courtesy of Debbie Roberts
While it's impossible to pick just one favorite shrub, I have to say purple beautyberry (Callicarpa dichotoma) is right at the top of my list of favorite shrubs. Even though it does have an interesting shape with its almost horizontal branches, for most of the year it's fairly quiet and unassuming. But in the fall, when many other shrubs and perennials are looking a bit tired, purple beautyberry puts on an amazing show. Small purple berries drip from the branches. The shrub seems to glows in the sunlight. Here in my Connecticut garden, the berries remain on the shrub after the leaves fall off so it's not unusual to find the little purple berries dusted with snow in the winter.

Purple beautyberry likes a spot in full sun to partial shade and average garden soil and it seems to be deer resistant, at least in my garden (knock on wood!)


•••••••••••••••••••••••••••••••••••••••••••••••••••••••••••••••


Christina Salwitz is a home gardening training specialist. That's a lot of words to say that she doesn't garden FOR people, she teaches them to garden, which seems so appropriate for an activity that derives so much of its enjoyment in doing it, not just appreciating it. She gardens in Washington state and blogs at The Personal Garden Coach where she posts amazing photos that will have you clambering to get into the garden, tips and tricks, book reviews and more. She is also the co-author of the new book Fine Foliage, which celebrates the beauty of foliage over flowers. You should see some of the amazing foliage combinations presented in the book. It's stunning. She is also a member of the Garden Designer's Roundtable

And because with a book hot off the presses and a booming coaching business she's a busy lady, so Christina cut right to the chase:


My favorite “lately” has been the Bountiful Blue Blueberry. It has SUCH amazing foliage color, evergreen, turns a lovely soft plum tone in winter, AND an incredible amount of great fruit. What’s not to love?!


•••••••••••••••••••••••••••••••••••••••••••••••••••••••••••••••


Steve Asbell is an incredibly talented gardener, blogger and artist who is lucky enough to garden in Florida (at least I'd consider him very lucky at this time of year). His blog, The Rainforest Garden, is about "taking a healthy dash of botanical style and incorporating it into your life through decorating, crafting, cooking and yes, even gardening." His illustrations are not to be missed. He also has a book coming out in early 2014. Plant by Numbers has tips and recipes for creating a carefree indoor garden with 50 artistic living arrangements with houseplants, ranging from tried and true Dracaenas to up-and-comers like mistletoe cactus and bromeliads.

Steve is writing about one of my favorite tropical shrubs:

Photo provided by Steve Asbell
Dwarf Bottlebrush (Callistemon viminalis ‘Little John’)

For those of you growing in zones 9-11, dwarf bottlebrush has everything you could possibly ask for in a shrub. First of all, it’s one of those rare bushes that stays small without much maintenance, with tight whorls of velvety blue-green leaves that stay attractive throughout the year. Most folks however, grow it for the fire-engine red ‘bottlebrush’ flowers that glow in the sunlight and bring hummingbirds in droves. All of these great features are reason enough to grow the plant, but the reason it gets my vote is that it is incredibly drought tolerant and thrives in the hottest and driest spots in my garden. If you live in zone 8 you can grow dwarf bottlebrush with protection, or just grow the larger varieties since the cold will keep them in check. In northern zones, dwarf bottlebrush’s small size and admirable drought tolerance makes it a winner for container plantings.


•••••••••••••••••••••••••••••••••••••••••••••••••••••••••••••••


Linda from Each Little World is a great blog friend whose garden isn't all that far from mine, but I still haven't seen yet. She is blogging less frequently than she once did but every post is insightful and interesting. I'm crossing my fingers that we'll see more of her garden as spring approaches, especially because big changes are in the works in her garden: a large tree that was the foundation of one of her shady beds fell in an early winter storm so she'll be figuring out what is next for that part of the garden. Her photos, often taken by her talented husband (and gardening conspirator) Mark, are stunning and look like they've been lifted from the pages of a lovely gardening book. 

Here's Linda's pick:
Dwarf Alpine current makes a long, low hedge curving away from the nearby apple trees in Linda's garden.
Mark Golbach photo
If it were May or June, then I'm sure I'd declare Doublefile Viburnum my favorite shrub. It's definitely a show-stopper and is always the center of attention when it blooms. But shrubs in the winter garden need to stand-out in a different way than summer plants. At this season, Alpine currant (Ribes alpinum) makes a much needed statement. I grow both the straight species and the dwarf variety ('Green Mound'). 

They take well to pruning, creating strong horizontal lines in the garden: green in summer; almost black in winter. Some years, they make a strong presence in the winter garden; other times only the top of the hedge peeks out of the deep snow. Because they become so densely twiggy they have not been broken like so many other garden specimens during the heavy snowstorms we've had in recent years. It's a shrub that's well-worth a second look, and it's usually readily available at most nurseries.


•••••••••••••••••••••••••••••••••••••••••••••••••••••••••••••••

Erin here: I'm overwhelmed by all the great shrubs that garden bloggers love. Some I've never heard of and others I had written off but now I'm anxious to try (Fothergilla and Alpine current, I'm looking at you). But I thought it was only fair to share my favorite shrub, which I know will come as no surprise to regular readers. 

Plant touchers unite!
 Hydrangea paniculata 'Limelight' is hardly flashy anymore in these days of super-improved shrubs but to me, one of the best things about shrubs is that they are often the lowest maintenance plants in the yard. That's important to me.

I have some special plants and I'm happy to give them extra care but there just isn't time for a garden full of diva plants. Some of them just have to manage more or less on their own. And that's just what Limelight does. I prune it in very early spring or late winter every year (some years more than others), I sometimes throw some compost or organic fertilizer at the base of it (but sometimes not) and I make sure it gets a good amount of water (I have a soaker hose in that garden that I circle the root zone with). And that's it. It's hardy to zone 3 (Siberia?) and heat tolerate to zone 9. The only thing to know about it is that while hydrangeas have the (often wrong, at least in northern zones) reputation for liking shade or part shade, Limelight wants sun, at least up here (I would assume it would  take a bit more shade the farther south you are). Given those few things, Limelight offers up huge lime-tinged blossoms that fade to pink and then dry to brown, where they are a welcome sight in the winter garden.


Thank you to all the great garden bloggers who participated! Now, onto the important part: What is your favorite shrub?

Labels: , , , ,

19 February 2013

The unofficial start of spring: Ordering begins

I couldn't stand it anymore. I've resisted the gardening urge as long as possible, and frankly, I did better than I do most years. But fellow bloggers are posting pictures of bulbs starting to peek out, and I suspect if I dug a little (and was actually at home during daylight hours), I might find the same thing, so that's enough of a sign for me that it's time to start planning for spring.

The first thing that goes in the garden every year is onions. I really enjoy growing onions, and not because it's a huge cost savings to grow my own (onions, unlike tomatoes, aren't that expensive in stores and at farmers' markets). I just really like onions and have found the ones I've grown to be absolutely delicious. Although all of the varieties I've grown can be stored, we eat onions at a rather astonishing rate so I've never really gotten around to storing any for more than a few weeks.

My favorite place to order onion slips from is Dixondale Farms. I like nurseries that specialize in just a few plants. There is a level of expertise that comes with a specialist nursery that is rare to find in other places. Dixondale, who I've ordered from for the last four years*, sends nice big bunches of slips (baby onions).

So, this weekend I made my first official garden purchase of 2013. I always order the Long Day Sampler, which usually includes yellow, white and red varieties and I did again this year. Dixondale changes up the included varieties from year to year, but this year it includes Walla Walla, a sweet yellow favorite; Redwing, a beautiful red that is slightly strong, but not gross strong; and Ringmaster, which is a nice white onion that makes up in reliability what it lacks in flash.

Walla Walla
Ringmaster. Territorial Seed Co. photo


Ringmaster onion.
I also ordered some Borettana Cippolini slips. Although I'd heard about Cippolini onions before (if you watch cooking shows, they often use them), I had never tried one until last fall, when my husband got a roasted organic locally grown Cippolini on top of a steak at a restaurant. The steak was good, but the onion was to die for. It had been roasted with just a touch of olive oil and balsamic vinegar, sprinkled with just a few flakes of salt and had a taste that made me know, within seconds of putting it in my mouth, that I was going to have to get my hands on more of these onions. They are wide and flat and you usually find them relatively small, although you can grow them to be larger. One of our favorite ways to eat onions is just grilled whole and I can't wait to get some Cippolinis on the barbecue.

Borettana Cippolini onions.  Dixondale Farms photo
Cippolinis look like the photo above when you pull them out of the garden and clean them up. But this is how I really want them to look, all glistening and shiny in their carmelized glory:

Food Network photo
Because I've decided I really love growing onions, I'm going to dedicate more space to them than I have in the past. The past couple years I've grown them in half of raised Farmstead bed I won through a giveaway at North Coast Gardening, but I think I'm going to buy another raised bed from Eartheasy exclusively for onions. The best part about growing onions is that nothing touches them, so I don't have to build a fortress around the raised beds to protect them from critters both domestic and wild.

So fess up, have you ordered anything for the spring garden yet?

*Interestingly enough, when I was going through old posts to figure out exactly how long I have been ordering from Dixondale Farms, I found a post from February 16, 2010, in which I declared that I couldn't stand it anymore and I had to order some onions. I'm nothing of not predictable, I guess.

Labels: , ,

14 February 2013

Back in the renovation saddle again

It has been two years since we finished our renovation. We love almost everything we did as part of that insanely large project although there are very few things we would choose to do differently if we were to do it all over again. But looking back, that renovation damn near killed me. OK, that's being dramatic, but it was far more emotionally draining and stressful than either of us expected. And because it went considerably over budget (due to a few unexpected things that popped up and a general contractor who was amazing in almost every regard other than his ability to accurately quote the job) it was also a big financial strain.

We're still feeling a the financial pinch of that renovation. Perhaps the hardest pill to swallow was that we created a whole new loan at the end of it. So, even though we pay extra on our principle every month, we were suddenly back to square one.

Those kind of numbers make you pause before you go spending any more money. Neither of us is comfortable with debt. We don't carry balances on our credit cards and we only allow ourselves to have one car payment at a time (and it would be nice if that went away too). We also like to keep a healthy cash reserve handy for emergencies too. So when we started thinking about other projects in the house, we resolved that they would be paid for in cash. No racking up credit card bills or applying for another loan.

So we've been saving. We have a little corner of the savings account reserved for our next project. Yes, believe it or not, after all that renovation, there are still projects to be done.

And there are two big ones lurking. The first is the downstairs bathroom, which we both hate and which we swore when we looked at the house would be the first room we fixed. Ironically, it is the only room in the house that we've done absolutely nothing to so far.

The other is the working side of the kitchen. The cabinets were in need of a paint job when we bought the house. Trust me, 11 years of serious cooking and dog living (when you have two enormous dogs in your house, everything is worn a little harder) haven't done them any favors. Remember, the house was a summer  place for at least the two previous owners, so nothing was really designed to be lived in hard. And we do some hard living.


This side of the kitchen is not so bad.
There is no doubt that the more glamorous of those two projects is the kitchen, but it's really not horrible the way it is. Technically, it functions. A coat of paint would most certainly greatly improve the situation. The bathroom is hideous. There is no getting around that. But ever since we built the bathroom upstairs, I basically don't go in the downstairs bathroom anymore and no one has showered in there for two years. In other words, out of sight, out of mind.

So, with a little bit of cash saved up and the memory of the renovation a bit foggy (although no amount of therapy could make the thought of the stress of that go completely away), we're back at it again. We're fixing up the kitchen.

The working site of the kitchen (before we swapped out the island top).

Don't get too excited; this isn't a gut renovation or anything particularly glamorous. Really, this is the completion of the what has become a kitchen renovation in slow motion. Within a year of buying the house we bought a new range. After that we bought a new dishwasher and replaced the floors. Then we got a new refrigerator and a new faucet. At some point I replaced all the knobs and the lighting and of course we fixed up the whole eating area. Most recently we got a walnut top for the mini island.  All of those things, other than the cabinet hardware, will remain the same, but we are getting new cabinets, new countertops and a couple other gizmos.

The kitchen isn't the worst thing in the world, but the cabinets were in rough shape when we bought the house and 11 years hasn't done them any favors. They either needed fixing and repainting or replacing. But they were never very high quality so we have a lot of sagging shelves, cracked panels and not the most creative storage.
Chipped corners and cracking seams can be found on pretty much every cabinet.

This is a good example of why you're not supposed to put your coffee maker under your cabinets. It was like this when we bought the house and it has not gotten any better. Worse yet is the mildew or whatever those dots are (they do not come off with any cleaning product known to man including the Magic Eraser).

This is the grossest shot. This is over the stove. The cabinets are completely discolored and covered in mildew. If you look closely you'll notice there seem to be some dog hairs stuck in the sticky greasy mess up there. Newfie hair has the amazing ability to go literally everywhere.

I'll share lots of details with you in the weeks to come. Some of the decisions involved in this project have been particularly challenging (I'm still suffering from decision fatigue from the renovation and that makes it that much worse), but so far we're doing a great job sticking to a pretty tight budget.

Stay tuned.


Labels: , , ,

13 February 2013

Pretty organized paint

Last week when I randomly went on a painting spree and suddenly painted the back door black, I was totally irritated when I couldn't find the can of tinted primer that I know exists somewhere in this house. I never did find it, but when I realized the sheer volume of paint in this house I decided a little organization was needed.

I nice little display of paint cans that are all pretty and matching was never going to happen. All my paint cans have drips of paint going down them (here's a little tip: when you pour paint out of the can, do it so the front of the label is down so that when you spill paint over the edge you're not covering up the information on the back). They get thrown in a closet in the basement.

But it would be nice to know what's all lurking in there before I start a project without having to pull it all out. So I made a little spreadsheet that now lives on the inside of the paint closet door.

I figure I can update the spreadsheet when things change drastically and cross off things when I use up that paint. Because you know, you never know when you're going to use up the sample can of Killala green paint (what do you suppose that was going to be for?)

It's called Killala Green, but you can call it Kermit green. And I have a can of it.

How do you keep track of your paint? Or do you do the "Take a guess" method?

Labels: ,

12 February 2013

The ultimate gardener's getaway

Have your thoughts turned to summer yet? I've been trying to stave off that feeling I get every year at about this time when I get the itch to start gardening, but it seems impossible.

What I'm about to tell you about won't help with that. If you need some help with your garden dreaming though, that I can help with.

Remember Jack Barnwell? I did a Q&A with him a couple years ago after finding out that he was the talented garden designer behind some of Mackinac Island's most amazing gardens. Well Jack wrote to me a month ago or so with some really exciting news that I'm so happy to share with you.

Jack Barnwell
Jack Barnwell toting plants the Mackinac Island way.
This summer there will be a garden event  on Mackinac Island to best all garden events. OK, maybe I'm being dramatic, but there is no doubt this will be phenomenal.

Here's the quick rundown: Two days, three nights, umpteen amazing private gardens, the amazing gardens of The Grand Hotel, seminars by amazing garden designers, cocktail parties, dinners and oh yeah, my buddy P. Diddy (that's P. Allen Smith in The Impatient Gardener speak).

It's called The Grand Garden Tour and it will be held August 25-27 at none other than The Grand Hotel. You do know The Grand Hotel, right? It is certainly one of the most famous hotels in the world and was featured in the movie "Somewhere in Time" starring the late Christopher Reeve. It is the epitome of charm and is the first thing you see when you approach Michigan's Mackinac Island. Its grounds are immaculately kept and feature enough gardens to spend a day exploring. I actually spent part of a night there a couple years ago.*

This is the same bed that borders the road at The Grand Hotel in 2011 and 2012. It is always so much fun to see what they come up with every year.
A bit about Mackinac Island, in case you're not familiar with it. It's an island (8 miles in circumference) right where lakes Michigan and Huron meet. No cars (other than the occasional emergency vehicle, but I've only seen one in 30 or so times I've been there) are allowed on the island, so you either get around on foot, on bike or by horse. All of this makes it totally unique. It survives on summer tourism, but there are absolutely lovely summer homes (and a few year-round homes) all over the island. It is really the ultimate retreat. Gardeners know there is something special about Mackinac Island. If plants could dream of plant heaven, it would look a lot like Mackinac Island. Of course the black gold that is composted horse manure is part of it (obviously that's plentiful on an island that relies on horses for transportation), but there's something special going on here beyond that.

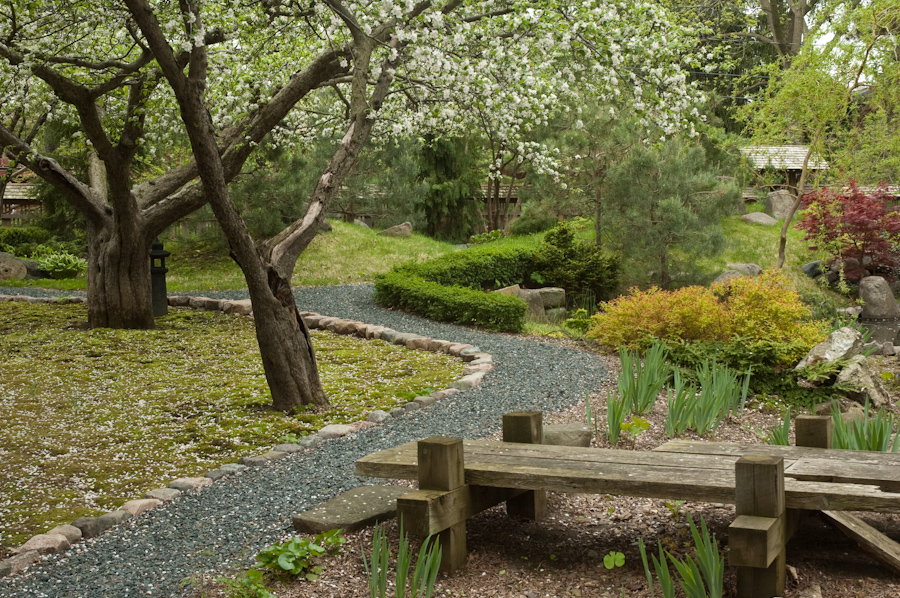
This is the Jack Barnwell-designed garden at The Iroquois Hotel. It is one of my favorites and the inspiration for  the stacked-stone wall I put in the back yard.

It never ceases to amaze me how much plant material Jack fits into his installations to make them full but not crowded looking. 

As I mentioned, I've been to Mackinac (pronounced Mack-i-naw, it's a French-explorers-weird-spelling thing) Island many, many times in my life and every time I've gotten there by boat. All but a few times, I've sailed there in a sailboat race from Chicago to the island, but guess what, you'll get there by boat as well, because that's the only way to get there. Well, technically speaking you can fly into the small airport on the island or, in winter, ride a snowmobile there over the frozen Straits of Mackinac, but almost everyone gets there by a ferry from either St. Ignace or Mackinaw City (on the Upper Peninsula and the mainland of Michigan and connected by the spectacular Mackinac Bridge).

The Mackinac Bridge -- The Impatient Gardener
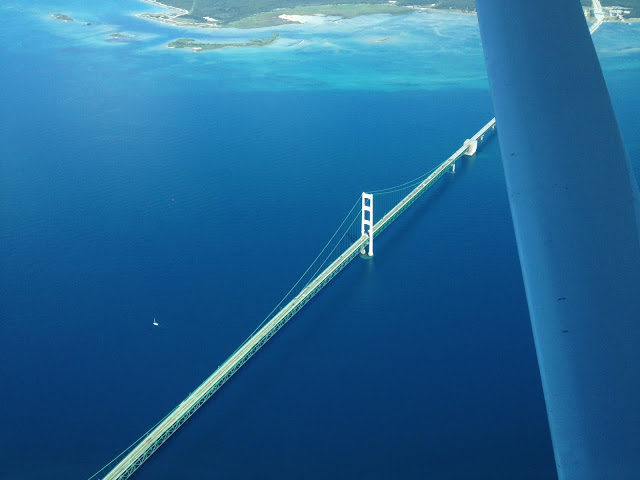
The Mackinac Bridge as seen from a plan leaving Mackinac Island.
But back to the event. Attendees will go to a cocktail reception on the front porch of the Grand Hotel (probably the most famous front porch in the country, and by the way, if you're not staying there you usually have to pay to even step foot on it). The front porch is always decorated with gorgeous red geraniums, but they are doing it up even better for this event. Proven Winners, which is a partner in the event, is going to bring in huge planters and loads of amazing flowers. Then you can have dinner in the dining room and enjoy the Mackinac Island nightlife (I know a little something about this so if you want personal recommendations, let me know).

This photo, taken from a horse-drawn taxi while passing by show just the tiniest corner of the Grand Hotel's amazing front porch, but the entire thing is lined with red geraniums.
Monday morning there will be seminars and live hands-on demonstrations in the hotel's Tea Garden. Presenters, including Jack, will do container and in-ground design and installations live. Jack tells me that lemonade, tea and cookies will be served (as well as music) during the presentations. Can you imagine a more perfect day?

After lunch, attendees can head off to view about a dozen private gardens on the island. Honestly, this would be my favorite part. The gardens are so amazing, but you'll never have another chance to see them like this.

Private Mackinac Island garden -- The Impatient Gardener
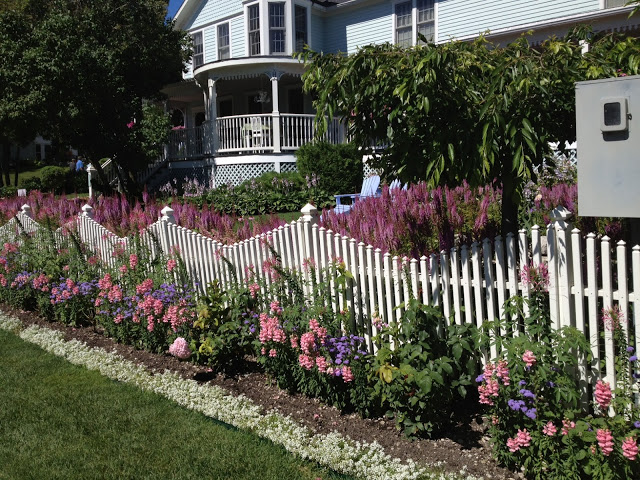
This is a favorite private garden of mine. I walk past it on the island every year.
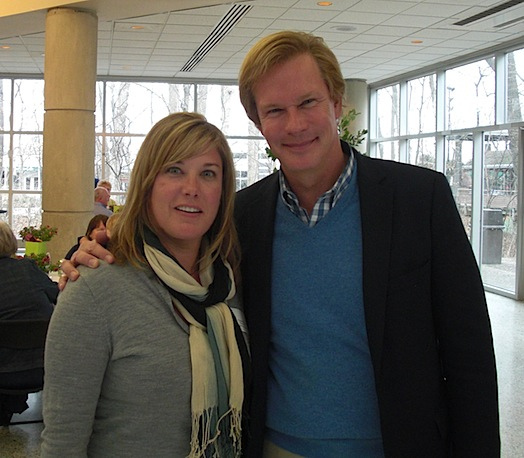
After that, it's more cocktails in the garden with P. Diddy, who will also present a seminar Tuesday morning. P. Allen Smith is gardening's secret funny man, as I found out at Proven Winners event a couple years ago (see, me and P. Diddy go waaaaaayyyy back).

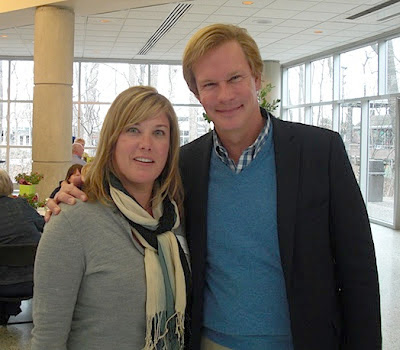
I do not know what is wrong with my face in this photo. I look like I had dental work done or something. Anyway, see, me and P. Diddy are pretty much besties.

When Jack first wrote to me about the event he described his vision for The Grand Garden Show as, "Simple, yet elegant and awe inspiring." Given the rundown of the program and the setting, I'd say that sounds just about right.

So that's the preview of what I have to think is going to end up being one the most amazing gardening events ever. Rooms are already booking up at the Grand Hotel, so don't wait too long to decide if you're going. Keep in mind the prices you're seeing for the booking through the Grand Hotel (I have to check with Jack if you can stay in other hotels on the island and still participate) include everything: all the seminars, food, cocktails and discounts on ferry tickets. I'm told the website for the event will be up soon and as soon as it is I'll let you know.

So what do you think? Sound like the perfect gardener's getaway or what?

A favorite Jack Barnwell-designed hanging basket.

The amazingly lush window boxes outside the downtown grocery store, designed, of course, by Jack Barnwell.

*So, a few years ago, we didn't have hotel rooms sorted for after our sailboat race to the island (these usually book up a year in advance or close to it) and I went to Expedia in hopes of finding a room. I did book a room at a small hotel but it turned out Expedia had poor records and there weren't any rooms available. Since it was Expedia's fault, it was up to them to find me another room. And the only available rooms on the island were at The Grand Hotel. It's a bit of a walk from where the boats dock up to the hotel, but I was still excited to stay there even if it was only for one night. But here's the problem. The race was one of the slowest in recent memory. Normally we finish very early in the morning on Monday or sometimes even Sunday night, but that year we finished Tuesday at 2 a.m. My room was only for Monday night. So at 3 a.m. I wandered up the hill and checked in to the fanciest hotel I've ever stepped foot in, having not showered or slept much in three days. I think I may have still been in the same clothes I wore during the entire race. I wasn't alone though. Checking in in front of me was famed Chicago architect Helmut Jahn (who is also an accomplished sailor) and I took solace in the fact that he looked worse than me. Anyway, I checked in at 3 a.m., slept until 9 a.m., went downstairs for the included breakfast (delicious by the way), and was checked out by 10:30. And that's how I spent my seven-hour stay at The Grand Hotel. 


Labels: , , ,