The Impatient Gardener: March 2015

30 March 2015

SMITTEN WITH SOUTHERN CHARM


What are the components of a great trip? Great people, a beautiful garden, amazing food and an exciting and completely charming city are good places to start. Throw in some power tools and you've got a fantastic experience and one that I was fortunate to have earlier this month when I ventured to Charleston, South Carolina, to be with the Troy-Bilt Saturday6 blogging team.

To say I am smitten with Charleston, which I was visiting for the first time, would be putting it mildly. But before we get to some of what I discovered in the city, in addition to the amazing food, let's get to the cool part: power tools. 

Prepare to be envious. We went to a rice plantation, Middleton Place, and got to spend the better part of a day playing with dozens of Troy-Bilt products. We mowed, rode, tilled, mowed some more, blew, pressure washed and trimmed on a little corner of a national historic landmark property all in the name of familiarizing ourselves with Troy-Bilt's line of products. 

The FLEX system starts with a Power Base (note the foldable handles to make it even smaller to store) that clicks in to various attachments. You literally scoop up the attachment and it clicks in and you're ready to roll.

Rochelle Greayer of Pith and Vigor wields a mean power washer.

There were some standouts, the first of which is the company's new FLEX system. This is one of those ideas that you can't believe no one thought of before and you're sort of bummed it wasn't you who came up with it. FLEX consists of a power base that clicks in to various attachments, saving money as you add equipment to your collection and maybe even more important, space. Right now there are wide-area mower, snow thrower, pressure washer and leaf blower attachment but more attachments are coming down the pike. The Power Base costs $399 and the attachments range in price from $279 for the pressure washer and blower to $499 for the mower. That means it's probably not economical to go with the FLEX if you only need a mower, but the savings are realized as you add attachments. As I think about our small garage storage area full of a mower, snow thrower and pressure washer, I can't tell you how nice the space savings of the FLEX system would be. There is no doubt in my mind that if I were a new homeowner or someone starting out, FLEX would be the way to go. There's even a shelving unit to organize it all that appeals to my desire to be organized.

Kenny Point of Veggie Garden Tips tries out the FLEX mower. The front wheels spin 360 degrees which makes the mower very easy to handle but if you are mowing on an incline or aiming for super straight lines you just lock them into place.

The other product that really impressed me caught me by surprise. I was not expected to be excited by a tiller. In fact, I'm not really a tiller person. I don't believe in frequent tilling of soil, but they have their place when starting a new bed or when working in a lot of amendments. And I find them rather unpleasant to use. I always feel like I'm trying to control a bucking bronco when I'm using a tiller.
Enter the Bronco Axis tiller. Instead of the blades moving like a paddlewheel, they are actually vertical and rotate in a circle. This means that instead of needs shoulder surgery when you're finished tilling, you can actually walk next to the tiller, using just one hand to steer it, so you don't have to walk in the area you've just tilled. It sells for $899 and I'll be the first to admit that's a lot of money for tiller (other, more traditional Troy-Bilt tillers sell for between $400 and $599), but after trying the Bronco Axis, if I were in the market for a tiller I'd absolutely pony up the extra dough.

You can see the difference between a more traditional tiller, upper left, and the Bronco Axis, which has blades set vertically, upper right. Eric Rochow of GardenFork enjoyed the smooth ride.


But let's be honest, we were all chomping at the bit to to get on the riding mowers. There were three models for us to try: the Neighborhood Rider (a small rider targeted to people who have small yards but want a rider that stores in the same space as a walk behind), the Super Bronco XP and the new Mustang Pivot zero-turn mower. We buzzed all over the place and it was fun to see the differences between the different models. Of course we probably all had the most fun on the zero-turn mower, which has a wheel instead of the bars you see landscapers use. This makes it much easier to operate (apparently the bars take a little practice), but what I really liked the most was being able to see right in front of the mower since the engine was in the back (and the cup holders).

Teresa O'Connor of Seasonal Wisdom puts the Neighborhood Rider through its paces.

With the lawn sufficiently mowed (I sort of wonder if a grounds crew was lurking nearby shuddering), we took a tour of the fabulous Middleton Place. I ask for your forgiveness in advance because you are about to see a lot of picture of camellias. It was the first time I'd ever seen one in person and camellias, which are sort of otherworldly in that they look so perfect they almost look fake, were a sight for sore eyes for a flower-starved northern gardener.


Isn't this just so southern? The Spanish moss (Tillandsia usneoides, an epiphyte that causes no damage to trees) is so romantic.

This live oak may be more than 500 years old. A few years ago it lost a couple of large branches and arborists from around the country consulted on its care. If you look to the right you can see the low brach is being supported by a crutch and wires help support other parts of the tree.

As you leave the formal French gardens, you come across this perfect framing of a view. When you walk around, you see this charming wood nymph statue. I love how someone has put a camellia blossom in her hand.

I was fascinated by this lovely bark on the crepe myrtles.

Although the original house is gone, it was set here, with a perfect view of the Ashley River.


As we were walking, we happened upon this scene; a hat casually set on an original brick wall. I have no idea who it belonged to, but it feels like a gardener has just set it down before taking a break.

The old stableyards ooze plantation charm.

This guy saw us coming and immediately put on a show. (OK, it was probably for the girls just out of the shot, who were far more interested in eating than admiring him.)

I also had several hours one morning to explore the city. I probably put on six or seven miles, with no real idea of where I was going, just running in to one charming vista after another.


Kim from Sand & Sisal took the same picture but I have no idea when. I think it's funny that we both happened upon the same place. I've never been a big fan of ivy but window boxes like these could change my mind. 

There are some gorgeous private gardens, on view just through the fence.
Check out those fantastic pillars.
Fantastic details abound in Charleston. Not only would I love to live on a street called Ropemakers Lane, but I'd really like this marble street sign to mark my street. This marble-cased window might be the coolest window ever.
I told you I was smitten. Between the gorgeous gardens, charming historic detail and the amazing food (I can't even describe how good it was but I'm pretty sure I had the finest bread pudding ever), I can't wait to go back to Charleston.

My trip was provided by Troy-Bilt, but you know how I roll and they didn't tell us what to think or what to write (I'm just guessing they wouldn't have required as many photos of camellias if they had). For more on my partnership with Troy-Bilt, read this post.

Check out my fellow Saturday6 bloggers for their take on the Charleston trip. Just promise to pretend not to see the unflattering photos of me. Oh my gosh, what was I thinking when I got dressed that morning? I need a stylist or at least someone to give me some fashion advice. I'm not kidding.

Rochelle at Pith and Vigor
Teresa at Seasonal Wisdom
Eric at GardenFork
Kenny at Veggie Gardening Tips
Kim at Sand & Sisal


Labels: , , , ,

27 March 2015

A PREVIEW OF NEXT WEEK

It's Friday Finds time, but unfortunately it has been a busy week and I've not had much time to spend on the Interwebs. So rather than send you in the direction of some great things to read, I'm going to tease up a few posts I'm working on for next week because there are some goodies.

A glimpse at a private garden in Charleston.

I snuck away to Charleston a few weeks ago and I'm going to tell you all about it. It was a fantastic trip and I completely fell in love with the city, which I happily roamed around for an entire morning. There's a good chance I took more than 100 pictures of camellias, which I'd never seen in person before. I promise I will not run them all.

I must have beat the spring rush at the soil lab because the results of my soil tests are due back later today. I can't wait to see what they show and to share the results (and what they mean) with you.


Last weekend we officially finished construction on the garage pergola. I think it was a year and a half in the making. I'll give you the whole rundown on how we did it, what we did wrong and how we fixed it so you don't do the same thing and show you how it turned out. I will not give you an accounting of how many trips to the hardware store it required because I lost track around 20.

And who knows what else might pop up on the blog as we head into April. Have a great weekend. My weekend plans include giving the dogs baths (this is a rather time-consuming affair so it requires scheduling), potting on some more seedlings, starting a few more seeds and hopefully spending a little time on initial garden cleanup.

What's on your agenda for the weekend?


Labels: , , ,

26 March 2015

HOW TO START SEEDS IN SOIL BLOCKS


I'm starting most of my seeds a new way this year and I'm absolutely loving it. Last fall I invested in a soil blocker and I've been using it for all but the largest seeds I've sown this year.

The concept of a soil blocker is that you grow seedlings potless, which restricts root growth by "air pruning" instead of roots running into the side of potting and starting in circles. This makes transplanting much smoother as the seedlings never really realize they've been moved, they just keep on growing. There are other benefits to soil blockers including not having to deal with little seed modules and the ability to rearrange your seedlings easily. For instance, you can start a tray with multiple kinds of seeds and then move them out to a lighted area as they germinate.

Although soil blockers come in a couple of sizes, I bought one that makes four 2-inch blocks and it suits my needs perfectly. It also comes with a little dibbler that creates about a half-inch hole in the top. You can remove this, but I just fill the little hole in with some soil if I need to plant seeds shallower.

The most intimidating part of using a soil blocker is creating the soil mix. I can't tell you how many recipes I read online. In the end, I just kind of came up with my own mix and it seems to be working fine. My advice would be to not sweat it too much.

You can buy bagged soil blocker mixes. I tried this one but found that I had to put it through a sieve and about three-quarters of the mix was too large to be used. I'll save that for other potting mixes, so it won't be wasted but I wouldn't call this mix ready-to-use.

As far as I can figure out, the key to a good seed starting mix for a soil blocker is small particles and moisture. You have to have something that will hold together and big chunks are not conducive to the block holding together over the long term. So almost everything I use goes through a sieve.

A few of the ingredients I use in my homemade soil blocker mix.

For my homemade mix, which I came up with after reading other recipes and just experimenting, I've been using coir bricks that I've reconstituted for at least 24 hours as a binder, a regular organic seed-starting mix, vermiculite, some worm castings and a bit of bone meal. These ingredients (or similar ones) seem to come up in almost every recipe I've seen in varying amounts.

Roughly it breaks down to these amounts, although I admit I eyeball it all and have never measured anything.

Soil Block mixture:

(Some affiliate links are used)

2 parts reconstituted coir fiber
2 parts sifted organic seed starting mix
1.5 parts vermiculite
1 part worm castings
1 part (or less) bone meal

There are a lot of large bits left after putting the ingredients through a sieve. I save these bits and will use them in other potting mixes.

I use a big soil mixing tray to work it all together, mostly with my hands. (You'll notice I'm wearing rubber gloves in the photos. That's only because the mixture gets super messy and it's hard to sow seeds when you can't find them in your hand because of all the mud!)

The next step is to add a good amount of water. Even better than water is compost tea. The amount will depend on how moist your ingredients were to begin with but you'll probably add more than you think. I mix it in with my hands, adding water until when I grab a handful, the mixture holds together a little water squeezes out. Sometimes it's helpful to reserve a little soil mixture in case you overdue it on the water.

You'll know the mixture is wet enough when liquid comes out when you squeeze it and it holds together.

Here's how you make the blocks:

  1. Dip your soil blocker in water (or compost tea). This will help the soil blocks slide out and it's important to do this between every set.
  2. Stick your blocker into a pile of prepared soil mix and rock and twist as you apply a lot of pressure. The point is to really jam the blocks full of the mix.
  3. Flip the blocker over and test with your finger that the blocker is really packed. Especially check the end blocks as those seem to miss out sometimes. If necessary, I pack in more mix with my hands.
  4. When you're satisfied that it is packed tight, take some kind of straight edge—I use a 9-in-1 painter's tool—to scrape the bottom of the blocker so that they have nice flat bottoms to sit on.
  5. Put your blocker in a tray without holes and slowly depress the plunger, rocking gently a little bit to help release the blocks from the mold.
  6. Repeat all steps, setting the blocks tight to one another, until the tray is full.
Wiggle the soil blocker around in the soil to pack in as much mix as you can.

When you're satisfied that the blocker is tightly packed, use a straight edge such as a painter's tool to scrape the excess off the bottom so the blocks sit nicely in the tray. 

Then you just plant the seeds as you normally would. If they are tiny seeds that are meant to be surface sown, I fill the depressions in the blocks with a little mix. Then I always sprinkle some vermiculite over the blocks after sowing to help keep them from developing a crust on top.

When all your blocks are made, it's time to sow seeds.
If you put a dome over the tray while the seeds germinate, you probably won't have to water for several days because there is enough moisture in the blocks. Once the seeds have germinated and you remove the dome, though, they can dry out pretty quickly. I just pour water in the bottom of the trays once or twice a day and keep a spray bottle handy to spritz the top if necessary.

This Redbor kale grew very well in soil blocks.
Each block had a lot of roots and it was time to pot it on in larger individual pots.


It's time to harden them off and plant them out or pot them on when you see a lot of good root growth, which of course is easy to measure since you can examine the entire block unlike when you're growing in seed trays.

Have you ever tried using a soil blocker? 

Sources (some affiliate links): I bought my soil blocker from Lee Valley Tool but it doesn't look like they sell them anymore. Here are some other options (mine makes 2-inch blocks). I use this Tidy Tray to mix my soil and I really love it. These are the coir blocks I got. A little goes a long way because it really expands. I got my soil sieve set from Garden Tool Co. and yes, it's pricey but I love it and I've been much more use out of it than I thought I would. 


Labels: , , ,

24 March 2015

STOP! BEFORE YOU TOUCH THE GARDEN, DO THIS

Before you add anything to your soil or plant anything in your garden this year, answer one question:

When was the last time you had a soil analysis done? Five years ago? Ten? Never?

Soil analysis tests are an investment—usually $10 to $15—but I can almost guarantee that you will recoup that money several times over by not adding things to your soil that it doesn't need.

Just to be clear, I'm referring to a soil analysis done by a lab, not one of the little kits you pick up at the hardware store where you mix something that resembles and Easter egg dyeing kit with tiny bits of soil. I think those are probably better than nothing and are a bare minimum if you are gardening in a new place. Of all the things you need to know about your soil, the acidity level is the most important in my opinion, and those little kits can give you a pretty good idea of where that is at.

When you take a soil sample, dig down about 4 to 5 inches and sample from several places in your garden. 

Most labs that do soil testing focus mostly on agriculture testing or environmental testing for things like Chromium ("Erin Brockovich," anyone?), but they also do simpler tests aimed at homeowners. But you won't necessarily hear about them until you go looking for them.

To my knowledge, every state has a public university extension program and they will either be able to test your soil at a state lab or give you a list of labs that do the testing (if you're in Canada, here's one list of soil labs I found). Just do an Internet search for "University of (your state) extension" and once you get to the extension website, do a search for soil test. If that fails you could search for a nearby state's lab and ask if you could send your sample there.

It's important that you take a sample properly. Some labs provide sample bags but most that I know of are fine with a sample in a regular old Ziploc bag (well, actually a new bag because you wouldn't want anything else contaminating your sample).

A Ziploc bag works fine, but some labs also provide wax-lined sample bags.

When it comes to taking a sample, don't be greedy. Different areas of your yard could have very different soil depending on fill that might have been used, what has been growing there, or how you've amended the soil over the years. So stick to an area that you anticipate will have consistent soil. You want to take small samples from about five different areas within a bed (assuming you've identified that as your test area) for a total of about 2 cups of soil. A trowel will do just fine for this job. Just dig down to about 5 to 7 inches below the surface and bring up a bit of soil. Then use just the "core" of what comes up on your trowel to add to the sample bag.

I took samples from two gardens and you can even see the difference in the soil. The top sample is from the small garden between the patio and the house that, despite having great growing conditions, does not produce plants that thrive, leading me to believe there's something wrong in the soil. The bottom sample is from the main garden.

Label your bag and fill out the sample submission form. If you are sending more than one sample, make sure to label them in a way that makes sense to you. I used "Patio garden" and "Main garden" as well as assigning each a sample number as required on the form I sent in with them.

Speaking of forms, there will usually be one to fill out and send in with your samples, so make sure you do that. Most labs will also ask for what kind of planting is destined for the area so they can offer amendment recommendations.

Labs will have submission forms for download on their website. Make sure to fill it out and mail in with your samples.

I recently sent two soil samples in to the University of Wisconsin Soil Lab. The first is from the skinny garden between the house and the patio. This three foot strip of dirt is deep and gets full sun. It might be slightly dry because it is a little under the eaves, but I make it a point to water it. And even though sun-loving plants should thrive there, they don't. They grow, but nothing is truly happy there. Which makes me wonder if something is going on with the soi. I will probably dig out all of the dirt there and replace with with really nicely amended soil, but if there is something leaching into the soil, that should show up in a soil test.

I also sent a sample from the main garden, just because I've never tested that area.

Depending on how busy the lab is (I'm hoping I beat the spring rush), I expect to get results and a list of suggested amendments in a couple weeks. It should be interesting.

Have you ever tested your soil? What did you learn?


Labels:

19 March 2015

THE ONE VEGETABLE YOU MUST GROW THIS YEAR

I know that a lot of gardeners don't necessarily care to get into vegetable gardening. I know that because until about seven years ago, I was one of them. And while I think that vegetable gardening can be one of the most satisfying things a human being can do, I also get that it's not for everyone so I won't tell you that you MUST grow vegetables.

But there is one veggie that I think every single person should grow. It's nutritious, tastes so much better than what you can buy in the store, will definitely save you money, can be grown regardless of where you garden and it's no diva when it comes to growing. It's hard to screw this one up.

It's lettuce.

I cannot think of anything that is easier to grow.

Here's what you need to do to grow lettuce. Find a partly sunny spot; lettuce doesn't love heat, so it grows best early in the season and again late in the season. It can be in your garden amongst your flowers, in a whiskey barrel or in any wide container you have. It has short roots so you don't need a deep container.

If you're planting in a garden prepare the soil by making it loose and fluffy. Maybe throw in a little compost, but don't stress because lettuce is not a heavy feeder. If you're growing in a container, throw in an organic potting mix with nice drainage. Avoid potting soils that already have a chemical fertilizer or water retention methods included because the point is to eat this and you don't want to be eating that stuff.
Lettuce growing in close little rows, top. The bottom photo is actually of beet seedlings which I also think you should grow, but they aren't quite as easy as lettuce.

Once the soil is prepare, moisten it. It's helpful to make the soil plenty moist before you sow seeds because lettuce seeds are tiny and light and will be washed away by the hose or even a watering can.

If you like things neat, make a couple rows. Don't stress about how far apart they are: 6 to 8 inches is fine. If you just want a patch of lettuce (my preference) you can skip straight to sowing the seeds. Take a small amount of cut-and-come-again lettuce seeds (I like to buy the pre-mixed mesclun-type combinations), and sprinkle them in your rows or all over your pot or patch, aiming to get them about a half-inch apart.

Then take a handful of soil and sort of sift it through your hands to put the thinnest covering of soil over the seeds, maybe an 1/8th of an inch thick. Then lightly press on top to make sure the seeds have good contact with the soil. Then, if you have one, take a little spray bottle with some water and just moisten the surface.

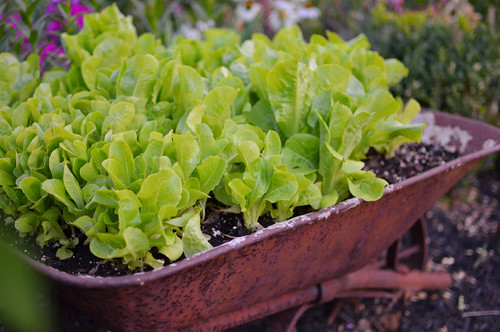
Lettuce in an old wheelbarrow. Hershey photographers photo


Keep the soil moist but avoid flooding it and in about a week the seeds will have germinated. Wait until the leaves are about 4 to 5 inches tall, and trim them low with a scissors and enjoy your delicious salad. Keep them watered and they will regrow and soon you will have more delicious lettuce to grow.

Don't love salad? Fine, put some fresh leaves on your sandwich, or use them as a garnish. But try them, because even if you think you don't like lettuce, you may be surprised that you love this.

That is it. That's easier than placing your coffee order at Starbucks.

So, will you be growing lettuce this year?


Labels: ,

17 March 2015

SOMETHING YOU SHOULD KNOW


I don’t do a lot of partnerships with companies, but I’ve recently entered into one. Because this is a departure for the blog, I thought the best way to deal with it is to tell you what it is, what it isn’t and what it means for The Impatient Gardener. 

Over the last seven years, I’ve been approached by a handful of companies looking to partner with me and until recently I’ve turned them all down because I was uncomfortable with their mission or their products or something just didn’t feel right about it. So when Troy-Bilt approached me to be part of their Saturday6 blogging team for a year, I did a bit of research on them to see if it would be a good fit.

I already knew that I liked Troy-Bilt products and when I looked into their company, I liked the way they do business as well. 

So what does this mean for the blog? Honestly, not much. I’ll be writing a few posts about events sponsored by Troy-Bilt and some of their products. Anytime I write a post or write anything on social media that is a part of my partnership with Troy-Bilt, I will clearly disclose that it’s part of deal, so to speak. If you follow me on Facebook, Instagram or Twitter I’ll be hashtagging everything I post that is related to my agreement with Troy-Bilt with the completely annoying tag #sponsored. It may not always be required, but I’d rather err on the side of transparency than to leave you guessing. 

This picture has nothing to do with this post, but every post needs a little pretty, so here's a filtered photo of my CanCan rose last year. The poor thing didn't pass the performance test though so it's getting moved soon.
But I want to make it clear that I’ll always be brutally honest with you about my thoughts on products or programs. In other words, Troy-Bilt doesn’t own my opinion and they’ve made it pretty clear they would never want to.

I will be writing a few pieces for Troy-Bilt’s newsletter and some of their social media outlets, but those will always be bylined or credited pieces so you’ll know if it comes from me. 

You’re also going to see an ad on the blog for a bit and that, too, is part of my partnership with Troy-Bilt. I’ve always chosen not to have ads on the blog and so far, this will be a temporary exception to that. 

One of the things I’m most excited about as part of this partnership is an opportunity to work with a Wisconsin Katie’s Krops gardener. I’m not required to tell you anything about Katie’s Krops as part of my agreement with Troy-Bilt, but you can be sure I will be anyway, because it’s really cool and more than a little inspiring. 


Labels: , , ,

11 March 2015

GARDENERS, KNOW THY ENEMY (aka THE GARDENING SIN CONFESSIONAL IS OPEN)

Not too long ago I offered absolution of garden shopping sins and many of you took me up on that offer (don't worry, I'm an ordained minister of the Internet Church of the Garden so I'm entirely qualified to offer such absolution). I felt so much better about it that I ordered 40 willow rods the other day, and I only feel a little guilty about it. (It's Margaret Roach's fault.)


Recently a book showed up in my mailbox for review called Weeds of North America ($35, University of Chicago Press). Sounds like it would be good for insomniacs, right? I think perhaps it shows what a garden geek I've become that I am ridiculously excited about this book and know that it will be at the top of the garden book rack forever.

This isn't going to be one of those books that you pick up in the middle of winter for a jolt of inspiration. It's going to be a book whose pages are dog-eared and muddied, signs of being flipped through with hands straight from the garden, as I try to identify the latest unwelcome intruder in my garden.

But before I get into the book, I need to make another confession. I have done something horrible with a weed.

When I started gardening at our cottage about 12 years ago (it will be 13 years in June that we've owned the house but I didn't do any real gardening the first year), I was a novice gardener. I was also a poor gardener as we had tied up just about every penny we had in the house. I had big ideas and no budget so I was thrilled with whatever flowers I could find existing in the garden or free from friends and family.

What is now the circle garden was once a vegetable patch and when I started gardening there it was filled with a random assortment of weeds and shrubs that seemed to have been stuck in with little thought as to design.

One of the flowers that was blooming there was a delightful lavender number with cup-shaped flowers extending up a stem. It practically oozed cottage charm.

In one of our frequent walks around the yard, my mom said, "You know that's a weed, right?"

Although I was a decade removed from being a teenager, I gave a reply that could have come from any sassy 14-year-old's mouth.

"A weed is just a plant in the wrong place," I said. "I think it's pretty."

And my mom, who had been down this road with me on more than one occasion replied, "You'll be sorry."

Gardeners, listen to your mothers!


I'd never properly identified it until Weeds of North America showed up. That pretty flower is Campanula rapunculoides, aka creeping bellflower. Here's what Weeds of North America says about it:

Creeping bellflower is a weed of gardens, fence lines and occasionally cultivated fields. It is shade tolerant and able to survive in crops. It is a serious weed in lawns, where it competes with the turf, robbing it of moisture and nutrients.

Life cycle: Perennial reproducing by creeping rhizomes and seeds; plants may produce up to 3,000 seeds.

In other words, I'm screwed. I have tried to rid my garden of this plant. I even dug up an entire section of the circle garden a couple years ago in an attempt to dig it all up. It came back. I haven't allowed it to flower for several years now, but the rhizomes all but ensure that it will always be there.

It would be one thing if I alone was made to pay the price for my gardening ego that allowed me to think for one second that I knew better than my mother, an experienced gardener. But my sins go much further.

Since there were several plants sort of plunked in that area when we got the house, most of those were rehomed. And it also served as a holding bed for awhile, so while I was renovating other parts of the garden, I would stick plants there while I decided what their future was. I moved several ornamental grasses there when we ripped out the enormous bed of them off the patio. And then I decided I didn't have a need for all those grasses and I did what gardeners do: I shared them.

Some of them went to my mom. Others went to an ornamental garden in the middle of downtown that is maintained by volunteers, one of whom is my mom.

You can see where this is going, right? Creeping bellflower is starting to pop up in new places, namely the places where I so generously donated those ornamental grasses. I have infected other gardens and I feel horrible about it.

Had Weeds of North America been around 12 years ago, that probably wouldn't have happened. I could have looked it up and I would have known to get it out of my garden immediately instead of letting it flower (and therefore seed) all over the place.


Although it may be a book with a title that could probably become a joke on a late-night talk show (by the way, I don't fault the title; I like a reference book that says what it is outright), it is filled with beautiful photos by France Royer. Yes, weeds can be beautiful, especially when they are safely captured in the pages of a book much like Hans Solo frozen in carbonite. The writers did an excellent job of sticking to the main facts. Being concise is important in this book because, let's be honest, there are a lot of weeds to cover.

And that—the sheer number of weeds to be covered—is this book's biggest challenge. How do you begin to organize them all? Authors Richard Dickinson and Royer have done a yoeman's job, organizing them by leaf arrangement and flower color, but it can still be a little challenging to find what you're looking for. Fortunately the attractive layout and excellent photos make flipping through this book enjoyable.

There is no mention of how to rid yourself of the weed once you identify it. But then again, I also understand this: that's not the book's purpose. Also, I suspect the book's authors would be unwilling to wade into a controversial stance on when to use chemical solutions and when not to.

I've been waiting for this book.

-------------------------------------------------

OK, folks, it's time to confess your weed-related sins? What's the worst weed-related thing you've done?


Labels: , ,

09 March 2015

DON'T LOOK NOW BUT GARDENING SEASON IS ALMOST HERE

Now THAT was a weekend. Temperatures here nudged up to 40 this weekend, birds were singing, the sun had warmth and I got a few more garden chores taken care of.

I got the last Limelight hydrangea pruned and it feels good to have that job finished. I also covered up the raised vegetable beds and the compost pile with black plastic in hopes of heating things up a little quicker (there is still a layer of snow on them). These are all small things but on those first warm days it feels wonderful to just be outside.

We even brought up a couple of chairs and basked in the sun on the deck for awhile. It was divine.

I'm thrilled to report that inside seed starting is officially underway.

Check out the root sticking out of this soil block.

I started a flat of Redbor kale, which I grow more as an ornamental than an edible (I prefer Lacinato kale for eating). I think kale does better when you direct sow it, but I'd like to have some established plants for growing as ornamentals so I'm hoping these will be a good size by the time I plant them out.

I'm growing a lot of things in soil blocks this year for the first time. I'm just experimenting with them right now, but once I get a better feel for them, I'll do a post about how to use them. One of the interesting things about them is that it's much easier to see what your seeds are doing. For instance, I was shocked at how quickly roots were coming out of the bottom of the block even with a small amount of top growth. Gives you perspective on how much is going on that you never see.

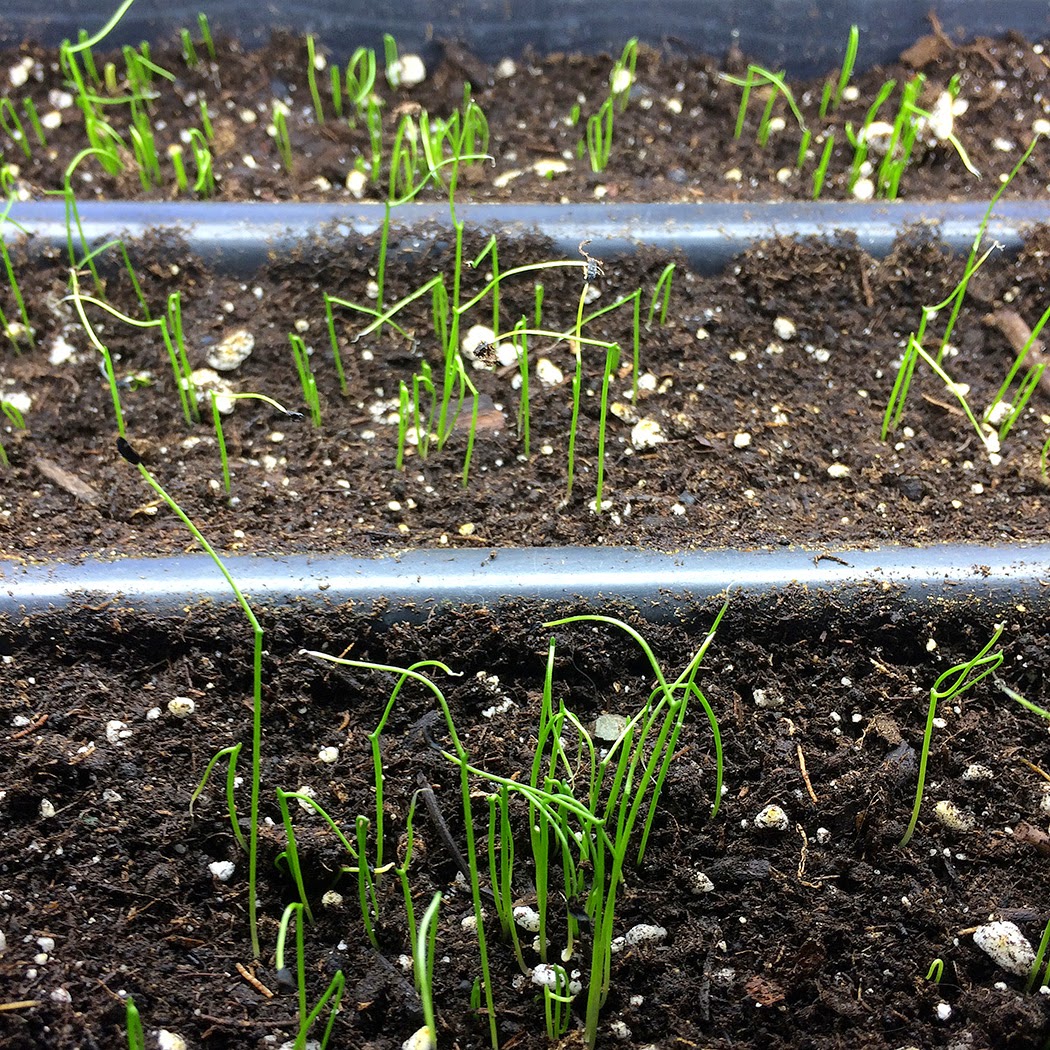
Chives growing away.

I also have a flat of chives under the grow light. I want to finish the chive hedge on the circle garden this year and between these new plants and being able to take divisions of what is there, I think I should be able to make it all the way around.

Gigante parsley, which is notoriously slow to germinate, is on the heat mat in the basement, but I don't expect to see anything popping up for a couple weeks.

Sweet peas when they had germinated sufficiently to be brought upstairs.

The sweet pea trial had an interesting outcome. Sort of. To refresh your memory, I took three seeds of two varieties of sweet peas: a Spencer variety for cutting—Lake Windermere—and an heirloom variety grown mostly for its scent—Fire and Ice. For each variety, I soaked one seed for 22 hours, nicked one seed and left one seed alone. Then I planted them in 4-inch pots (three per pot), heated them to between 60 and 65 degrees and watched for germination.

Here's when they germinated:
Day 6: Untouched Fire and Ice
Day 8: Untouched Lake Windermere
Day 10: Nicked Fire and Ice
Day 13: Soaked Fire and Ice

From there, Fire and Ice took off and Lake Windermere was stuck in time. The one seed that had germinated wasn't exactly thriving and the other two never germinated. Upon a close inspection, I found something crawling in the Lake Windermere pot and I'm pretty sure it was some kind of fungus gnat because the soil was too wet. That's the danger of using a larger pot with seeds ... it's very easy to make them too wet.

Fire and Ice is doing well enough to be ready for a little pinching back.

Because of that, I don't think this was really a fair trial, although I think the fact that the untouched seeds were the first to germinate in both pots suggests that you probably can't go wrong, no matter which way you choose to treat your sweet pea seeds.

I did sow another pot of Lake Windermere, so it will be interesting to see what happens with that.

The "real" sweet peas as well as Verbena bonariensis and several other things are scheduled to be planted next weekend. Good thing I ordered a bigger grow light!


Labels: , , ,

06 March 2015

FRIDAY FINDS: IT'S ALMOST SPRING

Things are looking up, folks. Meteorological spring started this week (although it's clear that Mother Nature laughs in the face of so-called meteorological spring), the clocks go forward tomorrow night (yawn), the sun has actual warmth and I'm taking a fun little trip next week that I'm very much looking forward to telling you about. Oh, and "Gardeners' World" starts up again today (check the Youtube channel tonight or tomorrow).

Soon we'll all be running around in a fit trying to get all of our spring projects finished.


Doesn't the price of outdoor furniture blow your mind? It often costs more than indoor furniture! And that's OK if you live in a place where you can use it all the time, but we use it for about four months of the year so I'm just not comfortable investing a ton of money in it. Our outdoor dining table and chairs don't match but they are both great. I think I'm going to spray paint the chairs and buy new cushions (the cheap cushions that came with them have been shot for awhile) to freshen up the look. They sell pretty standard-size cushions in a bunch of fabrics here and here.

I always love Linda's perspective on gardening and am a great admirer of what she and her husband Mark have created. But gardens chance and time marches on and Linda now finds herself contemplating a big change. 


Grow a Good Life photo
When you're thinking about what you'll be starting from seed, don't forget herbs. Rachel at Grow a Good Life has a great article on several that you can start from seed quite easily.


I love a good, well-lit neutral space with warm touches, but I'm also a lover of color. This home (with great before shots to show the change) has an unexpected blast of color that makes it seem as though the rest of the home is designed specifically to show it off. Of course Loi always has such impeccable taste I would expect nothing less.

What do you have on tap for the weekend? Don't faint from shock, but there is a slim possibility that it might be nice enough to get back to work on the neverending garage pergola project! 

Labels: , ,

04 March 2015

GET OUT IN THE GARDEN AND GET PRUNING

It might have been 15 degrees last weekend but I was bound and determined to garden, and garden I did. I actually had a very legitimate reason to garden: hydrangea pruning time.

I love hydrangeas and have a lot of them, but the only kind I've added in the last seven years or so are either so-called smooth hydrangeas (Hydrangea arborescens) or hardy hydrangeas (Hydrangea paniculata). After years of disappointment with  big-leaf hydrangeas that didn't bloom (the plant might be hardy but the buds, which are set on last season's growth, rarely are for me), I have pretty much given up on those.

And for arborescens and paniculatas, late winter is the time to prune. I'm in zone 5 so that's right about now. If you are in a lower zone you might need to wait a little bit and if you're in a warmer zone, you probably want to get on with it if you haven't pruned already. The key is that you want to prune when the plant is dormant.

The arborescens I have are 'Annabelle', Incrediball and Invincible Spirit and these couldn't be easier to prune. I just chop them back to 6 to 12 inches from the ground. They bloom on new wood and cutting them back will keep them a little shorter and therefore less floppy. But don't be fooled into thinking that cutting these hydrangeas back will make them small. My Incrediballs that flank the deck stairs were well over 5 feet tall last summer.

With the paniculatas, you're mostly pruning to control the size. These also bloom on new wood and there is an effect to pruning, other than the size of the plant. When you prune, you'll get more flowers but they will be smaller. If you don't prune, you'll get slightly few flowers but they will be larger. To me, it all evens out in the end so I don't worry too much about it but some people might be partial to one look or the other.

Before: The Limelight hydrangeas along the deck are planted downhill, so when I pruned them, my goal was to level the tops. On the right is an Incrediball that I pruned to about a foot and in front of the Limelights is a Little Lime that also got a little sprucing up.

After: The Limelights have been pruned to be more or less level. Even if I wasn't planning to prune them, I would have gone in and removed the old flowerheads because they may not fall off by themselves and can look ratty if they are still there when the new flowers bloom.
My paniculatas are all either Limelight or Little Lime. This year I started with the three Limelights that I grow along the deck. This is the first year that I've pruned them and one of my goals with pruning was the even them out. The ground falls away in that area, the one farthest north is considerable lower than the one on the south end. But these are most often viewed from on top of the deck, where they sort of peek up, and it's odd to not have them even. So when I pruned, I lined up the top of them with the trim on the deck skirting, aiming to have them level on top.

There's a branch that is crossing twice and needs to be removed. Crossing branches are bad because they can rub against each other and open the wood, making it susceptible to disease.

But before I start taking off top growth, I always start with crossing branches. These are never good to have in any shrub or tree, so if I spot a crossing branch, I immediately cut that out. If I were pruning anything else, the next thing I'd do would be to look for dead wood, but I've never found any in a Limelight hydrangea. Once I got rid of the crossing branches, I started reducing the overall size of the plant, always cutting back to a leaf bud, which looks like a little swelling on a branch.

Because I was trying to make the three hydrangeas level, the one on the south end got a much more severe pruning than the other two. It will be interesting to watch if there is any difference between the three because of that.

I followed the same procedure for the Little Lime hydrangeas, making sure to take out any branches that were sticking out at odd angles. I sort of like to see the branches end up in a V shape when I'm finished.

The one hydrangea that I've not yet pruned is the giant Limelight in the main garden. I'm looking to take out some of the oldest stems in the middle of that one to keep it nice and open, but there is so much snow piled up at its base that I can't get the pruning saw in there. Temperatures are supposed to increase this weekend though, so I'm hoping it will melt enough to go at that one.

When the ground is thawed, I'll give all of the hydrangeas a bit of organic fertilizer and a shovelful of compost to get them going on the right foot. Beyond that, they won't require any maintenance until next spring when I'm once again trudging through the snow, anxious to get on with the first gardening job of the year.


Labels: ,