The Impatient Gardener: March 2014

27 March 2014

OH YEAH, I REPAINTED IT. AGAIN.

The vanity that is. I did this several weeks ago, actually, but forgot to tell you about it.

It is now Hale Navy (satin finish) and I'm finally satisfied.

Hale Navy vanity

You may recall that I originally painted it Hudson Bay (satin), but felt like it was too slate blueish and just dull.

Hudson Bay, Old Navy, Hale Navy comparison
Hudson Bay (sanded) on the left, Old Navy on the right and Hale Navy up in the first picture.

So I repainted it with Old Navy in semigloss and we lived with it like that for a couple weeks. But every time I walked in there I felt like it was purple (and I don't like purple) and icky shiny not good shiny.
Shiny semi-gloss Old Navy (and I actually put another coat on after this).

It bugged me enough that I actually disliked the vanity more than before I had painted it at all.

So I bought more paint. This time it was Hale Navy, which is a very black navy but not at all purple, and I went back to the satin finish.

Hale Navy
Thank goodness, the third time was the charm. I really like it now. That's as far as the bathroom has gone though, and frankly, as far as it will probably go for awhile. After all, we're now into that spring rush when I'm busy trying to finish up everything I need to get done before gardening season begins.

Plus, it's way better than where it started.


Labels: , , , ,

25 March 2014

SCOURING THE INTERNET FOR GREAT GARDEN TELEVISION

I don't think it's any secret that there is a lack of quality gardening television shows available in the U.S. There are some, of course, and two that come to mind are The Victory Garden and P. Allen Smith's Garden Home, both on PBS.

Although I have the DVR programmed to record every one of these I can (which means a lot of old, fuzzy episodes of The Victory Garden recorded from some channel called RLTV that runs a lot of ads for how the elderly can learn to use computers), I cannot manage to quench my thirst for gardening programming.

And let's be honest, at this point it's a matter of keeping my sanity. If you follow me on Facebook or Instagram, you saw what I did this weekend.

Two interesting things to note about this photo: 1. I suspect that one should not be considering garden bed shape while the snow shovel is still standing at attention (leaning on the garage); and 2. See that big icy puddle on the path? That's why leveling a path is so important!

That's my attempt at redefining that garden bed that crosses the path on top of a foot of snow with a half frozen hose. With another inch of snow added last night, clearly I need to get my gardening frustrations out somewhere.

I watch a lot of television shows on my iPad. That way I can watch while I'm cooking, cleaning, painting, drying my hair or just walking around the house (not recommended; ouch). So I've been searching for gardening shows I can stream on my iPad.

I started at Amazon Prime. There aren't a lot of shows to be had as part of the Prime program, but I did find several old English gardening shows that were somewhat interesting. The best was "Secret Gardens of England" with Alan Titchmarsh. Apparently, in England it's not uncommon for somewhat regular gardeners to open up their gardens to the public a few times a year for a small fee (which is often donated to a charity). This program highlights a few of the lesser known gardens and is quite interesting because these gardens are for the most part relatively small properties with unique growing conditions rather than huge estates.

Another Amazon Prime show I watched was a full season of "The Great Gardens of England," which is about the same as "Secret Gardens" but features more popular, grander gardens.


What I found so interesting about both shows, but particularly "Secret Gardens" is that the most interesting gardens are a partnership, usually between a married couple, where each person has a specific role (and that doesn't mean that the man is relegated to hole digger all the time). I'm beginning to suspect that the checks and balances that come with gardening with another person create a much more beautiful space.

Anyway, you can only watch old English ladies in frumpy dresses stroll around gardens for so long, and I'd about had my fill of that.

Next I went to the PBS app where I found access to some episodes of regional gardening programs. "Volunteer Gardener" from Tennessee was pretty good as was one from North Carolina, but when one of them flipped to their regular segment filmed at Home Depot where a woman in an orange apron explained how to make a container that consisted of a spike, a geranium and ivy, I decided I was done with that too.

While I was searching for programs on my laptop, I landed at Gardeners' World on BBC. I used the Hola extension that makes your web browser look like it's coming from a different country (the same one I used to watch Sarah Richardson design shows on HGTV Canada) to be able to watch the three episodes of this show that were available online for viewing. Holy smokes, they blew my socks off.

This is quality programming, people. The cinematography (I think that's the right word) is unbelievable. It is filmed so beautifully with the shots often starting closely zoomed in on a plant and panning out to catch the frame in the background. The segments are a nice length and very interesting.

What I like most though is the presenters. They have dirty hands from digging in the dirt. One of them, Carol Klein, is this exuberant woman who is constantly chatting and smiling and has had dirt on the knees of her blue jeans in every segment. In other words, they are real gardeners. I love it.

One episode had a segment on Boxwood blight and was filmed in presenter Monty Don's garden (as many segments are). His garden is a beautiful formal one, with perfectly trimmed boxwood hedges creating the structure. One area was decimated by Boxwood blight, so the segment highlighted what to do about it to try to keep it from spreading throughout the garden. The quick answer is to cut off the affected plants, dig out the roots, burn it all and cross your fingers. So I was thinking to myself, what is this guy going to do? He just lost an entire hedge from around one area of his garden and now it won't match the rest. But while he was cutting it down (and mentioning that he had planted the boxwood more than 15 years earlier when his children were young) he said he was excited about the possibilities of what he could do there now that he wasn't limited by the hedge in that area. You have to admire that attitude.

This is Monty Don's dog Nigel who is super cute and constantly chasing his ball. Photo from Don's blog.

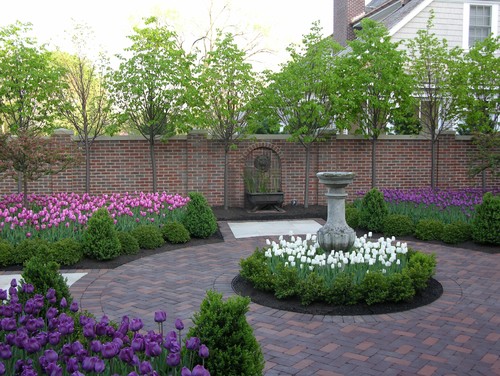
Monty Don's garden Longmeadow.

In search of more episodes of Gardeners' World, I landed on YouTube where wonderful people have (probably totally illegally) posted excellent episodes of the show and its specials. Gold mine!

One special that I really enjoyed was called "The Science of Gardening" with the aforementioned Carol Klein. It was a really fascinating look into exactly what the title suggests, but in a very approachable and easy-to-understand manner. The section on soil structure was particularly interesting to me.

I also watched a special on the 2013 Chelsea Flower Show. For some reason I always find it to be hard to find information and images from the show, which is surprising since it's pretty much the biggest thing going in the gardening world. This was a great look at the world-famous event. Interesting tidbit: Gnomes have been prohibited from displays at the Chelsea Flower Show basically forever, but in 2013 they were allowed and later auctioned off for charity.

A clematis display at the Chelsea Flower Show.

Youtube is one of those places where it's hard to search for shows, but you usually find them by looking at the suggestions after you've watched a video. So I'm hoping I'll continue finding more programs to tide me over until I can get in the garden.

Do you have a secret source for great gardening programming?

I've updated the "Favorites" tab at the top of the page with links to seasons and episodes of some great television shows on Youtube to help you find some of them a little easier.

Labels: ,

21 March 2014

FEATURE FRIDAY: SPRING HAS SPRUNG

The declaration in the headline might be more optimistic than realistic, but I thought it would be appropriate to mark the first full day of spring with some shots of spring bulbs in full bloom, even it will be several weeks before such a thing happens in my area.


When I did the garden design styles series, one reader had a comment that had me laughing so hard and I've not forgotten it. Now every time I see a photo of a garden with a boxwood hedge I think of it.

Casa Mariposa said, "I don't like structured, formal gardens and little boxwood hedges drive me nuts. I just want to take a pair of shears to the side and cut an escape route for all the plants penned up inside." 

The image of cutting an escape route for the plants stuck in boxwood jail (such as the tulips below) brings a smile to my face every time.


Looking at these photos, I'm a bit sad that I don't grow more tulips, but it seems like a worthless cause when every critter around seems to line up to eat them.

I've discovered some of the fancier kinds of daffodils and that helps me forgot that I'm missing tulips. I love the doubles and many of them have a lovely fragrance too.

The Impatient Gardener photo
Every spring I tell myself that I'm going to plant more spring bulbs come fall and then every fall I decide that I have too many other chores to do in the garden so I skip it. The only negative about spring bulbs as far as I'm concerned is having to deal with the foliage after the flowers have faded. The more daffodils I have, the more braiding of leaves I have to do and that gets tiresome. Still I doubt that few things can stir a gardener's soul more than the springs first flowers.

What are your favorite spring bulbs?

All photos from Houzz.com. Click on the photo for more information.

Labels: , , , , ,

19 March 2014

IN SEARCH OF THE PERFECT GARDEN TOOL

Several years ago, my gardening life was changed. I discovered the hori hori aka soil knife. Instead of carrying around various trowels, pruners and weed extractors, I could garden with one tool.

Hori horis pretty much do it all. They cut open bags of mulch or pieces of twine. They dig out weeds, they create trenches to plant seeds, they cut off small branches and free potbound plants from their containers (by destroying the container). And most off all, I felt like a gardening badass wielding a big ol' knife in the yard.


I had two main problems with my original hori hori: Its wood handle was not particularly comfortable to use and meant that if I stuck it in the ground for a second I might spend the next 20 minutes looking for it and there was no ergonomic design to it at all.

Then I found out about the Professional Gardener's Digging Tool, which is sort of a hori hori on steroids. I thought this would be improvement I had been looking for. First, it has a red handle so I wouldn't lose it as much. Second, the handle is offset from the blade so you get a lot more digging power. And third, there is a nice hand guard that you can use to push against.


But the the blade on it is very thick. This is good for serious digging because there's no way this thing is going to break, but it's not good for any of the other things I like to do with my hori hori. The blade wasn't really sharp at all, so cutting plastic bags was reduced to poking a hole in them and ripping. It was also no good for light pruning. One of my favorite things to do with my hori hori is to stick it in the ground at the root level of a stubborn weed and turn it around it, cutting the roots. Because the blade on this was so average, that didn't work. And the thing is a beast, so it's not like you can stick it in your pocket or anything.

I don't know anyone who had tried a soil knife who hasn't fallen in love with it, at least in concept. So there must be several versions out there, right? They were surprisingly hard to find.

Here's what my perfect soil knife would have:

  • A sharp stainless steel blade, flat on one side and serrated on the other.
  • A brightly colored handle made of something other than wood.
  • Some sort of ergonomic design to the handle. Ideally it would be offset, but I'd at least like something that conforms to a shape of your hand a bit. 
I posted on a gardening group on Facebook and these two were suggested to me (in addition to the very good suggestion of painting the wood handle of my existing hori hori a bright color, which is a thought that has occurred to me in the past but I've never done).


This tool has a cast aluminum blade, but it is serrated on one side like I wanted. It also has a hand guard at the top of the blade to push on. I don't see that there's much in the way of a comfortable hand hold, but the handle is at least plastic and the tip of it is orange.

I'm not sure about that split tip. I'm not really sure what that would do. Rather than a fully curved blade like both of my soil knives have, it has a curved channel in the middle and straight edges. That's neither a positive or a negative in my book, just different.

The best thing going for this one is the price. It's just $8.99, meaning that if you lost it, it's not a huge heartbreak to buy another. Or you could buy a couple for different places (i.e., I might keep one on my car for when I run out to the community garden).


This tool has a stainless steel blade, with serrated and straight sides like I wanted. Those serrations look serious and there is a probably a good chance I could cut my finger off with this one. Imagine that tetanus shot. There are inch marks on the inside of the blade as well, but I'll be honest, I almost never measure anything in the garden.

It also has a bright orange handle with a bit of a flare as it meets the blade so that's kind of a guard. It has a thumb rest too, although until I actually got it in my hand, I'm not sure if I'd use that or not. Although the handle has some shape to it, it looks to be made of a hard plastic, whereas the Fiskar's one was "soft touch" so I presume there would be some give to it that might help with hand fatigue.

The little notch is for cutting twine, which I can see being useful, although really it's not that big of a deal to cut twine with the blade either.

This one is $21.99 plus shipping (since I don't think you can pick it up in most stores or on Amazon Prime). 

Want to guess which one I bought? 

Yep, it's the A.M. Leonard one. The reviews for it are stellar, but what really sold me was the stainless steel blade. I haven't received it yet, but I'm looking forward to getting my hands on it.

I'll do a review of it compared to my other soil knives in a few months after I've had a chance to put it through its paces.

What's your go-to gardening tool?

If you're looking for reviews on the traditional hori hori, Fiskar's Big Grip Knife and the Professional Gardener's Digging Tool, check out North Coast Gardening where Genevieve, who is a professional landscaper, has reviewed all three.

Labels: , ,

14 March 2014

FEATURE FRIDAY: GREAT GATES

I love gates in gardens. The sense of enclosure that they bring is so charming. I love gates that give you just a peek of what lies beyond or ones that frame a view perfectly.

Here are some great garden gates.


Until I started looking for gates, I had no idea there was something called a moongate. But there is, and they are fantastic.


Maybe I'm a traditionalist, but there is something pretty great about a nice simple gate too.


What's your favorite style of garden gate? Do you have one in your garden?

Labels: , ,

13 March 2014

LIGHT AND BRIGHT: GIVING A DRESSER NEW LIFE

Remember when I bought this dresser?


Oh, you don't? Well that's probably because I did that at least three years ago. I bought it because it was just sitting there in the thrift store and it looked so cool that I bought it. Without any plan for it.

You will be happy to know that I have stopped doing that: buying stuff at thrift stores that I don't have a plan for. It almost never ends well.

In the case of this poor dresser it went into the garage. Where it sat and collected dust, spider eggs and a good amount of mildew.

Last year I dug it out, determined to fix it up or get rid of it. And when I did I was reminded of just how cool it is. It's not the most well-made dresser. It's all veneer, some of it in not such good shape, and while it's sturdy, it's not like this was built by a craftsman.

Dresser redo: paint, wood bleach and liming wax

I solved the mildew problem with a really good wipe down with white vinegar (which is a good idea with old furniture anyway because it takes care of smells as well. Then I sanded it down with 220-grit sandpaper just to rough everything up. In places where the veneer was lifting, I pulled it up and glued it back down with regular wood glue. I also filled some of the holes with and areas where the veneer was damaged with wood putty.

I used Zinnser BIN Cover Stain primer because it has good adhesion and I just wanted to seal up everything really well. Then I put on two coats of Benjamin Moore Aura semigloss in Mascarpone. And then I let it sit for more than a year while I figure out what to do with the drawers.

In that time, we managed to pile a bunch of stuff up on top of it and ruined the paint job on top, so when I took this project up again, I lightly sanded the top and put another coat of paint on it and then went back to the drawers.

I had already sanded them when I first started this project, but I gave them just a light touching up by hand with 220-grit and cleaned them well. I really liked the light color they were after sanding, but there was no way to keep that color because wax or polyurethane would darken it. So I used some wood bleach to lighten them up. I just bought a bottle at the hardware store and followed the directions. Honestly, I'm not sure how well it worked but I think they got a little lighter.

When they were dry I went back and used liming wax on them. The white of the liming wax brought out the grain, which I actually liked on this piece (which is unusual for me), and lightened up the wood. It also helped take out some of the yellow in the wood (which really isn't coming through in these photos taken in the dark depths of my basement).

Dresser resurrection: Paint, wood bleach and liming wax

I still don't know where this is going to live. I think once I get the finished half of the basement spruced up (seriously, will that EVER happen?) it might be nice there and could even be used as console for a television if we would have one down there.

It might not have a home immediately, but I still  love it. I'm happy I went out of my comfort zone of painting everything and did something different with this piece.

Labels: , ,

10 March 2014

Redesigning the back yard

Like pretty much everyone, I'm anxiously waiting for spring to show up. But a girl can only paint so much stuff in her house before the paint fumes take over and you have to give in to the pent-up gardening urge. So, over the past couple weeks, I've been redesigning the back yard.

First of all, it's really the side yard, but we call it the back yard because the true back yard is pretty much the woods. It does back up on our neighbors so maybe it makes more sense in that context.

The trouble spot for as long as we have owned our home has been the area north of the garage. It has always been a weedy, forgotten about part of the yard. But when you look to the east, where you can catch a glimpse of the lake, you're looking right at it. Plus, it's not a very attractive view for our neighbors.


Up until about three years ago it was made even worse by a 1,000-gallon propane tank. At some point I planted a small garden with a reed fence to screen the tank. I always sort of hated that garden. It was a weird, kidney bean-shaped thing that was too small to make sense, but it was a horrible place to try to dig in the dirt as it was filled with roots from a nearby birch tree.

This is the only picture I can find of the the kidney bean garden in its original form. You can see the propane tank through the reed fence.
Once we got the tank out of there (after switching to natural gas) we were able to clean out all the weedy areas and the dead shrub skeletons, and we planted three large Arrowwood viburnums. These should get about 8 to 10 feet tall and provide a nice screen from the neighbors but still look nice.

Here's what the kidney bean bed looked like last year, after I had already given up on it. 

Then last year, the big birch came down, creating much more sun in the back yard and making the kidney bean bed look even worse.

After seeing this post about "positive" space in garden design I started playing around with a few ideas back there.

Here's a rough idea of what I came up with. The big dark circle to the left is the giant spruce in the yard. I think it is probably even bigger than I've drawn it.


For reference, here's an overhead view of that part of the garden last summer.


The idea is that the lawn takes on a perceived elliptical shape, overlapped by the ellipsis formed by combining the two gardens that border the path. I say perceived, because the ellipsis is not bordered on all sides, but my intention is to create enough border that it is implied.

What love most about this plan is that it creates an area to the north of the garage that finally makes sense.
This is a rough plan for the area by the garage (which is sort of drawn in in pencil to the right).

What I'm less sure about is opposite that where the ellipsis will meet the retaining wall in the garden off the deck. I'm just not sure how that's going to look with half circles going opposite directions there.

The scale of these drawings is a complete guess and it's not one of the things I'm particularly good at. Scale has always plagued me, but until the snow melts enough that I can actually get out there and really look at the space and maybe drag a hose around for a bit, I can't be sure how it will all work.

I think (and hope) that I've got the scale wrong on the plants as well. That would be good because right now I need approximately one million plants to achieve this new look. (An aside: When I got the circle template and started working on this, Mr. Much More Patient said, "Those look like really expensive circles. I think you should stop drawing so many of them.")

This is a very rough idea of what might happen by the deck. I didn't draw in all the existing plants in the area between the deck and the stone retaining wall, but that area is pretty well filled in with existing plants.


Here's what  it looked like last July (by the way, the as-it-is garden tour I did last year, where I didn't clean up anything, just took the camera and started shooting the garden has been extremely helpful in remembering what the garden actually looks like. I think every gardener should do this multiple times through the summer, just for reference).


I've specified some plants in the plans, but they are really a first crack at it. I will, of course, be using the existing plants from the kidney bean garden and moving a few things out of the garden by the deck that just can't handle the amount of sun that is there now that the birch is gone. I know that I would like to add another viburnum in the back and some sort of focal point small tree or shrub in the middle of the far side.

I will also connect the two beds that flank the path to create an ellipsis with a path running through it. I think I probably should have done that from the beginning. And on the other side of the path, near the patio, I think I should continue the curve created by the retaining wall around the Serviceberry tree, so some plants will come out of that area as well.

Now, if only the snow would melt.

Labels: ,

07 March 2014

Feature Friday: An approachable approach to a casual landscape

For this week's Feature Friday I wanted a more "normal" garden. That is, something approachable for the average gardener. The last couple weeks I've featured gardens that approach the dream category, but this one feels very real to me (even if the house suggests they probably hire a gardener to maintain it).

I like that relatively ordinary plants have been used throughout. I'm a bit of a plant collector and always like to have the newest cultivar, but there is something simple about the plant selection here that I find soothing.

My favorite part is the dry creek bed they've created in the middle of the driveway. I've seen a lot of driveways that have what amounts to a drainage ditch in the middle and none of them are particularly attractive, but this is a very creative and attractive solution to a relatively common problem.

Woodburn & Company Landscape Design

Woodburn & Company Landscape Design


The landscape design firm is Woodburn and Company. They are located in New Hampshire, and this is what they had to say about this project on their website:

This property in Camden, Maine is an open woodland sloping to the water. The landscaping was designed to retain a natural feeling in keeping with the site and locale. A “dry stream bed” was included inside the front drop-off loop that allows for natural drainage and creates an informal and interesting foreground for the house. Every opportunity was used to create scale and charm throughout the landscape with enframed views and interesting landscape details.

The picky editor in me (the one who is not responsible for any typos you find on this blog) would like to point out that enframed is not a word, but I'm going to give them a pass because I'd rather have a landscape designer who knows how to make a yard look pretty than one who knows that enframed is not a word.

What do you think about this landscape? 

Labels: ,