The Impatient Gardener

27 October 2017

FRIDAY FINDS

It has been a difficult few weeks to be a gardener in my area. The sun is setting early (and soon to be much earlier) so there's no time for gardening after work and the weekends have been rainy. I appreciate this late season rain, as I believe that it is best for plants to go into dormancy well hydrated, but it would be much more convenient if it could just rain during the week instead of on the weekends.

That pattern may change this weekend, thankfully, but it's also going to be in the 40s. Remember how I said that the problem with cleaning up the garden is that it's either the right time for the plants or the right time for the gardener and those two things rarely happen simultaneously? Well, that's what's happening now.

Box o' bulbs waiting for planting. More coming tomorrow too!

Well there's nothing to be done about it. It all has to get done. The priority this weekend will be bulb planting, and a lot of it. Once that's finished I can better clean out beds and then start mulching with shredded leaves (of which there are thousands on our lawn). After that, the containers need to be cleaned out. Most of the plants are mostly still alive (and would be more so if I hadn't pretty much given up on watering) as we've not had a frost yet, but they've served their purpose. The new containers I planted for fall will stay, but everything else will begin its road to compost.

So that's what is occupying my time this weekend. Here are some of the things that I enjoyed online recently:

Linda, whose garden shines no matter the time of year, is celebrating flaxen hues.

I do tend to go on about Chicago's Lurie Garden, but check it out in fall! It's gorgeous.


This is not a link, but can I just say I wish I would stop seeing posts about holiday shopping? Enough! Unless its a DIY project that takes time, it is WAY too early to be discussing such things. We still have Halloween and poor, forgotten Thanksgiving!

Sadly, many salvias are not hardy in my area, but they are beautiful enough to give some of them a shot and hope for the best.

Did you know you can buy kit houses on Amazon? I sure didn't until I read this article on GardenFork.

Are you planning to be in the garden this weekend?
SaveSave

Labels: ,

19 September 2017

IT'S TIME TO TALK BULBS + SOME FOR YOU TOO

Longtime readers will know that I'm not one to rush the seasons (other than winter, which I'm happy to mentally check out of sometime around January 5), but we need to talk about autumn. And maybe a little bit about spring. Because even though my garden is currently enjoying a very summerlike couple of weeks, the autumnal equinox is Friday, which means it's time to get serious about fall garden jobs.
daffodil study
Some of my favorite daffodils that I grew last year, including three split corona varieties and one multi-flowered variety.

And among all the less-than-pleasant jobs (endless raking, anyone?) is one that I guarantee will bring you more satisfaction than any other: bulb planting. OK, so you'll have to wait a few months for the real satisfaction but I promise that there is nothing better seeing the first flowers pop up in spring when the rest of the world is gray.

Because I live in an area with a lot of deer and, more recently, a healthy rabbit population as well, I only plant bulbs that are critter resistant. I can protect my garden in summer from animal browsing by using animal repellents, but I'm not going to pull on my parka in late winter or early spring to go out and spray flowers. That means that my go-to fall-planted bulbs are daffodils and alliums, both of which I can all but guarantee won't be eaten by anything.

naturalizing daffodils
A naturalizing daffodil mix I planted in a wooded area last fall bloomed for months in spring, starting with these yellow trumpet daffodils before they gave way to all sort of other varieties.

When planting almost any bulb, my advice is the same: think drifts, not dots. There is something so spectacular about swaths of flowers in spring. Some bulbs naturalize better than others, so last fall I planted a naturalizing mix in the woodsy area along the driveway. They were fabulous last spring, but I anticipate they will get even better as they multiple in future years.

An exotic and unusual double with orange accents.
Daffodils are tough buggers, as this one that seemed intent on blooming through a nest of mayapples proved. 

There are "fancier" daffodils out there as well, and those I like to save for areas closer to the house where their finer details can be admired. The doubles look like roses, the miniatures are charming and sweet and those with reflex petals are downright intriguing. But last year I discovered a group of daffodils that really stole my heart: the split coronas. I can't explain why I had never paid much attention to this before, but last spring they were the real standouts for me.

mount everest allium
'Mount Everest' allium was a lovely addition to this part of the garden in early summer. 

purple sensation
'Purple Sensation' alliums looked great from afar and up close. 

If daffodils are the good-doers of spring, alliums are the statement pieces of early summer. Although they come in myriad forms and a handful of colors from deep purple to blue and snow white to pale pink (with the occasional yellow and maroon thrown in), all alliums do one thing better than any other flower: draw your eye. Be they tall like 'Globemaster' or 'Gladiator' or shorter in stature like 'Ivory Queen', just the form of alliums is an attention-getter. I let them stand in the garden long after their flowers have faded as even the dried flowers add important texture.

Quick aside: Here's the how-to on my favorite way to plant bulbs. When you buy them in massive quantities as I tend to do, you have to find an efficient way to get them in the ground and this is fast!

OK, you're sold (as you should be!). But if you're expecting me to tell you to get out there and start planting, you're going to be disappointed. Because in most places in the U.S., it's still too early. You want your bulbs to have time to settle in, but you don't want them thinking, "Hey, it's go time!" I wait until there is a decided nip in the air, usually before a frost. That puts my personal bulb planting time around mid-October, although you can plant them right up until the ground is frozen if you really have to. So why the rush on talking about bulbs now? Because if you don't buy them now, all the good stuff will be gone by the time you do.

So here's me, telling you to shop. Seriously ... go for it, and I promise you will thank me come spring.

To help get you started, Longfield Gardens has agreed to give a selection of daffodils and alliums to two lucky readers. I'll be giving away one Naturalizing Daffodil Mix with 100 bulbs, perfect for creating a swath of gorgeous blooms that should multiple over the years, and one Amazing Allium Mix with 63 bulbs of four varieties of alliums, including 'Christophii', which is a favorite of mine.

Enter using the widget below. There are a lot of ways to enter to maximize your chances, but if you're short on time all you have to do is log in and click and you're in!


Labels: , , , ,

29 October 2016

HOW TO USE A BULB AUGER (AND PLANT BULBS IN MINUTES)

Last spring Mr. Much More Patient looked out the window at our still-gray landscape and asked why we didn't have more daffodils. They are a good bulb to grow here because no critters will touch them. Still, I don't want to add too many more to the gardens, as keeping them healthy requires leaving the foliage standing to die back naturally, and I don't love that look in my garden. (In fact I often cut off the leaves before I should, knowing full well this will affect their life span.) But we do have a lot of wooded areas that are quite bright in spring and would look lovely with some color. And I'd never have to worry about the foliage looking tatty.

So I told Mr. Much More Patient we could have mass quantities of daffodils if he didn't balk at the cost and would agree to help plant them.

And that's how we ended up planting 400 daffodils this week.


When I'm planting daffodils in the garden proper, I like to dig big holes and plant them en masse, but that approach wouldn't work well for the woods. For one, there are a lot of roots around and digging big holes is not easily done. I also bought varieties that are supposed to naturalize (i.e. multiply) more easily, so wanted to give them enough room to do their thing in the future. That meant planting them individually and there is no better way to do that than with a bulb auger.

Think of a bulb auger as a really big drill bit for a power drill. They come in different lengths, but most seem to be in the 24-inch range. In my opinion, bigger is better because that means less bending over. It does take a little practice to get the hang of the auger though, so here are a few tips to make sure you don't spin your hand off.

Set the drill torque on the drill setting and on a lower speed if you have a variable-speed drill. 

Put the auger in the drill the same way you'd fit in any drill or screwdriver bit. Then you want to turn the torque setting to the drill setting. If you have a drill with multiple speeds, put in on a lower speed setting. Our Milwaukee drill has two speeds and we run it on the slower speed for this.

Drilling a hole with a bulb auger is not the same as drilling a hole in a piece of wood, where you generally want to keep pushing. If you push like heck when you drill a hole in the dirt at some point the dirt (or more likely the roots, rock or something under the soil) is going to win and the auger will stop spinning but your arm won't. I'm not kidding ... your arm keeps spinning. And it hurts. This is why you want it on a lower speed.

In order to avoid that, work the auger up and down as you drill, gradually working it down into the soil. If it does get stuck, don't try to push through it. Reverse the drill, back up a little and then start working up and down again until you've got the hole drilled to the depth you want (about 6 to 8 inches for daffodils, but they aren't overly fussy).

Here's a quick video of the technique. I should add that this soil was in an area where we added quite a bit of soil so it was pretty fluffy (and already mulched with leaves; we were just adding a few bulbs to those we had planted a few days earlier), so it was pretty easy going. You may need two hands on the drill for a lot of conditions and I'd advise two-handing it until you know what you're dealing with.


Doing the up and down motion leaves a lovely little pile of soil around each hole, so it's easy to refill after you put a bulb in the hole. One note: We noticed that we were using up the batteries on the drill quickly when we were whipping through holes so quickly. We went through a battery about every 100 holes. So make sure you have a fully charged battery and if you have a spare battery make sure that's good to go too.

Working with two people we were able to crank out those bulbs in no time, probably about an hour total. Mr. Much More Patient was on drill duty and I plunked the bulbs in the holes and covered  them as I went. I found it was much easier to dump the bulbs into a trug rather than try to fish them out of a bag every time.

There's plenty of time to plant bulbs still. In fact you can pretty much do it as long as you can get in the ground, but planting bulbs in really cold ground, when it's really cold outside, can't be much fun.

If you're in the market for a bulb auger, here are a few to check out.

Affiliate links follow. Thanks for supporting this blog!


Labels: , , ,

24 October 2016

WEEKEND PROGRESS

We were blessed with yet another gorgeous autumn weekend here. I can't say enough about how wonderful the weather has been for most of this year, but I feel like we deserve it after two really cruddy years. I'm still gardening in shorts most of the time and I can't think that's common for this time of year at all.

In an effort to keep you up to date with the oval circle garden progress, I thought I'd just give you a quick peek at what was happening this weekend. Frankly, I'm in full-on scramble mode, so I've not been taking much time to take pictures (or do anything else, like clean my house), but I did snap a few here and there.

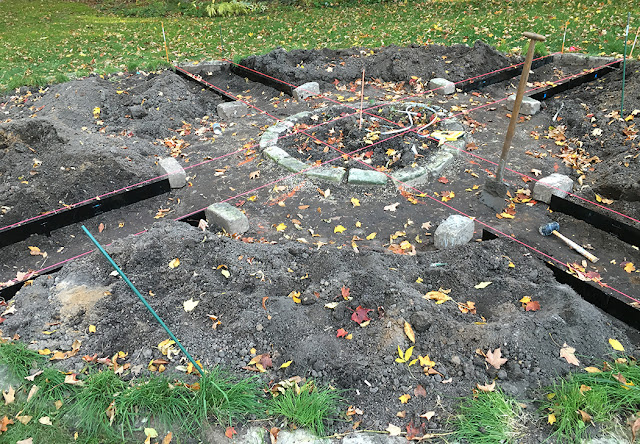
You can see how the paths are coming together here. The random cobblestones more or less show where the inner circle path will be.

The big project in the ongoing circle garden ordeal was to install the metal edging. As I mentioned, I found it at Lowe's for about $10 per 8-foot piece. I bought extra stakes that are a foot long and really much better than the ones that come with the edging. I didn't really even bother with those. I have also ordered some end stakes for the inside ends, but those should be easy to put in.

From this angle you can see that the two side segments are going to be quite small. I may have to alter the design to accommodate that.

Mr. Much More Patient was in charge of cutting using a jigsaw with a blade for cutting metal and I handled the rest. The process wasn't difficult .... just a matter of leveling each piece from end to end and then with its partner on the other side of the path. I didn't bother with leveling each path's edging to the other paths. That would be impossible and the gravel will accommodate small changes in level.

The next step will be to install the paver base and the gravel, but first I have to dig the inner path around the circle down a little bit.

As the paths become more real, I'm seeing that the side segments are quite small, which may require some changes to the design. Fortunately I have all winter to think about that.

I also spent a little time this weekend being thankful for whoever invented the bulb auger. Last spring Mr. MMP said he'd love to see the woods full of daffodils, and I told him that was no problem so long as he would help plant them. With him running the auger and me putting the bulbs in and covering them over, we cranked through 200 bulbs in less than half an hour. Earlier in the day I planted 45 alliums in an hour and a half using a traditional bulb planter. Clearly the auger is the way to go.

And the last exciting tidbit from the weekend is a find that I'm super excited about. I've been so thrilled with how the rose I'm growing in a container is performing that I decided I'd like to grow a few more that way. My plan is to put them on the corners of the driveway apron where it meets the patio, but of course this requires a pair of matching containers of some size.

Here's the pair of planters I snatched up at a great price. I'll need to change the color though.

Although I went to the Restoration Hardware outlet store looking for a bed (I really want an upholstered bed, but that is really another issue all together), I swung by their outdoor area and saw a matching pair of their Adamo cast stone planters in the medium (24-inch) size. These babies go for $369 each on the website (really, RH? You need to get real with your pricing!), but they were marked down to $100 each at the outlet, plus there was an additional 30% off of everything that day, making them just $70 each. The color, called Honey Lemon, is sort of a light buff color and not my favorite at all, but I think I'll be able to stain them a gray color. I can't tell you what a relief it is to have found these at a great price. I struggle each year to find good containers and I feel like I often overspend. I'm envisioning a white rose in each pot with annuals around the edge.


Oh, and my favorite maple tree is starting to put on a show. I shared this photo on Instagram because even people who aren't too happy about autumn, like me, can appreciate that kind of beauty.


Labels: , , , , ,

30 September 2015

4 THINGS TO DO NOW FOR A GREAT GARDEN NEXT YEAR

The garden is looking remarkably good for this time of year, but things will change quickly, so now is the time to take care of a few jobs to prepare for next year. Here are four things you can do right now to have a great garden next year.

I cleared out the half of the patio garden that I will be redoing. I incorporated a good amount of compost and raked it out and now the area is ready for planting either this fall or, more likely, next spring. Photos of the area from a variety of angles will help me plan this winter. 

1. TAKE PICTURES
They don't have to be pretty, but if you haven't been taking photos of your garden all summer, now is the time to whip out your camera or your phone and take a lot of pictures from different angles. Trust me. You think you're going remember what your garden looks like, but come February you'll be wondering what plants are lurking out there. And knowing what's out there will make it that much easier and that much more fun to do a little mid-winter garden planning.

2. TAKE NOTES
If you have a memory better than mine, mental notes should do just fine, but otherwise write down a few notes about what you want to change or reassess next year. I've printed out pictures in the past and written right on them, but even a list in the "Notes" app on my phone has come through in a pinch.


3. KEEP UP ON THE WATERING
Personal experience (and common sense) has taught me that plants that go into their winter hibernation happy instead of stressed fair much better through whatever winter can throw at them. The only thing that's less fun than dragging a hose around the garden is dragging a hose around the garden while you're wearing a parka, but it will be so worth it come spring.

4. PLANT A FEW BULBS
Even if you don't go hog wild on the bulbs, at least plant a few. The joy they bring after a long, gray winter is immeasurable. I've gone years without planting any new bulbs and have regretted it every time. 

Labels: , , ,

24 April 2015

SPRING BULB POT TURNS OUT TO BE A TASTY TREAT

Friday Finds is coming later but first I wanted to share an update with you.

Remember the bulb container I planted in fall? I kept it in the (unheated) garage all winter and brought it out maybe six weeks ago or so, putting it in a warm and sunny spot on the patio. And for a time there was a lot of progress. Plants were popping up (interestingly I think some tulips were coming up which were supposed to late-blooming tulips and the last thing to emerge) and I was looking forward to a big, colorful show.

Poor little bulb leaves nibbled by critters.

And then I came out one morning and the whole thing had been nibbled down. I guess even things in pots on the patio are no longer safe. One of these days I'm going to learn and just protect everything from the deer herd, but for some reason that's a lesson I need to learn every year.

Other bulbs should emerge from the container (although I wish they would hurry up, I was expecting blooms by now) and I'm going to move it up onto the deck, where presumably the deer won't go, although at this point I guess I wouldn't be surprised to see them standing in my kitchen looking in the fridge.

There is lots of spring to come. The first daffodils in the yard just bloomed this week, a welcome sight that is a harbinger of the color in the making.


Labels: ,

30 October 2014

PLANTING A LAYERED BULB CONTAINER FOR SPRING

Although the forecast for Halloween is for a full-on gale we continue to enjoy a pretty great autumn here so I still haven't done much in the way of garden cleanup. One fall gardening chore I have accomplished, however, is planting bulbs.

It's been several years since I've planted any bulbs, but last spring I was kicking myself for not having more color around because it is so appreciated at that time. I picked up bulbs at Costco and from Brent and Becky's Bulbs (my first time ordering from then and I was very happy with my purchase) and planted them all in about an hour or two.

I'm not going to tell you how to plant bulbs because really it is the most simple of gardening tasks. Dig a hole to the proper depth (it'll be on the back of the package), stick the bulb in pointy side up, cover it with soil, water it and sit tight until spring. There are other things you can do, including fertilize with bone meal and recently I read a suggestion to soak bulbs in Moo-Poo Tea before planting. I don't honestly think you need to do either of those things if you start with good bulbs but they might help keep them going in future years.

I did try a little gardening experiment though. Growing tulips at my house is a pointless activity. Some critter always eats them. But they are so beautiful and I didn't want to go another spring without them. So I'm growing some in a container. In fact I'm growing a whole bunch of bulbs in a container.

I started with a medium-sized planter, the one I grew the patio tomato in this summer, actually. I also reused the potting mix I used for the tomato, although I added a lot of grit to it (I've discovered chicken grit, purchased at a feed store, for this purpose). Bulbs contain everything they need to grow, but they don't like being soggy, so good drainage is really important.

To create a layered effect of bulbs that should bloom from late winter or very early spring all the way through the warmest days of spring, I selected three varieties. I picked a late-blooming tulip (honestly, I can't remember the name but it was a purple and apricot mix from Costco), a mid-spring blooming daffodil ('Avalanche') and a mixture of very early blooming dwarf irises. If you wanted to try this same layering effect, you can really do it with any bulbs so long as you layer them from earliest blooming on top to latest blooming on the bottom.

Sure, I could have made a fancy Adobe Illustrator graphic for you, but this photo of a sketch I made took exactly one minute to create and you get the basic idea, right?

I started with enough soil in the container to be able to plant the tulips (the last to bloom) at their proper depth or a touch deeper (about 9 inches) and packed them in shoulder to shoulder. Then I layered on more gritty potting mix and planted the daffodils about 6.5 inches from the top of the container. I didn't have enough of these to pack them in as tightly, but I evenly spaced out the 10 bulbs I had.

Tulip bulbs packed in tight make up the bottom layer.

Daffodils make up the middle layer.

You get how this goes by now. I covered that with more soil and planted the irises about 3 inches from the top and covered them with soil, filling it all the way to the rim of the pot because I'm sure it will settle throughout the winter.

Dwarf irises are on top. These were then covered with potting mix all the way to the rim of the container.

What I didn't do was water the container at this point, which is a big departure from what you should do when you're planting bulbs in the ground. The potting mix was already really moist and I didn't want the bulbs to get too wet. When I was finished, I just stuck it in our unheated garage sort of in the middle and away from the walls. I have other containers I'll be storing in the garage for winter so I'll group them all together and maybe put some bubble wrap or something around them.

I'll bring out the bulb planter in late winter and give it a good drink and then hopefully the magic will start to happen. If all goes as planned, the irises will bloom first and as they are fading the daffodils will emerge. When those start to fade, the tulips will push through. Don't worry about all the bulbs being on top of each other: the plants will find their way around them.

If you're doing this, the key is to store the container in a cool enough spot. Bulbs need a certain amount of cold to bloom, so a basement is probably too warm.

And now comes the tough part: waiting for spring.


Labels: , , ,

21 March 2014

FEATURE FRIDAY: SPRING HAS SPRUNG

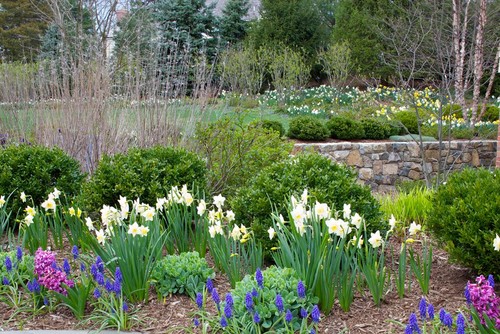
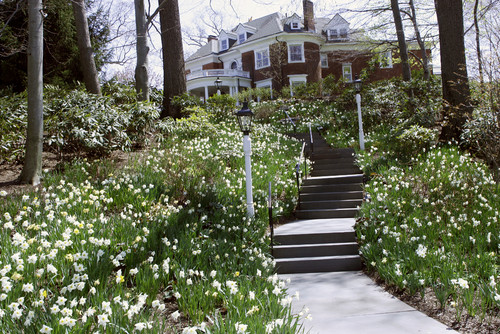
The declaration in the headline might be more optimistic than realistic, but I thought it would be appropriate to mark the first full day of spring with some shots of spring bulbs in full bloom, even it will be several weeks before such a thing happens in my area.


When I did the garden design styles series, one reader had a comment that had me laughing so hard and I've not forgotten it. Now every time I see a photo of a garden with a boxwood hedge I think of it.

Casa Mariposa said, "I don't like structured, formal gardens and little boxwood hedges drive me nuts. I just want to take a pair of shears to the side and cut an escape route for all the plants penned up inside." 

The image of cutting an escape route for the plants stuck in boxwood jail (such as the tulips below) brings a smile to my face every time.


Looking at these photos, I'm a bit sad that I don't grow more tulips, but it seems like a worthless cause when every critter around seems to line up to eat them.

I've discovered some of the fancier kinds of daffodils and that helps me forgot that I'm missing tulips. I love the doubles and many of them have a lovely fragrance too.

The Impatient Gardener photo
Every spring I tell myself that I'm going to plant more spring bulbs come fall and then every fall I decide that I have too many other chores to do in the garden so I skip it. The only negative about spring bulbs as far as I'm concerned is having to deal with the foliage after the flowers have faded. The more daffodils I have, the more braiding of leaves I have to do and that gets tiresome. Still I doubt that few things can stir a gardener's soul more than the springs first flowers.

What are your favorite spring bulbs?

All photos from Houzz.com. Click on the photo for more information.

Labels: , , , , ,