The Impatient Gardener

15 May 2017

HOW TO PLANT A TREE (THE NEW WAY)

Prepare yourselves. I'm about to tell you how to plant a tree in a way that may go against everything you've ever been told about planting a tree. But bear with me because I'm also going to tell you why it's a good idea to plant a tree like this.

Plant a tree for life, not for the short term.

First of all, you need to start thinking about a tree as a many-year (possibly a lifetime) investment. You need to think about the long-term health of it, not just the next five years. There are things you can do when you plant a tree that will determine if it lives to see your kids' weddings, or perhaps the next owner's kids' weddings.

The typical advice about planting containerized or balled and burlapped trees is to disturb the roots as little as possible and plunk it in a very wide but not too deep hole. For balled and burlapped trees this advice often includes leaving all the burlap intact to rot away naturally (which I've actually never seen happen), which you pretty much have to do in order to leave on the wire cage that holds the whole thing together.

Here are the problems with that method:
  1. Once roots start circling, as they are wont to do when grown in containers or spend a lot of time in the balled and burlapped state, they will continue to circle because they have "root memory." Roots that circle will never properly anchor a tree and are lightly to girdle the whole thing, essentially choking itself off.
  2. Trees, like almost all plants, do not like leaving familiar territory. Roots are unlikely to stretch out beyond the conditions in which they are accustomed. This is why it is no longer advised to put a "$5 plant in a $25 hole." Why would roots want to seek water and nutrition and stretch out if they are comfy in their little universe?
  3. It's very easy to plant containerized or balled trees too deeply because they've been growing that way at the nursery.
Balled and burlapped trees are typically grown in clay because it's the only kind of soil that will stay together in a ball, but few people grow trees in full clay. My garden is certainly an example of that. My soil is mostly sand or sandy loam, although there is some clay in a few spots in the yard where clearly fill had been brought in at some point.

So when I got a tree recently—an espalier Asian pear that I've been desiring for a long time—I planted it in a way that was pretty much exactly the opposite of what the nursery advised. I turned it into a bare root plant.

Don't freak out. This whole process moves quickly so at no point are the roots allowed to dry out. Here's the process:

1. Lift the whole thing into a very sturdy wheelbarrow. A kiddie pool would work too. Then fill it with a few inches of water and let it soak for several hours. The bottom of a balled and burlapped tree is likely to be hard as a rock so it needs some time to soften up.

How to plant a tree the new way
Start with the tree in a wheelbarrow or kiddie pool and allow the bottom to soak in a few inches of water for several hours to help loosen the root ball.

2. Then use a hose and some gentle work with your hands to carefully work all of the soil off the root ball without tearing away fine roots. I'm not going to lie, this is a long, messy process.

How to plant a tree-- the new way
Carefully wash all the soil off the roots. In the beginning of the process, above, you'll be breaking off big chunks. At the end, you have to tease it out through the roots, as shown in the quick video below. 


3. When all the dirt has been washed off from the roots, examine the root ball. Look for circling roots and cut them. Clean up jagged roots (mine had a ton of these that seemed to have been ripped off and scabbed over).

The new way to plant a tree
Here's what the roots looked like when I cleaned off the soil. There were two huge roots that had been ripped apart at some point and a few fiberous roots. I would have liked to see a lot more.

4. Find the root flare. This is where the trunk flares out and the roots begin. That is the level where you want the top of the soil when you plant.
5. Dig your hole as you usually would—at least twice as wide as the root ball and no deeper. In fact it's best to plant just a touch high to accommodate for the soil settling. Don't add any amendments to the hole. (I did sprinkle some mycrohizal fungi on the roots. There is some discussion as to whether this does anything or it's a feel-good thing, but I opted for feel-good put some on.)
6. Place your tree, making sure to face it the best direction and check that the soil level is correct by laying something—a long stake or a shovel— across the hole, then gradually add soil to the hole. About halfway through, firm in the soil—I like to face my foot toward the truck and my heel out and gently press down in a circle. Don't smash it! You're just trying to firm in the tree, not squish the life out of it.
7. Add in more soil and repeat the firming process.
Firm in the soil by gently pushing with your heel around the tree.

8. Water it well, preferably using the water from the root-washing process which can have beneficial bacteria in it.
How to plant a tree the new way.
Water in well, preferably using water from the root washing process.

9. Once you've watered and all the water has been absorbed, check the soil level again and add more if necessary.
10. Mulch deeply around the root zone, but don't pile up mulch on the trunk. If need be, water again at this stage.
11. Stake the trunk low and remember to remove the stake when the tree seems well anchored, no more than year from planting.
A few notes about my specific situation:
  • Because I was planting an espalier tree that will be supported by guide wires on the fireplace facade, I planted the tree quite close to the house, about 14 inches. This is much closer than you should ever plant a tree in any other case.
  • I also didn't stake the tree because of it's location and the guide wires. There won't be wind whipping this tree around so I skipped the stake, but it's an important step in almost any other case.
  • I firmed down the soil under the root ball only because I'd recently put that soil in from another spot in the garden. Here's why I did that. 
When the tree is planted, it's not uncommon that it will sulk a bit at first. Don't freak out. The tree is stressed. It has experienced a drastic change in growing conditions and its roots have been disturbed. This is unlike what you've probably experienced with other methods of planting (and a good reason to plant in spring or fall but not the heat of summer, which is stressful enough on its own), but keep in  mind that you're aiming for the long term health of the tree here. 

You will probably have to be very careful about watering for the first two weeks. I don't want the roots to dry out at all during this time, so I stay on top of the watering, but be sure not to over water, which is probably worse. Once you're past this first critical period, you should go to a "proper" watering schedule, which is to say regular but infrequent (generally weekly) deep watering. This encourages deep root growth rather than surface root growth.

How to plant a tree the new way
The planted tree is looking pretty good in its new home and it has acquired its own bodyguard.

I bet you're skeptical right now and maybe even thinking, "Planting the old way worked fine, why change it?" But did it really work better? Have you seen trees die or just fall over in a wind storm? Of course these things happen for other reasons as well, but often it's because of improper planting. And just think about it: Doesn't it make sense to get a tree growing in the soil that it will call home for the rest of its life from the get-go?

Here's a study on this method if you need a little science to quell your skepticism. And here's more information on the why of this.

Labels: , , , , ,

26 April 2017

ORC WEEK 4: EASY + BEAUTIFUL DIY FLOOR

I knew the floor would be the single biggest change in our basement renovation. The old floor was just so terrible that it absolutely could not stay, not to mention we needed a floor to not just change the look of the space, but add warmth, sound dampening and be durable.


I can't tell you how happy I am with the change our new cork floor made. But that is jumping ahead in the story because we installed this baby ourselves!

Globus Cork provided the materials for this floor so that I can share the process of selecting it and installing it with you.

Before we finalized the design, we laid out one row of tiles and took a panoramic photo to see the whole room at once. You can see we make a few changes to the planned design.
So in Week 2 (back when I was an optimistic person who wasn't completely freaking out about finishing this project on time), I walked you through the process of selecting the floor, which was no easy feat when the options are pretty much only limited by your imagination. We decided on a random stripe pattern in using Bleached and Alabaster colors, both in the nugget texture.

We installed click and lock bamboo floors in the bedrooms several years ago when we did our big renovation and I remember there was an issue with the delivery truck actually getting the flooring to our house. It came in several boxes and technically we should have had a forklift to move it. So it was a lovely surprise when the cork flooring showed up delivered by a regular carrier, possible only because it's so light.
I made a list of the order in which the stripes went that we checked off as we went so we didn't lose our place!

Globus Cork has a really thorough installation tutorial on its website which was hugely helpful but honestly, we were overthinking it. We opened the boxes and let the cork acclimate for a few days while we prepped the floor. The key thing is that the cork, which is laid used a contact adhesive (the back of the cork tiles are pre-coated and then you apply glue to the floor) needs to go on top of clean plywood or uncoated concrete. We had our tile installer friend (a good friend to have!) do a self-leveling skim coat on top of the concrete to make everything smooth and give us a nice surface to work on.

As with any floor, the hard work is in the prep, and it's important to make sure that everything is square. Using a chalkline, we mapped out the center, perpendicular lines and a starting line for our first row that was based off the centerline, not the wall (there isn't a straight wall in this house).

From there it's just a matter of rolling on the adhesive, letting it dry clear (it took about an hour with a fan blowing on it in our cool basement), and then sticking on the cork. In order to avoid stepping on the adhesive, the first few sections, each about 3 feet wide, took a bit of time. The first row is the most important, so we took a lot of time lining it up with chalkline and a square, making sure to not allow it to touch the floor until we were ready for it to stick.

Line up the inside corner of the tile first, then the long edge, followed by the short edge and lastly the freestanding corner. I applied firm pressure for a nice tight seam.

It's important to line up one corner at a time and just lightly let it touch (if you have to pull it up you still can, albeit very carefully, so long as you don't press down) and then gradually get the other corners set. Set the next tile by butting it up right next to the first tile, again one corner at a time. The nice thing about the cork tiles is that they have some give, so you can really get nice tight joints by firmly butting up to the previous tile.


Pound the tiles with a rubber mallet to seal the adhesive. We paid special attention to edges and corners.

With the first row set, we made our way across the room, checking off each row on my cheat sheet, because it would have been easy to lose our place with the random stripe pattern. When a section was done, we pounded it down with a rubber mallet. I'm not going to lie: This was the only onerous party of the process. You have to pound the cork (not roll it) to seal the adhesive, and that's a lot of pounding. Bonus: You can skip your regular arm workout.

Use a drywall T-square, a solid cutting surface (NOT your floor!) and sharp utility blades to trim the cork tiles. We cut them upside down, but I don't think it matters. Way easier than the saw you'll need with just about any other kind of floor!

There's a few other tips and tricks we learned to installing cork flooring:

  • Unless your pattern requires them to be lined up, offset your seams.
  • Use a drywall T-square and a sharp utility knife (change the blade often) to cut cork. 
  • Take your time with the first few rows and then you can fly pretty quickly.
  • A scissors or utility knife also works for cutting around odd-shaped corners or obstructions.
  • Pull tiles from several boxes to account for any color variation.
If you look closely you'll see a bump where we failed to make sure the self leveler was completely smooth. 

There's one don't to share with you as well. Globus Cork is clear that the floor needs to be perfectly smooth before you lay the cork and in almost every spot it was. But there was one place where the self leveler didn't level very well and there was a bit of ridge. I meant to sand that area down, but I completely forgot about it, and now there is a raised spot visible through the cork. It's not a big deal and I doubt that anyone else will really see it, but it could have easily been avoided. So learn from me: Make sure you don't skip that step! Cork is a forgiving floor because it can handle a floor that slopes (don't try that with tile), but its flexibility also allow bumps under the tile to show.


After the floor is installed, a final coat of sealer goes over the top (the cork is already sealed, but this final coat helps seal the joints and make the cork even more durable). It was easy to apply with a foam roller but took a little longer to dry than we expected. The only problem with that was that we had to wait a little longer to show off our new floor!


I can't begin to explain the difference this floor makes in this space. But maybe I don't need to. I think the pictures speak for themselves. What you can't tell from the pictures is how much nicer it is down there. It's hard to explain, but it goes beyond just looks. It's warmer, quieter and cozier. And I really do think the stripes combined with the off-white paint on the walls and ceiling have made the room feel far more in proportion than before. Almost like it's magic. Yeah, let's go with that. It's magic. 


I'm (crazy enough to be) redoing the basement as part of the One Room Challenge. Check out the progress week by week here:
And make sure to check in on the hundreds of other guest participants and featured bloggers. Things are gonna get hairy from here on out!


Labels: , , , , , , ,

20 April 2017

ORC WEEK 3: CHA CHA CHANGES

Ah yes, Week 3 of the One Room Challenge. I remember this week from when I did this last year. It is when the panicking properly starts. Because right now it does not feel like I'm even remotely halfway through this basement project.

You can catch up on Week 1 and 2, but most of the work is happening on the computer. I've made a list of the items I need to purchase for this renovation and I've been working hard to check things off. That's ironic since I've mentioned on more than one occasion that this is a low-budget affair. But when you're doing a space for the first time—and that's really what this is as we just sort of stacked stuff down there before—there are a lot of things that you need to collect.

This is a pretty terrible photo, but it illustrates how we basically painted everything the same color, from the ceiling to the walls to the trim.

The biggest change in the space is also the simplest: paint. I'll never know what I was thinking when I decided to paint the walls down there raspberry and baby blue, but I'm far more in my comfort zone going with a cream color. We chose Benjamin Moore Mascarpone, which I've used for the trim and some of the walls in most of the rest of the house, for two reasons: 1. We had a lot of it left over from other projects so I didn't need to buy much, and 2. I just didn't have it in me to go through the whole "Which shade of off white should I pick?" thing. Honestly, it's a little warmer than I might have liked, and interestingly, the less expensive paint we went with for the walls, which we did have to buy, is far more yellow than the trim paint that we already had, even though they are all Benjamin Moore formulations, but it's OK.


I also changed out the door hardware from the bright, cheap gold to a more classic black. I originally decided on black accents in that space for the same reason I chose the paint color—ease—but I'm very happy with the decision. It's not just simple, not to mention black is often a less expensive finish than some others, it also works well with the space.

I chose these simple door knobs with a square rosette for the closet door and the louvered doors to the other half of the basement. (Here's an affiliate link for them.) Sidenote: Painting louvered doors is like visiting the seventh circle of hell and I don't recommend it.


And of course, my favorite bit so far is the industrial lights I made for less than half of what I could have purchased them for. It was a much easier project than I anticipated and I detailed the whole how-to here.

Next week is a big one: Floor time! I'm certain that more than anything a new floor is going to transform this space.


Make sure to check out the featured One Room Challenge participants as well as the hundreds of guest participants making huge changes to one room in their house in this crazy challenge.


Labels: , , , , , , ,

18 April 2017

HOW TO POT UP DAHLIAS FOR A JUMP ON SUMMER

It should come as no surprise to anyone who reads this blog or follows me on Facebook or Instagram that I have a dahlia addiction. This has been an ongoing problem and my collection seems to keep growing (although I continue to play with different methods of saving tubers from year to year and have yet to hit on one I am happy with).

I garden in zone 5b, but there's a lot more to it than than. Because we are about 500 feet from Lake Michigan, it is very slow to warm up here. In fact, it was a gorgeous weekend, but each morning at my house was foggy and overcast and it wasn't until later in the day that the sun was shining. On mornings like that, when I drive up the hill near our house, less than a quarter-mile away, every window in the car fogs up and I have to pull over to open up the windows and turn on the defrost until the car acclimates to the 20-degree (or more) temperature change). The air temperature at the top of the hill is about 70 degrees. The air temperature at the house struggles to reach 50 degrees, thanks to the influence of the enormous 40-degree lake we love to look at from the window.

That means that zones that are much cooler than ours are actually much warmer in spring (although we are warmer in fall and winter). It's a funny little microclimate, and a good reason why you really have to know your own garden and not rely on just the USDA hardiness zone map. But the practical application is that I can't plant things as early as many of my neighbors to the west and even north can.
'Cafe au Lait' dahlias are some of my favorites. They change color throughout the year. By autumn they were all lovely, buff and cream.  

And dahlias fall into that category. Dahlia tubers absolutely will not stand cold soil. Cold, wet soil is likely to make them rot in the hole, and spring in my garden adds up to a whole bunch of cold, wet, soil. That leaves me with two options: Wait until the soil is sufficiently warm to plant tubers in the garden, or get a head start on growing dahlias by potting them up for a bit.

There are pros and cons to each method.

The benefits of just waiting until the soil is warm enough to plant tubers directly into the ground probably start with it being easy. You plant them once and forget about it. But there are a lot of cons: You get a later start on the season so blooms will come later; it can be difficult to store tubers properly that long (especially if some that you buy have already sprouted); and it's easy to forget where you planted them in the garden and you may accidentally dig them up or plant something else too close.

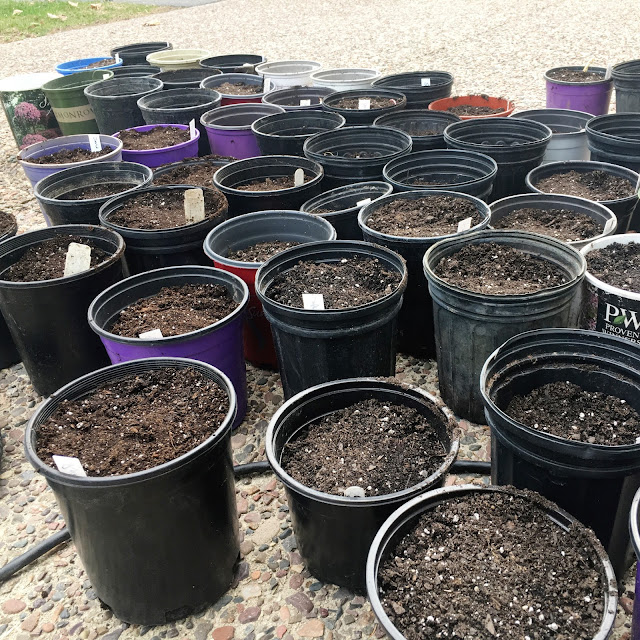
Planting in pots has obvious benefits that counteract most of those cons. You can get tubers out of storage sooner, get plants going so they have a healthy root system and good amount of top growth by the time they can be planted out, and you'll never forget where you planted one because you can see it. But that all comes at a price. You will need a lot of gallon-sized nursery pots (I save all my nursery pots for planting up dahlias and seedlings but did have to buy some to supplement my collection a few years ago), a lot of potting mix (I probably went through 3 cubic feet potting up my dahlias), and there's a lot more time in the planting and ongoing tending of the dahlias.

'Art Deco' gallery dahlia.

When you're as in love with dahlias as I am, the choice is pretty clear, but just planting them straight in the ground may work better for people with warmer springs.

You can see some of the dahlias I'm growing this year here.

Dahlia tubers all potted up. And no, I didn't count them. Some things are better left unknown.

Planting them in pots couldn't really be simpler. I just put a few inches of potting mix—I never use potting mixes with fertilizer added. It's like baking with unsalted butter to me; I like to control my ingredients—in the bottom of a gallon-size container, put in the tuber either on its side or pointed upward (you want the "neck" of the tuber where the eyes are pointed up) and then cover it up with more potting mix so the top of the tuber is buried at least a couple inches. I don't worry about filling the container all the way to the top with potting mix. Some tubers are smaller and don't need as much.

Then—and this is a step I learned from NOT doing it—label every pot. I know you think you'll remember that a grouping of pots all has the same kind of dahlia so you'll just label one and keep those together. That will not happen and you'll need to plant these well before you see any blooms. I finally broke down and bought a case of cheap plant labels so I will stop scrimping and forgetting what plant is what. Affiliate links at the bottom of the post will point you to those and some of the other products I like for potting dahlias.

Assuming that your potting mix is nicely moist, as it is when you open a fresh bag, there's no need to water tubers in pots right away. In fact all they need to get growing is warmth, so I just put them in bins or laundry baskets and bring them in the house. When shoots start appearing I'll water them and gradually move them outside to the temporary greenhouse. If you're potting up tubers that already have shoots, don't worry about them too much because they'll probably be heading off in odd directions. Just plant the tuber as above and cover the shoot, unless it's heading in the right direction and ends up above the level of the soil. In that case, I water the container and put it in a bright spot, usually in the greenhouse.

Then it's just a matter of giving your dahlias water and light as they grow until it's time to plant them out, which is usually the first or second week of June in my area, but depends entirely on the weather. Happy dahlia growing! Any questions, leave them in the comments.

Labels: ,

06 March 2017

PRESTO CHANGO POT TRANSFORMATION

When I set about doing this project, I planned on doing a long, involved tutorial on the blog. As it turns out, it was just about the easiest project I've ever done so no tutorial is needed.

Remember these pots I found on a super sale in fall at the Restoration Hardware outlet?


I knew when I bought them that the color wouldn't work at my house. I think it would be lovely in a lot of places, but they just look like big bananas in my yard. I searched the Internet unsuccessfully for a DIY solution for staining pots so I ended up just kind of winging it.

I sanded them lightly with 220-grit sandpaper and then I stained them with Minwax Classic Gray stain (affiliate link) (the half-pint container was enough for two pots). I tried out several combinations of Weathered Gray, Classic Gray and those with other colors mixed in and ended up liking plain old Classic Gray the best.

I used a saturated staining pad to quickly cover the pots, let them sit for a minute or two and then buffed them with a rag to remove any excess stain. I liked the color after one coat, but once it dried it was too light so I did another coat. But that coat didn't go on very evenly, so I ended up doing three coats.

After three coats of Minwax Classic Gray stain.
After they dried thoroughly, I ran the hose over them to see if the stain would wash out and it didn't. So that's all I'm going to do to them. I can't be sure how this will hold up but if some of the stain fades I'm OK with a mottled effect as well. In the end, they ended up a little darker than I had hoped, but I think it will be fine and it's much better than the original color.

'Windermere' starts as cream but fades to white and is said to have great fragrance.

The plan for these pots are a pair of 'Windermere' roses at the corner where the patio meets the driveway apron. I'll underplant them with annuals, especially for the first few years while they are getting established. I've had great luck with the 'Prairie Snowdrift' rose that I've been growing in a pot and overwintering in the unheated garage, so I'll treat these the same.

Until I get a chance to see how my stain job holds up I guess I can't really vouch for this method, but if it works it'll be about the easiest project I've done.


Labels: , ,

20 February 2017

HOW TO MAKE AN INDUSTRIAL LIGHT FIXTURE

You know what a bummer it is when you find something you really like only to discover you really don't want to spend that much money on it? That sort of sums up my search for lights in the basement, which, as you may recall, we are trying to do on a tight budget. At one point during my search for lights, which was all over the place as I couldn't decide what kind of "feel" I wanted down there, I found a simple but sharp industrial style light that I kept coming back to. At $130 plus shipping, it would have been in the budget had I only needed one, but it was a no-go when I needed three.


At some point during the process of falling in love with this light, I posted a picture of it on Instagram, to which my friend Eric from Gardenfork replied, "You know you can make that, right?" So I watched Eric's video on making an industrial pendant light and set to work sourcing the parts.

My Instagram post showing the $130 inspiration light that I recreated for $60. 


I had a sneaking suspicion that it probably wasn't that hard to make some light fixtures, but my concern was knowing what parts I needed. And since I would have to order most of them online, I didn't want to end up in a situation where I'd order things I didn't need or fail to order something important. Eric's video helped with that part and then I went to the Gardenfork Facebook discussion group (a group hosted by Eric for discussing DIY projects, gardening stuff, and tons more), posted the list of the parts I was planning to buy and asked someone who had a clue to check my list to make sure I had everything. Eric was nice enough to reply and I had to swap out one item, but from there it was off to the races. In the end, I was able to recreate the inspiration light for less than half the price!

The parts you need to make this light, clockwise from the left: Metal shade, brass shade fitter/clamp, nut, electrical wire, ceiling canopy, porcelain socket, threaded nipple. 

Here are the parts I ordered (links take you to where I ordered them from but there are lots of places to order these things from):

You can absolutely pick up the wire at at the hardware store but I threw it in the cart as long as I was ordering.

Other parts:
  • Threaded hollow nipple. We reused the ones from the old lights but we could have purchased them for 38 cents. 
  • A nut that fits that nipple (purchased locally)
  • A canopy "kit" if necessary. This includes the metal piece that stretches across the hole in the ceiling where the electrical comes out (maybe this is called a junction box, but the fact that I made these lights with no concept of what these parts are called ought to reassure you that you can do this) and bolts to screw into. Again, we were able to reuse the old parts from the previous fixtures. 
Onto the assembly. This is the part where I should warn you that electricity is dangerous, etc. but you already know that and, frankly, I made it through this alive so you probably will too. (I'm kidding. You will.*)
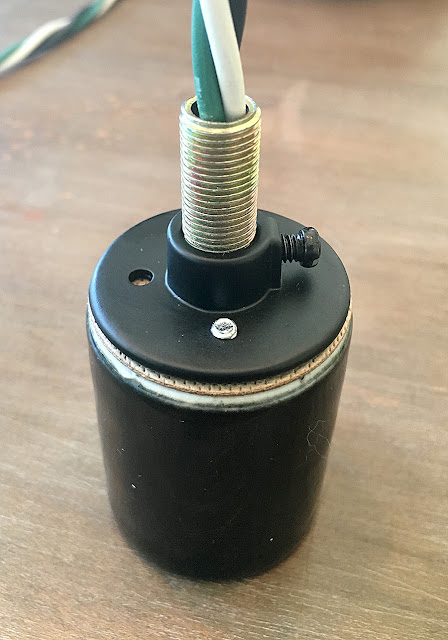
This is the bottom of the socket where the light bulb screws in. The only thing you need to worry about on this end is loosening the screws to allow the cap of the 

Start by unscrewing the cap from the socket. There are a bunch of screws in there so make sure to only unscrew the ones holding the cap on. 


Then use a wire strippers to take off about 1/4-inch of the plastic covering from the end of the hot (black) and neutral (white) wires and about a half-inch off the ground (green) wire.

Next, you have to attach the hot and neutral wires. Start by twisting the exposed ends of the wire and bending it into a 90-degree angle (just to make it easier to fit in the space. When you look in the socket, there will be a screw on either side of the green screw. Each is backed by a small plate, one in silver, one in brass. Attach light to light and dark to dark, so the black wire goes to the screw on with the brass plate and the white wire goes to the screw with the silver plate (it's hard to see in these photos but when you have the socket in front of you it's obvious). Unscrew the screw a few turns, slip the exposed wire under it and tighten. When you think it's snug, give it a little tug to make sure it's really in there. Do this for both wires.


Next, wrap the green ground wire around the green screw in the same fashion. This screw is larger, so you can make a hook with the wire and sort of wrap it around the screw before tightening.

Thread the nipple into the cap of the socket, tighten the set screw on the cap and feed your wires through it, working the cap down.


This next bit takes a little doing because there are a lot of wires to jam in that tiny socket, but work them down as best you can, then tighten the screws that hold the cap on firmly. 


When it's on it should look like this:


Now take a deep breath because you've done the hard bit. Next you want to feed the wires through the canopy and push the nipple through the hole (there will be no snickering, thank you very much).


Use a nut to secure the canopy tight to the socket.


Then attach the shade holder to the shade. It just slips on and you tighten the screws. Slide the socket in the top and tighten the top clamp screw to secure it. We actually did this after we wired the lights to the ceiling as it was easier to attach everything without the shade on. 


 Then wire it to the existing electrical box like you would any other light. Mount the canopy onto the metal holder on the junction box to secure the light to the ceiling.

And that's it ... a light that, as far as I can tell, is identical to one you can buy, except mine cost $60 and the inspiration light was $130.

Here's the inspiration:

 And here's mine:


* But if you don't, don't blame me.


Labels: , , ,

21 December 2016

HOW TO TIE A BEAUTIFUL RIBBON

When Mr. Much More Patient proposed to me, the ring came in a perfectly wrapped box (done at the jewelry store) that sat flat on the table. After we got through the whole "Yes!" bit, I went back and examined that wrapping, which was done without tape, just a perfectly cut square of paper and that beautiful red ribbon. I couldn't for the life of me figure out how they got ribbon on all four sides of the box without the annoying bump caused by the criss-cross on the boom, so I studied it until I figured it out. And I've been tying ribbon like that ever since.

This is particularly good for small packages and large ribbons, all of which look silly sitting catty whampus with that big lump under them. Once you get the hang of it, I guarantee you'll like how your packages look much more than the old way.

I should note, I picked the worst possible paper to do this with. Gold foil does not photograph well. Sorry about that.

So here's the problem with the old way. Gifts never sit right because of the crossing ribbon in the back. 


And here's what the back looks like.


To tie it so you don't have those problems, you want to start with the box in the opposite orientation that you will want the bow to lay. I want the bow to lay horizontal on this box, so I'm working with it in a vertical orientation.

With the ribbon still attached to the roll, measure out roughly how long you will want half of the bow and tail to be. In the photo below, my finger is at the mid-point and the ribbon below it is what I've allotted for that side of the bow and tail.


Wrap the other end of the ribbon (the part still attached to the roll) around the underside of the box and bring it back to the middle in the front. At the midpoint, twist the two ribbon ends a half twist so they cross over each other and end up perpendicular to the ribbon already wrapped around the box.


Wrap the end still attached to the roll around the underside of the box and bring it back to the middle. At this point you will have ribbon wrapped around each side of the box and you will be able to cut the ribbon to the same length as the original tail you measured. Here's were it gets a little tricky. Maintaining tension on the twist, slide the just-cut end of the ribbon (in the photo below it's the ribbon coming from the right side of the box), under the ribbon on the top of the box.


Once you pull that snug, tie a simple overhand knot with the other ribbon tail. Everything will be held nicely in place at this point.


Now you'll tie the bow. If you learned to tie your shoes using the "bunny ears" method, that's what you want to do here. For those not from the bunny ears school of shoe tying, you want to make loops with each hand, like I'm doing with my left hand below. When you have two loops, take the entire loop in your right hand over the left-hand loop and through, then gently pull tight. As you pull, you'll notice the bow wants to twist a bit. It will lay nice and flat laying one direction (in this case that will be horizontally). Don't fight it because it will never lay right. 


When you flip it over, you'll see that the back is as lovely as the front and that the box will sit flat.


 Flip it over, trim your tails to the desired length and you're all done. Voila!


Labels: , , , ,