The Impatient Gardener

05 May 2017

ORC WEEK 5: MORE TIME, PLEASE!

This is the part of this six-week challenge where I've come to the full realization that there will be no major reveal in a week. Not a complete one anyway. This has been a frustrating project in that regard because nothing is seeming to come easily. I would guess this is more typical of most projects people do than when we redid our bathroom last spring. In that case, the decisions just flowed.

Part of the problem is that my brain is taking me to the garden, not to the Internet to look, seemingly endlessly, for the right area rug (now rugs). Never before have I wished more for an interior design friend who I could hand the reins over to.

In fact, there's been basically no progress on the room since last week. I'm still in shopping/decision-making mode, which I suppose should have been doing somewhere around Week One. Choosing items that work is much harder when you're trying (not very successfully, I might add) to stick to pretty tight budget.

This is what we'll use for the desk light. Unfortunately it came with a broken switch so we're waiting for a replacement to arrive.
There have been some missteps. Cushions that I ordered for the existing wicker chairs came and they were far too small. I decided the existing curtains are not going to work. A light came with a broken switch.

The good news is that we've been able to move Mr. Much More Patient's desk back into the space so he can get back to working properly.

The biggest decision I've been struggling with is that of rugs. Although I like the sort of muted-but-warm color palette that the fixed elements have in that room, I feel like a basement needs to go to great lengths to feel warm, so I'm looking at very vibrant area rugs. You gotta love a little rudimentary Photoshop work for such things.

This rug, a vintage one I found on ebay, is my favorite. Unfortunately it was a bit more than I wanted to spend and had not been cleaned. I figured by the time I had it cleaned it would be way out of my price range.

I've been playing around with other "faux vintage" rugs that are much more affordable, but I can't decide if I should go more towards pink or orange.
I did make one rug-related decision that I'm really happy about. I got this rug for the stairs to use as a runner. So good news: I love it. Bad news, that's a big project because I'll have to pull off the existing carpet (ew) and patch and paint the stairs before that can happen. See, this is why these projects are supposed to happen in winter!
The stairs to the basement are narrow so a typical runner wouldn't work. Instead I ordered several 2x3 rugs that I'll use for the stairs. 

This room will be finished and look great at some point, but I'm just giving you the head's up, next week's big reveal may be less than revealing. Such is life in the land of real DIY.

For better or worse, I'm redoing this room as part of the one room challenge. Make sure you check out the other guest participants (who, presumably, have made better progress than I have.)
And check out previous weeks in this project in case you've missed them:


Labels: , , , ,

20 February 2017

HOW TO MAKE AN INDUSTRIAL LIGHT FIXTURE

You know what a bummer it is when you find something you really like only to discover you really don't want to spend that much money on it? That sort of sums up my search for lights in the basement, which, as you may recall, we are trying to do on a tight budget. At one point during my search for lights, which was all over the place as I couldn't decide what kind of "feel" I wanted down there, I found a simple but sharp industrial style light that I kept coming back to. At $130 plus shipping, it would have been in the budget had I only needed one, but it was a no-go when I needed three.


At some point during the process of falling in love with this light, I posted a picture of it on Instagram, to which my friend Eric from Gardenfork replied, "You know you can make that, right?" So I watched Eric's video on making an industrial pendant light and set to work sourcing the parts.

My Instagram post showing the $130 inspiration light that I recreated for $60. 


I had a sneaking suspicion that it probably wasn't that hard to make some light fixtures, but my concern was knowing what parts I needed. And since I would have to order most of them online, I didn't want to end up in a situation where I'd order things I didn't need or fail to order something important. Eric's video helped with that part and then I went to the Gardenfork Facebook discussion group (a group hosted by Eric for discussing DIY projects, gardening stuff, and tons more), posted the list of the parts I was planning to buy and asked someone who had a clue to check my list to make sure I had everything. Eric was nice enough to reply and I had to swap out one item, but from there it was off to the races. In the end, I was able to recreate the inspiration light for less than half the price!

The parts you need to make this light, clockwise from the left: Metal shade, brass shade fitter/clamp, nut, electrical wire, ceiling canopy, porcelain socket, threaded nipple. 

Here are the parts I ordered (links take you to where I ordered them from but there are lots of places to order these things from):

You can absolutely pick up the wire at at the hardware store but I threw it in the cart as long as I was ordering.

Other parts:
  • Threaded hollow nipple. We reused the ones from the old lights but we could have purchased them for 38 cents. 
  • A nut that fits that nipple (purchased locally)
  • A canopy "kit" if necessary. This includes the metal piece that stretches across the hole in the ceiling where the electrical comes out (maybe this is called a junction box, but the fact that I made these lights with no concept of what these parts are called ought to reassure you that you can do this) and bolts to screw into. Again, we were able to reuse the old parts from the previous fixtures. 
Onto the assembly. This is the part where I should warn you that electricity is dangerous, etc. but you already know that and, frankly, I made it through this alive so you probably will too. (I'm kidding. You will.*)
This is the bottom of the socket where the light bulb screws in. The only thing you need to worry about on this end is loosening the screws to allow the cap of the 

Start by unscrewing the cap from the socket. There are a bunch of screws in there so make sure to only unscrew the ones holding the cap on. 


Then use a wire strippers to take off about 1/4-inch of the plastic covering from the end of the hot (black) and neutral (white) wires and about a half-inch off the ground (green) wire.

Next, you have to attach the hot and neutral wires. Start by twisting the exposed ends of the wire and bending it into a 90-degree angle (just to make it easier to fit in the space. When you look in the socket, there will be a screw on either side of the green screw. Each is backed by a small plate, one in silver, one in brass. Attach light to light and dark to dark, so the black wire goes to the screw on with the brass plate and the white wire goes to the screw with the silver plate (it's hard to see in these photos but when you have the socket in front of you it's obvious). Unscrew the screw a few turns, slip the exposed wire under it and tighten. When you think it's snug, give it a little tug to make sure it's really in there. Do this for both wires.


Next, wrap the green ground wire around the green screw in the same fashion. This screw is larger, so you can make a hook with the wire and sort of wrap it around the screw before tightening.

Thread the nipple into the cap of the socket, tighten the set screw on the cap and feed your wires through it, working the cap down.


This next bit takes a little doing because there are a lot of wires to jam in that tiny socket, but work them down as best you can, then tighten the screws that hold the cap on firmly. 


When it's on it should look like this:


Now take a deep breath because you've done the hard bit. Next you want to feed the wires through the canopy and push the nipple through the hole (there will be no snickering, thank you very much).


Use a nut to secure the canopy tight to the socket.


Then attach the shade holder to the shade. It just slips on and you tighten the screws. Slide the socket in the top and tighten the top clamp screw to secure it. We actually did this after we wired the lights to the ceiling as it was easier to attach everything without the shade on. 


 Then wire it to the existing electrical box like you would any other light. Mount the canopy onto the metal holder on the junction box to secure the light to the ceiling.

And that's it ... a light that, as far as I can tell, is identical to one you can buy, except mine cost $60 and the inspiration light was $130.

Here's the inspiration:

 And here's mine:


* But if you don't, don't blame me.


Labels: , , ,

05 October 2016

A BEFORE AND AFTER 3 YEARS IN THE MAKING

I'm not one to draw projects out. When I get set on doing something I like to focus on it like a laser and pound it out until it's finished. I'd rather wait until I can do all of it exactly the way I want to than take it by bits and pieces or settle for something I don't really love because what I really, really want isn't in the budget at that time.

But for various reasons, that approach wouldn't have worked when it came to dealing with our garage. Never a very good looking building, we toyed with the idea of tearing it down completely for a time. But when it became clear that really wasn't in the budget, we set to improving it little by little over the past few years.

Last week we put what is hopefully the last major finishing touch on the garage that has helped take it from a pretty pathetic looking structure that you'd be hesitant to park your car in, to something that I think looks far more charming than it really is.

October 2013
 

It all started three years ago almost to the day when out of seemingly nowhere, I decided I was sick of looking at a wreck of a garage, especially after we did so much work to renovate the house.

April 2014

The following spring very little progress had been made, but I satisfied my urge to do well, anything, by painting the door Benjamin Moore Wythe Blue, a color I'd been dying to use somewhere.

Later that spring we had the garage reroofed (which I can find no photos of) and that helped the look of the whole thing tremendously. We also got the driveway paved, which wasn't really on my radar but was something that Mr. Much Patient had pushed for for a long time (and in retrospect it was a good call).

July 2014

A few months later we hired a painter to paint the garage. At first I wasn't sure I loved the color (Benjamin Moore Ozark Shadows with Simply White trim), but you great blog readers encouraged me to live with it a little and that's a good thing because now I quite like it. At this point I was feeling like it was looking much better but still a bit plain.

July 2014

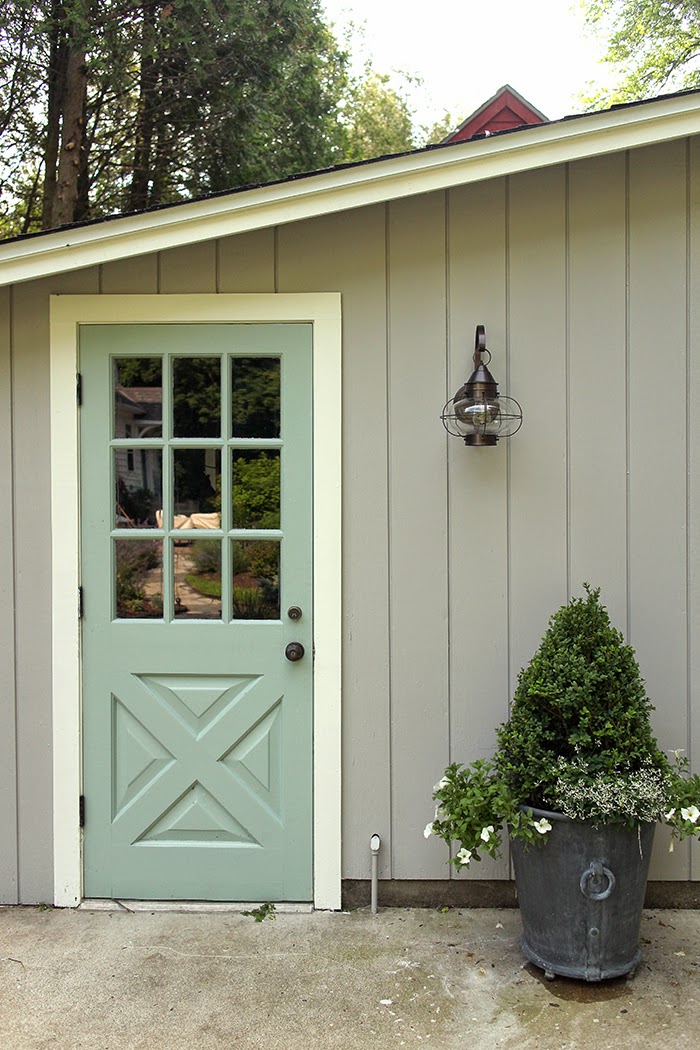
Then we stuck a new light on it. A really small change but certainly another little improvement.

April 2015

It sat like that for several months until the following spring when we built a small pergola on it to match the pergola on our deck. Of course Mr. Much More Patient still doesn't understand what the point of it is (answer: to look pretty, obviously), but I love it.

July 2015

Later last summer I decided that the Wythe Blue was never really right and I repainted the door Benjamin Moore New York State of Mind. Ah ... that's much better.

July 2016

This spring I bought a new planter for near the garage and slid the boxwood between the doors.


And then last week we finally did what I've been waiting ages for: We replaced those ugly, dented garage doors. I'll write a full post about that process (we did not install them ourselves) soon. For now, I'm just basking in the beauty of a garage that somehow went from pretty horrible, to pretty darn good. Fixing it up over three years never would have been my choice, but it actually worked out OK, and by spreading the cost over several years it doesn't seem like nearly such a big hit.

It's funny, since it took so long to get to this point it doesn't feel like it really changed that much, but check out this before and after.


Yep, that looks just a little better. And having two garage doors that work isn't so bad either.

Labels: , , , , , ,

15 February 2016

ALMOST PERFECT + SPRAY PAINT = LIGHT LOVE

There are times when you wonder what someone was thinking when they decided to make something one way or the other. I now believe that this is exactly why spray paint was invented.

I ordered this pretty light for the office / back room (heretofore just called the office even though there's really not that much work that happens back there, but this slash thing is getting annoying). Yes, the ceilings are low (well, 8 feet, which I guess is normal, but it's normal low, not normal high) and I've since read 40,000 designer blog posts about how I really should have a flush mount light there, but I didn't want a flush mount light. I wanted a pretty pendant light to be a fun dash of pizazz in the room.
Pretty light but bad canopy and chain color.

Lighting is one of those things where you can spent $10 or $1,000 and in the end you still have something that illuminates your room. It's just that the $10 looks like a boob and the $1,000 is a work of art. Most of us choose lights that fall somewhere in between. In this case, I was closer to $10 than $1,000 but still at a level I was somewhat uncomfortable spending for a light, even after finding a pretty good coupon. But when that light arrived I was smitten. Until I pulled the canopy and chain out of the box. Because while the light is scalloped-shaped bits of heaven (OK, capiz shells) finely lined in 14-karat gold (not 14-karat gold), the chain and canopy were spray painted a hideous shade of orange that I think was supposed to replicate copper but didn't in any way, shape or form replicate copper or any other actual metal.

There was also a pressing design issue with the chain: There was no way to shorten it. We tried to cut open a link, remove the excess links and close it back up again, but there was no way that sucker was going to go back together. Since by this point I realized that we were going to have to repaint the chain and canopy, we picked up a stainless steel openable chain link that twists shut and used that to make the connection where we had cut off the chain.

My mini spray booth setup and the canopy and chain in all its orange coppery glory.
The cutest can of spray paint ever.
And after a few coats of spray paint.

I scuffed up the canopy with a little bit of sandpaper, cleaned it well, rigged up a mini spray booth in the box the light was shipped in and went to town with a very cute mini can of gold spray paint.

Three coats later and all was forgiven.

The now-improved light looking great.
You can see the twist-close link we added to the top and the spiffy new gold color that matches the rest of the light perfectly.
Yes, it irritates me that you can pay not a little bit of money for a light and still have to fix it yourself, but I love it so much that I would have ordered it anyway even if I knew that ahead of time. I've come a long way. Years ago I would have sent that light back because if something was new it was supposed to be perfect. These days, I just get out the spray paint.

Here are some other random things I've spray painted over the years.

So what about you: Are you willing to make modifications to something new but not perfect?


Labels: , , ,

02 November 2015

GREAT LIGHTING FINDS IN AN UNLIKELY PLACE

I've been trying to source things for our potential bathroom remodel as I make a budget for it and over the weekend I came to the line on my spreadsheet for lighting. I started looking around in all the usual online places, trying to stay mostly in the huge lighting Internet superstores and away from Circa Lighting, where I know I'll fall in love with something that's more than I want to spend.

And then I popped over on Etsy and I couldn't believe all the great lighting there now. Between excellent vintage finds (so many popular lighting styles are vintage these days so why not buy an original for less if you can) and really creative handmade lights (that you can usually have customized if you need to) at pretty amazing prices, I spent hours poring through all the amazing options. Plus, I sort of love the idea of supporting small business owners. 

Here's some of what I found.

Do you see anything that strikes your fancy? I'll be honest, there are a couple vintage lights that I didn't include on there because I'm thinking of picking them up for the bathroom and I don't want someone to snag them first! I didn't include any sputnik fixtures or too many bare Edison bulb fixtures, but Etsy is loaded with them, so if you're looking for something like that, I'd start there.


Labels: , , ,

16 July 2014

PUTTING A LITTLE LIGHT ON EXTERIOR LIGHT SHOPPING

One of the things I particularly enjoy shopping for (other than plants or anything garden related) is lighting. It can also be exhausting because of the mind-boggling amount of options, but in general I find the search for lighting to be pretty fun.

I was happy to have the chance to look for a new light for the garage. We could have kept the old one as there was nothing wrong with it, but it really didn't relate in any way to anything else going on with the house or the garage. My search started at Home Depot, where the selection in the store was tiny compared to what I saw on their website. I didn't care for any of the in-store options so my search went online.

I was looking for a sconce with a slightly rustic or nautical vibe, preferably in a copper or bronze color (to coordinate with the exterior lights on the house). We also did not want to move the location of the light, which to my eye, is a little odd. It seems a little too far from the door and a tad too low. The height was a problem because it meant that we couldn't have anything that hung down, which meant that my original thought of a barn light was off the table.

Here are some of the options we considered.


Link

This is actually the same light we have by the back door on the house.

Liked it a lot, but it doesn't come in other finishes.

Link

Cool but eek on the price!
This next bunch all falls in the onion light category and once you get there the options are all over the place in terms of size, finish and construction. There are bespoke onion lights (guaranteed for life) but I kept the options in the production realm to keep the cost down.

Round


Squishier

Not round or squishy
My favorite of the three onion lights was the last, sort of amusingly called the Vidalia. I thought it was a good compromise between too squishy and too round and I also liked the square mounting plate on it. It had the option of using seedy glass as well, and I love seedy glass on outdoor lights for some reason. Unfortunately it also was almost $400 while the squishy one (call the Cottage Onion) was only $140. For a light that will rarely be seen close up, it would be hard for me to justify spending so much more for relatively small differences and clearly they both have the same vibe.

So we went cheap (well cheaper; it's still more than I had planned on spending) and squishy. Once I started looking at the onion lights I really loved them and the other options became distant memories.


Have you added any new lighting lately? Do you enjoy shopping for lighting or do you find it to be an onerous task?

Bonus points: Can you spot the difference in the boxwood container in those two photos? Yep, different plants. I have fiber optic grass on one side and 'Diamond Frost' Euphorbia on the other side and I try to rotate the container every couple of days to make sure the boxwood grows evenly.

Labels: , ,