The Impatient Gardener: August 2010

30 August 2010

We apologize for the interruption

If you're not following The Impatient Gardener on Facebook you're probably wondering what the deal with not posting the second half of the table re-do is.

Well, here's the ugly truth: Thursday night I was enjoying a glass of wine while doing a bit of computing and the next thing I knew, the glass of wine and the computer were one. It was a direct hit with a full glass of wine.

I do not recommend trying this at home. The sad news is that the computer is shot. Well, it's repairable, but the cost to fix it is almost the same as the cost of a new one.

So things are just a little delayed right now. I promise to get the second half of the table re-do, and many other posts I've been working on as soon as possible.

26 August 2010

How to turn an OK table into the perfect table: Part 1

When we started on the mini-kitchen redo last fall, I knew two things: I wanted a banquette and table that would allow us to easily slide in and out. That meant I was looking for either a pedestal or trestle style and after looking at what seemed like thousands of photos of tables online, I knew a trestle was just up my alley.

Photobucket
isn't she a beauty? Restoration Hardware photo


What I REALLY wanted was something distressed looking, like this Restoration Hardware table. What I didn't want is to pay a lot of money for a table.

You might recall that I ended up finding this Camden Table at the Restoration Hardware Outlet, with one smashed in corner and a hefty chunk off the sticker price (plus, RH had its annual Friends and Family sale going on for an additional 20 percent off).

Photobucket
Love the shape, hate the color ... and oh yeah, there's that bashed in corner to deal with.


In addition to the damaged corner, there were other problems: the table was too long and all the wrong color. Ordinarily I wouldn't be comfortable buying something new and changing it drastically. It just feels wrong to me ... like the only things you should really attempt that kind of makeover on are things you find on the side of the road, in your grandma's basement or at Goodwill. But it became clear to me that I was never going to find the right table for the space at any kind of affordable price.

My husband prefers to stay out of these more complicated DIY endeavors, partly because he's a perfectionist (and I'm not) and partly because he knows that I tend to become obsessed with these projects, staying up to all hours to finish them until I'm  happy with them. I can't really blame him.

But this one was way above my DIY pay grade. And it involved power tools that have the capacity to cut off important body parts. So he got involved, if only to make sure we didn't spend the money we'd saved on the table on some sort of emergency hand re-attachment surgery. (For the record, one person in our house has mangled a finger in a saw, and it's not me. I'm just sayin'.)

Photobucket
The green tape was my attempt at figuring out how much needed to be cut off the ends.


Originally the plan was to just cut off and equal amount of table from each end to make it fit the space. This would also cut off the damaged corner. But then it became clear to me that that wouldn't work. In order to allow people to sit at the ends of the table (an important aspect of this table because part of the reason we started this mini renovation of the eat-in area was to be able to seat more than four people at once), there needed to be at least one foot of table overhanging the leg.

Photobucket

Photobucket
Here you can see the original holes where the leg was attached and our process of drilling new holes farther in.

It became obvious we were going to have to move one of the legs and shorten the trestle, then cut off just one end of the table to make it the right length. I wish I could give you instructions on how to properly cut the trestle part, because it involved a mortise and tenon joint, but all I can tell you is that he took it to his dad's house where he used some tools (let's call it a bandsaw) and it came home the right length. Then we drilled holes in the bottom of the table to the same depth as the existing holes (we measured the depth on the drill and put tape around it so we would know how deep to drill) and glued in these cool little threaded inserts. Then we just bolted the leg back in its new place.

Photobucket
To cut off the table we flipped it over and taped the line where we would cut it. Then, using a square to make sure we had a square cut, we clamped the metal ruler in to act as a guide for the circular saw, outfitted with a new blade with the finest teeth we could find at the hardware store.


At this point, you're probably wondering why we did all this construction in the middle of our kitchen. It's a fair question and the answer is pretty simple: That table was the heaviest piece of furniture I've ever moved. The legs and the trestle were no problem, but the top of that table was crazy heavy. Definitely a hernia-giver. So we just opted to move it as little as possible. Also, it was winter, so it's not like we could just move it out the door and work on it right there.

Meanwhile, we cut off the end of the table. Since this is a veneered table, we flipped it over to cut on the underside, and we used painter's tape where we would cut, to make sure the veneer didn't crack or rip on the edges. We also bought a new blade for the circular saw with the largest number of teeth we could find. We wanted a very fine cut. We practiced on the first cut, cutting off only half of the total amount we wanted taken off. This served two purposes: testing to make sure our method would cut the table without destroying it and giving me a sample portion of table to sample finishes on. With the first cut going off as planned, we used a thick metal ruler clamped on as a guide, and cut on our tape line again. Whew. Done.

I lightly sanded the now bare edge of the table and attached some iron-on oak veneer (purchased at Home Depot). And then it was time to do something about the color of that table.

Here's part 2!

Labels: ,

24 August 2010

The big move

Photobucket

Nope, not a move for us, but for a good friend. This Blue Angel hosta was the first plant I planted here, seven years ago. It has performed beautifully here, where it anchored a corner of the garden. I think a conservative estimate of its size is 5 and a half feet wide. My neighbor says it's the one plant he always admires from his kitchen window (and his house isn't very close to ours).

But this part of the garden will be right next to the new deck, so not only does it need to be reoriented so the tall plants are on the other side, it will also be trampled while they are working on the deck. I'm working on pulling out all the plants that I love, but I will construct some sort of massive cage around the Japanese maple 'Orangeola' which I don't want to even think about moving since it is finally starting to grow a little bit.

Since it was the first plant I planted here, it's somewhat fitting that it was the first plant I moved out for the remodel. I had a nice area suitable for part shade plants so many of them were heeled in there. I suspect they will all spend the winter there as I don't think there will be time to recreate garden beds and move things in fall once the construction is done.

This would have been an opportune time to divide this massive hosta, but I'll be honest: I like it big. I didn't want to divide it and then have to wait years for it reach the same size it is now, so my goal was to move it in one piece.

That is no small undertaking. Fortunately the person who runs the Yahoo plant buying co-op that I'm a member of is a hostaholic so I knew just who to ask about how to move my beloved hosta with the smallest risk of doing major damage. She referred me to this tutorial.

Photobucket

Yeah. Easier said than done. This is one of those projects that really requires two people. But I just had me, a cat, two Newfoundlands and a black lab (staying with us for the weekend), and none of the last four were any help (except for the houseguest Stella who was nice enough to pose with the hosta for scale. Newfoundlands are no good for showing scale because they are unusually huge). So somehow I had to figure out how to wrap a line around that sucker when I couldn't even reach halfway around it.

Photobucket

Eventually I tied a bowline in one end of the line (everybody knows how to tie a bowline, right? What? You don't? If you can tie a bowline and a square knot you're set for life. If you throw in a clove hitch you're really going places. Anybody want a knot-tying tutorial for a complete departure from all this gardening/house stuff?) and fed the other end through it cinch up the plant, then took a few more turns around the plant and tied it off with a half hitch (OK, that's a good one to know too, but you probably already know it but you just don't know you know).

Photobucket

The tutorial said that the next step was to wrap it with masking tape. But I couldn't find any masking tape, even though I know there is a roll lurking in this house somewhere (the junk drawer eats tape and tape measures, it seems), so I broke out the painters tape.

Photobucket

The I took a break because, well, that was all incredibly frustrating to accomplish. When I was ready to move on, I dug the hole in the new spot. Then I came back and started digging it out. I tried to keep as big a root ball as possible on it but frankly I was just happy to be making progress. When I had gone all around the plant with the shovel and sort of pried/lifted it out. I slid a tarp in there and dragged that sucker onto the tarp by the rootball. Then I dragged it to the other side of the yard. Here's where I'm going to offer a suggestion not mentioned in the tutorial I linked to: Pick up the dog poop before you do this.

Photobucket

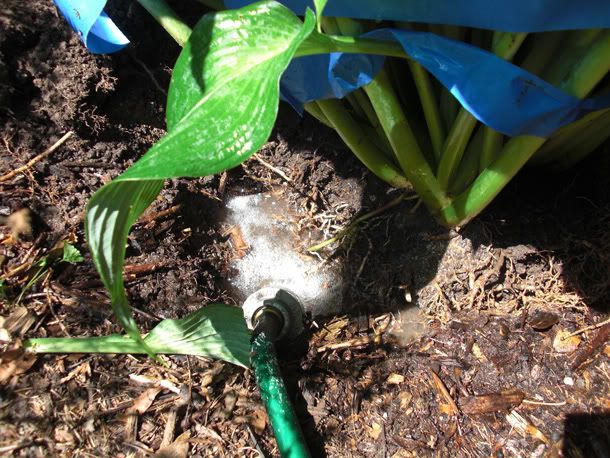
Then I dragged it into the new hole, and filled up the hole with water. After that had a chance to soak in (which didn't take long in the sandy soil in this area), I backfilled the hole with dirt and watered some more. I took the line off but left the tape to help support the leaves. Apparently the tape will fall off naturally "when it's time." The trick now is to keep it well watered while it's acclimating to its new home.

Photobucket

Then I repeated the process with a Paradigm hosta and a Nikko Blue hydrangea and five big pulmonarias. I'll dig out a couple other special plants in that garden, but the purple coneflowers and black-eyed Susans are on their own. They'll live or die, but they'll have to fight for it!

I'll keep you informed on this special hosta's progress.

Labels: ,

18 August 2010

Chair obsession

Photobucket

Thank goodness for cameras on phones, right? Since I don't always walk around with a camera but I almost always have my phone with me, it's so nice to be able to snap a shot of something great, even if people are staring at you for taking a picture of a chair.

That's what happened in the case of this chair, which was sitting in the lobby of the Hotel Iroquois restaurant on Mackinac Island. We were waiting to be seated and I saw this chair, this gorgeous mouth-watering chair, against the wall.

Click.

Part of the reason it's so amazing, I think, is because the beadboard walls are painted a light sky blue, which is picked up in the stripe on the seat, and of course orange and blue are complimentary colors so you know things are going to pop when those two are involved.

I'm definitely in a light blue and orange phase right now (and that's the plan for the new master bedroom when it comes time to worry about the pretty parts) I am now obsessed with this chair. I must find one similar to it to paint a great bright orange color and recover the seat.

What do you think? Better to leave the orange chairs to restaurants or do they have a place in a house?

Labels: ,

16 August 2010

A summer's worth of window box

I added a window box under the kitchen windows this summer and I just love it. Our all-white house really needed a shot of color and interest and the window box was just the ticket. But as you know, containers change through the season. I thought it would be interesting to look back and see how the window box has changed through the summer.

June 1

Photobucket

June 28

Photobucket


July 11

Photobucket
 
 
August 10

Photobucket

You can see that things have really started to fade with the heat of summer. I didn't realize just how shabby it was looking until I compared these photos. I'm looking forward to changing out the plants throughout the season, but I'm not quite ready to jump into a slightly more autumn-ish look so I'll just deal with what's there for now and try giving everything a good prune to see if I can't convince things to get going again.

Here are the plants I used:  Calibrachoa 'Superbells Blue,' Calibracho 'Superbells White,' Fiber Optic grass, Lobelia 'Lucia Dark Blue,' creeping jenny (from the garden), Angelonia 'Angelface Blue,' Angelonia 'Angelface Pink,' pink Pelagornium (geranium), lime green Nicotiana and Verbena 'Superbena Royal Chambray.'

Labels: ,

12 August 2010

Construction update No. 1

I'm not sure it's right to even call it a construction update, since no construction has technically begun, but it's all related, right?

Here's the background: If you're new to the blog the deal is that we are about to embark on a partial renovation of our house. We'll (and I don't literally mean "we" because all "we" will be doing is standing there with our jaws on the ground as we rack up a big loan) be removing the roof over the half of the house with two levels, raising it, adding a shed dormer to create more useable space upstairs, adding a bathroom, adding a deck with a pergola and putting in a sliding door to access the deck.

Our contractor is working on acquiring the permits and last week he had to mark off the area where the deck will be so that the county could come out and sign off on the plan. Since I'm such a visual person it was so helpful to see where the deck would be.

Photobucket
The plans for the east side of the house show the deck (the stairs coming off it will be widened to be closer to the width of the doors) and pergola.

We were afraid the deck may be too big and take up too much of the back yard, so we had our designer draw up a smaller version of the deck as well. The contractor laid out the larger version for the county's approval and I think it will be just fine. Any smaller could feel a bit cramped once we get a table and chairs up there.

Photobucket

The window you see, which is located in our den-type room (when we moved in it was the master bedroom but we preferred the bedroom upstairs), will be removed and sliding glass doors will be put in. The deck will start about 18 inches under the bottom of that window, so it will be quite high as the back yard slopes down. Good landscaping is going to be key.

Photobucket

Aren't you glad that I pulled a bunch of weeds and left them there for the photo? I guess we're all about real life here at The Impatient Gardener.

Other construction-related posts:
Choosing tile for the bathroom

Labels: ,

11 August 2010

Driftwood turned decor

I've been walking past driftwood my whole life.

I couldn't begin to add up how many walks on the shore of Lake Michigan I've taken over the course of my life, but an average of two per week since I was about 5 equals about ... well, a lot. And until about four years ago I probably never picked up a piece of driftwood.

And then I started to see interesting shapes in pieces of wood. I dragged home one that I called "The Diver" and it became a holder for our house numbers at the end of our driveway.

Photobucket

Two pieces have ended up as garden art.

And I continue to be inspired by all the creative things people do with driftwood.

Check out this post and this post from Completely Coastal to see what I'm talking about. Even West Elm is selling driftwood artwork. Or you can go to Pottery Barn and pick up a driftwood mirror.

I'll be honest: It kind of kills me that the stuff I've been walking by all these years is now for sale at Pottery Barn.

So earlier this year I started picking up little bits of driftwood instead of just looking at the big pieces (best found in spring after the winter storms wash up the big stuff on the beach). Every time I go to the beach I pick up a few interesting, small pieces of driftwood. I guess I'm collecting them in case I decide I want to make something out of them someday (and I love the idea of mobiles and frames made of the stuff). But what does one do with these things while they are collecting it? I just grabbed a cheap hurricane vase and threw in there.

Photobucket

But guess what? I'm starting to kind of like this driftwood-turned art/collection thing going on. And judging from people's reaction to it, so do some other people. Sometimes when people come over they like to pull out pieces and look at them closer and pick their favorites or have a discussion about what they think it looks like (driftwood tends to be cool that way; like clouds people "see" different things in a piece of driftwood).

This is may be the world's most interesting "tablescape," but it's a conversation piece.

Photobucket

Labels: ,

10 August 2010

Want more? You got it.

Hi gang. First of all, thank you so much for reading this blog. I hope you enjoy it and that it becomes one of your daily (OK, maybe not daily, but let's shoot for semi-weekly) reads.

There are a lot of little things that come up that I don't post about on the blog, though. These are things that don't really seem worthy of a full blog post at this time or are a little teaser for a future project, but are nonetheless interesting things I think you might like to know about. Anything that falls into those categories are things I'm posting on The Impatient Gardener Facebook page.

For instance, today I found a great tutorial on how to make your own roman shades. I'm thrilled about it, but until I really do make my own roman shades, I won't be posting about it here. When I find online contests, such as the one for a $50 Pottery Barn gift card that I posted the other day, I'm putting that on Facebook too.

All of the blog posts are also automatically posted there as well so if it's easier to follow there, you won't miss any.

So if you're a Facebooking type, head over to The Impatient Gardener page and "like" the page. And then drop me a line or post on the page and let me know what you think. Also, if you have a blog with a Facebook page or have a blog post that you think The Impatient Gardener readers would like, let me know. That's great fodder for the Facebook page too.


(Click on the link above or the cute little Facebook icon on the right to link up with The Impatient Gardener page.)

09 August 2010

Free blooms to brighten the day

Photobucket

Lauren over at Pure Style Home encouraged everyone to create a free bouquet to brighten up their homes and it occurred to me that I also needed to do some pruning and might be able to kill two birds with one stone.

I have several baby hydrangeas growing in pots in the Pit of Despair. After listening to Tim Woods of Spring Meadows Nursery advise that the first year or two (or three) of a hydrangea's life should be spent paying attention to its form rather than waiting for blooms, I thought it was time for another pruning session with the little guys. And wouldn't you know it? Invicibelle Spirit was putting some some mini pink blooms.

I brought them inside, and put them on the kitchen window sill, which is so much more charming since I added the window box this spring and the flowers outside are always just on the other side of the window.

Lauren's right: It does brighten everything up a little.

06 August 2010

Red, orange and purple: A color combination to love?

If you had told me a few weeks ago that I was going to fall head over heels in love with a red, orange and purple hanging basket I would have laughed out loud. Purple and orange? Oh yeah ... love it. Red and purple? A little too Red Hat Society for me, but I can deal. Red and orange? Just makes me think of Heatmeiser. All three together?

Photobucket

Well hello, darling!

This beautiful container was one of dozens hanging on Main Street in Mackinac Island. You can see the one next to it was a much more subdued, but equally pretty, yellow and white number featuring Lobularia 'Snow Princess.' I liked it as well, but it didn't jump out and grab me like its neighbor did.

I like how there are just a few wisps of a grass peeking out the top, adding just a little bit of texture. I suspect the designer of this container intended that grass to flourish a little more, but I think just a hint of it is nice too.

I'm not positive about the plants in this container but I think the red flower is Supertunia Red, the orange is Superbells Tangerine Punch (it could also be just Tangerine, but Tangerine Punch has a red center that I think you can see in this container), and the purple is the great Supertunia Royal Velvet.

What do you think about this container? Too much color or a wonderful bold statement?

Labels: , ,

05 August 2010

Great garden design

There is nothing like visiting a great garden to give you a jolt of inspiration and one that I like to visit every year is the garden at the Hotel Iroquois on Mackinac Island, Michigan. Before I even thought much about gardens I remember falling in love with an entire garden of huge alliums growing here. I think it's what started my love affair with alliums.

I was particularly excited to visit the garden this year because it is now a Proven Winners Signature Garden. Since I'm familiar with and grow many Proven Winners plants, I was excited to see how they used them in the gardens at the Hotel Iroquois. They also have a brochure about the garden at the hotel's front desk which was very helpful for identifying varieties.

One of the things I love about this garden is that it is a small space packed with plants. It also does an excellent job of mixing perennials and annuals as well as shrubs and small trees. It is everything a mixed border should be. Looking over these photos again, one thing I'm noticing is that even though it's a small garden they still used a huge variety of plants. Maybe restraint is overrated after all.

This picture shows my favorite part of this garden: The undulating flagstone terracing. It is so inviting and a great way to show off more plants in a small garden.

Photobucket


Some people hate what they call "meatball" boxwoods but I love them and I love the way this one punctuates the wall.

Photobucket


Check out all the different kinds of plants in this one small area of the garden near the restaurant. They've used purple fountain grass, Papyrus 'King Tut' (my favorite new plant of the summer), and oodles of petunias (and their cousins) plus about six other plants.

Photobucket


Here's a closer look at another area. Check out the boxwood hedge behind the plantings. These hedges run throughout the garden providing excellent structure and continuity. The taller pink plant by the purple fountain grass is a newer, shorter cleome called 'Senorita Rosalita.'

Photobucket

Photobucket


This picture doesn't look the least bit impressive but that bloom is from Incrediball Hydrangea which, if you've been reading this blog at all, you know is a bit of an obsession of mine. It was the first Incrediball bloom I've seen in real life and it was HUGE. And best yet, no flopping. I can't wait for some of mine to mature.

Photobucket


Height is added throughout the garden with small trees, both deciduous and evergreen, and plants like this clematis, which climbs up an adjoining building.

Photobucket


Some of the plant combinations really blew me away. Neither of these is particularly ingenious, but I think they both work incredibly well. Simple but packing a punch. The yellow plant is Argyranthemum 'Butterfly.'

Photobucket

Photobucket


These sedums (maybe 'Autumn Joy') might be prettier in their pre-bloom stage than they are when they bloom. I'm definitely going to add more sedums to my garden. Great structure.

Photobucket


Containers can't be overlooked here either. This one was a favorite featuring a plant I've not seen before: Juncus 'Quartz Creek' (the nice grass used at the thriller in this pot).

Photobucket


In addition to a guide to the garden and some of the plants in it, the brochure I picked up from the front desk has a small bio on the man who designed this garden. Jack Barnwell has been designing the garden at the Hotel Iroquois for 10 years. He's probably the man who planted those alliums that I'll never forget. He owns a landscape service on Mackinac Island and I suspect he also designs many of the other gardens on the island because many of them have a similar look and feel to them.

Are you on Facebook? So is The Impatient Gardener. Become a fan (or whatever it is called now that they changed it) and get sneak peaks of posts, links to other great blog posts of the day, notes about contests that I've found online and more. Check out the social networking links at the right and let me know if your blog is on Facebook so I can make sure to become a follower.

Labels: ,

02 August 2010

Summer vacation: Over

As you might have guessed, I've been on a bit of a hiatus. I had intended to do a bunch of posts before I left but I'm such a procrastinator that I was lucky I had time to throw my toothbrush in a bag, much less stock up on blog posts.

In any case, a little vacation is always a good time to get inspired and I found some great things to share with you. Unfortunately, my camera appears to be missing right this second. Don't worry, I'm sure it's around. It's either lurking in one of my many bags or on the boat, so worst case scenario I should find it by Wednesday when the boat is due back home.

In the meantime I wanted to share a photo I snapped with the camera phone of one of my favorite gardens on Mackinac Island, the garden at the Hotel Iroquois.

Photobucket

If you follow The Impatient Gardener on Facebook (and I'm pretty sure you don't because right now only a few friends and family are followers) you'd have already seen a sneak peak of this picture. You can follow me on Facebook by clicking on the link in the sidebar on the right, and there you'll not only instantly see my posts, but also other tidbits throughout the week.

I hope you enjoy this sneak peek at an upcoming post. This garden has me so enthralled, I'm seriously considering redesigning a good part of the "main" garden.

Glad to be back, and thanks for hanging out while I got away for a little bit.

Labels: