How to create a weathered wood finish
I showed you the new kitchen tabletop on Friday and promised a tutorial on Monday, so it only makes sense that you're seeing this on Tuesday (punctuality is not my strong suit).

This weathered wood finish is not something I recommend for someone who isn't prepared to roll with the punches a bit. The fact is, you just don't know how it's going to work on your piece. I think you have to be prepared with a backup plan if things don't go the way you thought they would. I think that could reasonably include applying a stain or whitewash or just painting the thing if things go awry.
That was a chance I was willing to take, as the alternative either way was just repainting it.
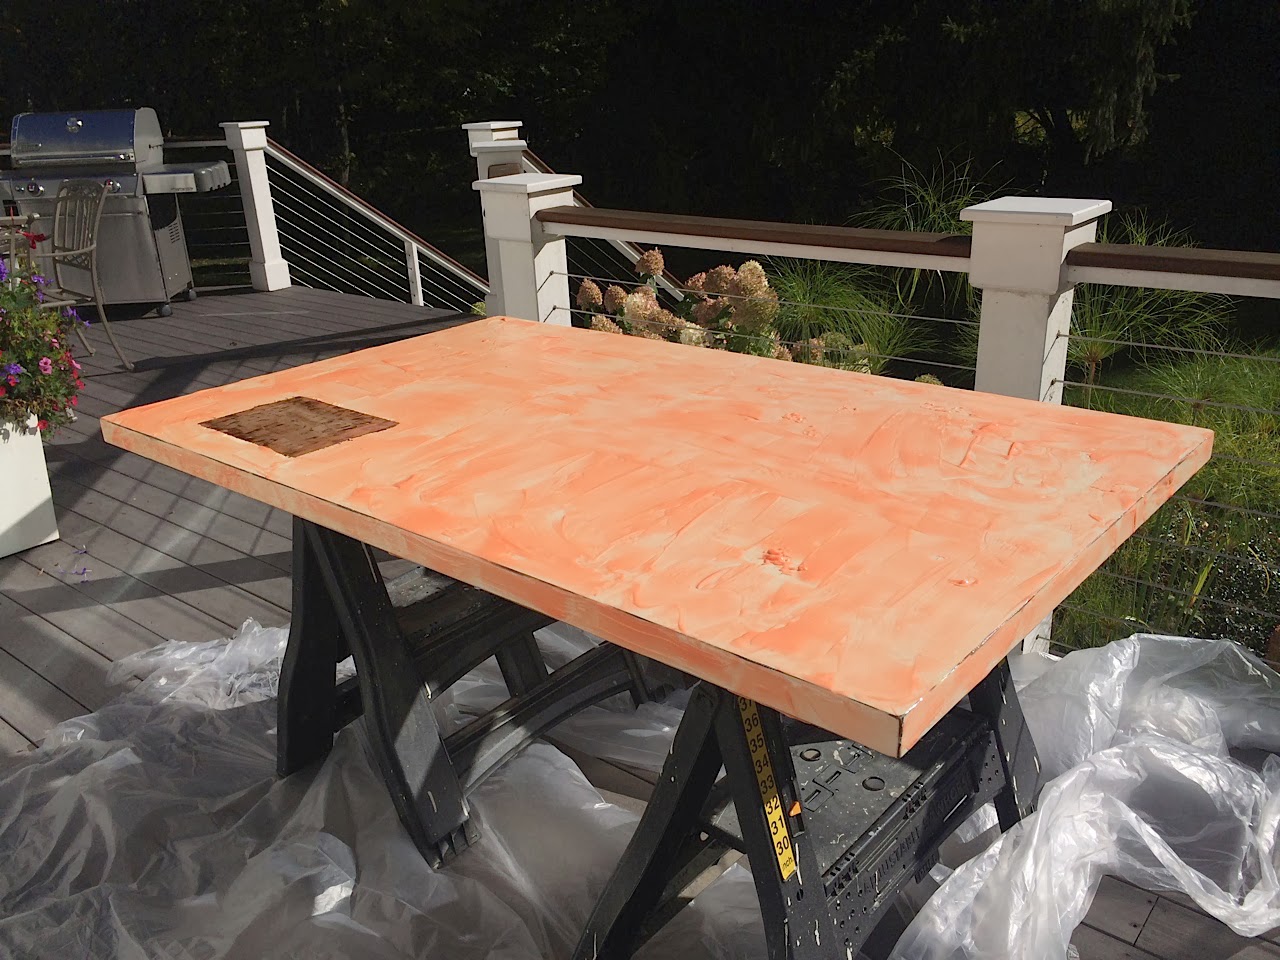
So I did a little test patch of stripper to see what the table looked like under there. DO NOT DO THIS. Or if you do, make it the smallest possible area you can. I did mine the size of a placemat and if you look hard on the finished table, you can still see it.

Now that we've got all the warnings out of the way, here's what I did.
I disconnected the table top from the legs, just because it was easier to manage this project outside for the messy bits. I applied Citristrip brand stripper. This is really the only stripper I'll use as the other stuff is just way too fumy and scary to me. But you still have to be careful with this citrus stuff. I got some on my sleeve and then pushed my sleeves up. Later on I felt this horrible burning on my arm and it turns out I gave myself a pretty good chemical burn (it's still a big scab on my arm). So be careful (and there's yet another warning).
Also, it's probably not the best idea to try to use stripper in the sun, but it worked pretty well. I actually applied it twice: Once to get the paint off and a second time to remove the rest of the stain that remained on the original piece.


After stripping it, I cleaning everything off with mineral spirits. I don't really recommend that because I think it made the table too greasy. Just spend the dough to buy the stripper wash.
Then I sanded with 220-grit sandpaper. I had to be really careful with this step because my table is covered in a maple veneer that is very thin. Too much sanding and I'd go right through the veneer and then you've pretty much ruined the table, I think. This was a really light sanding, just to smooth things out a bit and get off the last vestiges of stain. In retrospect, I think I would have been better off sanding with a coarser grit because maple is already a very tightly grained wood, and such a smooth finish sort of closed off the pores of the wood a little more than I would have liked, making it harder to get the driftwood solution to soak in.
Then I mixed up a very diluted batch of Driftwood Weathered Wood Finish. The directions call for one cup of water to one packet. I think I did at least three cups of water. I was going for a lighter color and I figured I could always apply a second coat to make it darker if need be.
Overall I was pretty happy with the results, but there were still a lot of very warm-toned areas that I wasn't thrilled with and the whole thing was looking a bit splotchy. I thought about applying another coat of the driftwood finish, but I was afraid that would only make the difference between the grayer areas and the warmer areas that much more noticeable.
So I tried spot sanding a little. I was interested to see that the driftwood finish really soaked in, so when I sanded it wasn't like I was starting with fresh wood. That's something to keep in mind if you decide to do this: I'm not sure going to back to fresh wood would be easy. By sanding the warmer-toned areas (undoubtedly spots that I didn't sand well enough originally) I was able to get it a bit blonder and take some of the red out.
After a bit of sanding it looked like this:

For awhile I thought about doing a very dilute coat of a gray stain over the table, but some very wise followers on Facebook told me it was time to stop and just walk away. It was a good reminder.
So then I got crazy and I wire brushed the whole table. Yep, that sounds as weird as it was, but I was trying to open up the pores of the wood so I could do sort of a limed effect with wax. This is where the type of wood limited me. If I were dealing with oak that would have totally worked and looked great. But maple has a very tight grain and trying to bring it out to be more pronounced is really hard.
I followed that up with a coat of liming wax. I bought some as a package with the weathered wood finish powder and didn't care for it at all. I found a lot of people online who swore by Briwax Liming Wax so if I were going to try this again, I think I'd try that. But the liming wax that I bought was hard as a rock and as far as I could tell, did absolutely nothing to provide that "limed" look. I even had to soften it in the microwave and it was extremely hard to work with.
I'm becoming a real fan of waxed finishes. I've had them on some furniture that I've purchased and used it when I redid our coffee table and I've been very happy with the durability of it. I also really like the low luster that it give after a good buffing and I knew I wouldn't have to worry about it yellowing or being too shiny like a polyurethane. After what that Polycrylic did to the original painted finish on the kitchen table I'm extremely hesitant to ever go near it (or anything like it) again.
I followed it up with several coats of Annie Sloan's Paste Wax. I love this wax so much. It is the consistency of whipped margarine and is extremely easy to work with. I also sprung for a waxing brush (I bought this one) and while I'm sure I could have applied it with a rag as I have in the past, I really enjoyed working with the brush and feel like it really made for a nice finish. Even though I've waxed stuff in the past, I searched online for a good tutorial to make sure I was doing it right. This video tutorial is great and I followed it to the letter (other than what to wash the brush in; I bought a bar of real lye soap which is fantastic for washing out brushes, although I wouldn't have it in the house if I had kids).
Toward the end I was getting mighty sick of buffing, so I had Mr. Much More Patient bring a buffer home from work one day and give it a good once over with that. I actually feel like the table got too shiny after we did that, but I know that waxed finishes tend to dull with time so I'm not worried about it.
I also gave the base a fresh coat of white paint (Benjamin Moore Cloud White to match all the other whites in the kitchen). I admit to a bit of laziness on this part of the project. I just sanded them down and gave them a really good cleaning and put a coat of paint over them. Since Polycrylic is water based I figured that a water-based paint would be OK to put straight over the top so long as I prepared the surface. And I didn't do any distressing, although I'm sure some will naturally occur.

Since this became a very long post, I thought I'd just quickly summarize the steps I would do if I were to do this same project again (and skipping all the stuff I did that didn't help):
1. Strip the tabletop.
2. Clean off the excess stripper with a stripper wash.
3. Lightly sand the table.
4. Apply a coat of Driftwood Weathered Wood Finish.
5. Apply a second coat after 24 hours if needed (I did not).
6. Wait for the table to dry thoroughly and sand the entire thing to make it smooth and less splotchy.
7. Apply several thin coats of Annie Sloan paste wax.
8. Buff between each coat and especially at the end.
9. Wait for the wax to dry a few days before putting the table into heavy use.
It can be hard to tell true color on photos, but I'll leave you with this one to get an idea of whether I ended up with a true "driftwood" finish. I picked up these two bits of driftwood on the beach the other day and set them on the table when I was cleaning out my pockets. I had a hard time finding them at first.

Just to clarify, no products were provided to me for this project and of course all opinions, good and bad, are my own.

This weathered wood finish is not something I recommend for someone who isn't prepared to roll with the punches a bit. The fact is, you just don't know how it's going to work on your piece. I think you have to be prepared with a backup plan if things don't go the way you thought they would. I think that could reasonably include applying a stain or whitewash or just painting the thing if things go awry.
That was a chance I was willing to take, as the alternative either way was just repainting it.
So I did a little test patch of stripper to see what the table looked like under there. DO NOT DO THIS. Or if you do, make it the smallest possible area you can. I did mine the size of a placemat and if you look hard on the finished table, you can still see it.

 |
| Few things are as satisfying as stripped paint waiting to be scraped off. |
I disconnected the table top from the legs, just because it was easier to manage this project outside for the messy bits. I applied Citristrip brand stripper. This is really the only stripper I'll use as the other stuff is just way too fumy and scary to me. But you still have to be careful with this citrus stuff. I got some on my sleeve and then pushed my sleeves up. Later on I felt this horrible burning on my arm and it turns out I gave myself a pretty good chemical burn (it's still a big scab on my arm). So be careful (and there's yet another warning).
Also, it's probably not the best idea to try to use stripper in the sun, but it worked pretty well. I actually applied it twice: Once to get the paint off and a second time to remove the rest of the stain that remained on the original piece.

Then I sanded with 220-grit sandpaper. I had to be really careful with this step because my table is covered in a maple veneer that is very thin. Too much sanding and I'd go right through the veneer and then you've pretty much ruined the table, I think. This was a really light sanding, just to smooth things out a bit and get off the last vestiges of stain. In retrospect, I think I would have been better off sanding with a coarser grit because maple is already a very tightly grained wood, and such a smooth finish sort of closed off the pores of the wood a little more than I would have liked, making it harder to get the driftwood solution to soak in.
Then I mixed up a very diluted batch of Driftwood Weathered Wood Finish. The directions call for one cup of water to one packet. I think I did at least three cups of water. I was going for a lighter color and I figured I could always apply a second coat to make it darker if need be.
 |
| After sanding, before applying the Driftwood Weathered Wood Finish (in the bowl). |
This stuff instantly turns the water black so don't be shocked when that happens. Then I used a cheap foam brush to apply it, but it was a little weird that it didn't really soak in. I blame that on two things: sanding down too much and using the mineral spirits to clean off the excess stripper. But I just let it sort of sit on the table out in the sun (which is supposed to accelerate the effect) for a bit, dried it off and brought it back in. The directions say it can take up to 24 hours for the color to stop changing so then I just sat tight.
Overall I was pretty happy with the results, but there were still a lot of very warm-toned areas that I wasn't thrilled with and the whole thing was looking a bit splotchy. I thought about applying another coat of the driftwood finish, but I was afraid that would only make the difference between the grayer areas and the warmer areas that much more noticeable.
 |
| After the weathered wood finish dried, the table was looking a little splotchy and a bit too warm-toned. |
After a bit of sanding it looked like this:

So then I got crazy and I wire brushed the whole table. Yep, that sounds as weird as it was, but I was trying to open up the pores of the wood so I could do sort of a limed effect with wax. This is where the type of wood limited me. If I were dealing with oak that would have totally worked and looked great. But maple has a very tight grain and trying to bring it out to be more pronounced is really hard.
I followed that up with a coat of liming wax. I bought some as a package with the weathered wood finish powder and didn't care for it at all. I found a lot of people online who swore by Briwax Liming Wax so if I were going to try this again, I think I'd try that. But the liming wax that I bought was hard as a rock and as far as I could tell, did absolutely nothing to provide that "limed" look. I even had to soften it in the microwave and it was extremely hard to work with.
I'm becoming a real fan of waxed finishes. I've had them on some furniture that I've purchased and used it when I redid our coffee table and I've been very happy with the durability of it. I also really like the low luster that it give after a good buffing and I knew I wouldn't have to worry about it yellowing or being too shiny like a polyurethane. After what that Polycrylic did to the original painted finish on the kitchen table I'm extremely hesitant to ever go near it (or anything like it) again.
I followed it up with several coats of Annie Sloan's Paste Wax. I love this wax so much. It is the consistency of whipped margarine and is extremely easy to work with. I also sprung for a waxing brush (I bought this one) and while I'm sure I could have applied it with a rag as I have in the past, I really enjoyed working with the brush and feel like it really made for a nice finish. Even though I've waxed stuff in the past, I searched online for a good tutorial to make sure I was doing it right. This video tutorial is great and I followed it to the letter (other than what to wash the brush in; I bought a bar of real lye soap which is fantastic for washing out brushes, although I wouldn't have it in the house if I had kids).
Toward the end I was getting mighty sick of buffing, so I had Mr. Much More Patient bring a buffer home from work one day and give it a good once over with that. I actually feel like the table got too shiny after we did that, but I know that waxed finishes tend to dull with time so I'm not worried about it.
I also gave the base a fresh coat of white paint (Benjamin Moore Cloud White to match all the other whites in the kitchen). I admit to a bit of laziness on this part of the project. I just sanded them down and gave them a really good cleaning and put a coat of paint over them. Since Polycrylic is water based I figured that a water-based paint would be OK to put straight over the top so long as I prepared the surface. And I didn't do any distressing, although I'm sure some will naturally occur.

 |
| This isn't a great picture, but it's the best angle from which to see the freshly painted base. |
Since this became a very long post, I thought I'd just quickly summarize the steps I would do if I were to do this same project again (and skipping all the stuff I did that didn't help):
1. Strip the tabletop.
2. Clean off the excess stripper with a stripper wash.
3. Lightly sand the table.
4. Apply a coat of Driftwood Weathered Wood Finish.
5. Apply a second coat after 24 hours if needed (I did not).
6. Wait for the table to dry thoroughly and sand the entire thing to make it smooth and less splotchy.
7. Apply several thin coats of Annie Sloan paste wax.
8. Buff between each coat and especially at the end.
9. Wait for the wax to dry a few days before putting the table into heavy use.
It can be hard to tell true color on photos, but I'll leave you with this one to get an idea of whether I ended up with a true "driftwood" finish. I picked up these two bits of driftwood on the beach the other day and set them on the table when I was cleaning out my pockets. I had a hard time finding them at first.

Just to clarify, no products were provided to me for this project and of course all opinions, good and bad, are my own.
Labels: DIY, driftwood, how-to, kitchen, table, weathered wood
posted by Erin @ The Impatient Gardener at
3:08 PM
4 Comments
![]()
![]()


