DIY: WOODEN PLANTER WITH LEAD TRIM
Since it's finally finished and planted, I think it's high time I share with you how we built the wood planter by the front door.

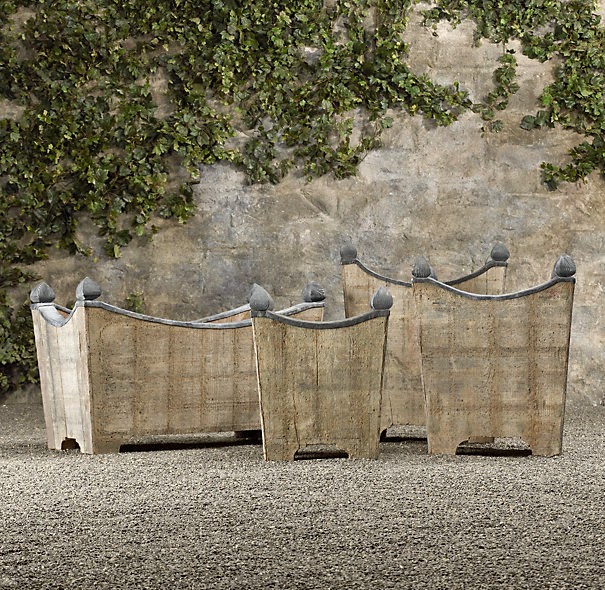
When the old planter fell apart after five or six years of year-round service, I was shocked when I found out how much large planters cost. Having found some wood ones at Restoration Hardware that I really liked the look of, but not the price of, we set out to create our own.
Before I get into how we did it (and how long it took us), there are a couple of things to declare right away:

Next we started screwing the boards onto the frame. We positioned the bottom about three inches up from the bottom of the oak boards to allow for the cutout later. We used four 8-inch-wide boards for the front and the back. On the sides, we trimmed an inch off of two boards, to allow them to tuck in behind the full boards. We predrilled all the holes and followed with 2-inch-long stainless steel screws drilled in from the inside.
Once all the boards were screwed on, we did the cut-outs on the top and bottom. I used a piece of sturdy cardboard and a yardstick to make a template for the top curve. For the bottom I made a similar template, just drawing a straight line and using a glass to create the curve. Mr. Much More Patient used the jigsaw to cut out the pieces after we used the template to draw them on.
Because I didn't want the wood touching the ground (and soaking up water), we put casters on the bottom frame. It raises the bottom just a touch, so you can't see them there or really notice that the planter is not sitting directly on the ground unless you look closely.
After letting the glue dry for a day or so, I took the edges out and hand bent them to fit the curves. Again, I used the E6000 glue on both the planter and the lead-covered wood strip and attached them. then I weighted it all down with cobblestones and bricks, just to make sure that there was good contact while the glue dried.
For the knob accent in the corners, I just used drapery rod finials from Home Depot spray painted in Rustoleum's soft iron. I predrilled a hole through the lead trim and into the planter and just screwed them in.
Instead, Mr. MMP had a local steel worker build a box to our specifications, so it fit perfectly. I had handles built in to the sides to make it easier to remove and had several drainage holes (I feel pretty strongly that a large container needs more than one drainage hole) drilled into the bottom. I primed and painted it with spray paint to help protect it because it was not galvanized and therefore will rust.
And this is where any concept of this being an inexpensive project blew out the window. Although he would not appreciate me saying it, Mr. MMP doesn't have the best hearing. So when he talked to the steel guy he thought the quote was for $50, but when he picked it up, he found out that it was actually $150. Ouch. The good news is that it will probably outlast the planter itself so we can do this all again in a few years.
So that's how we made it. And here's what it cost:
Budget breakdown:
Before I get into how we did it (and how long it took us), there are a couple of things to declare right away:
- It didn't turn out exactly how I had planned but I'm still very happy with it.
- There are things I would do differently if I were doing it again (see the bottom for those notes).
- It ended up costing way more than I expected, even though we built it ourselves.
We ended up with a planter that is 32 inches wide and about 30 inches tall (and weights probably 150 pounds). Yes, that is enormous, but with the stairs that lead up to our front door, I feel like we need a large planter there to balance everything out.
You may recall my trip to the lumberyard for the white oak to build the planter. I loved the white oak planters at RH and wanted a similar look. And no, I'm not doing anything to protect the wood and intend to let it age naturally.

This is where we come to the first, and biggest, mistake I made. The guy at the lumberyard suggested I buy "wet" wood to help keep the price down and be able to get what I wanted. Buying wood that was not kiln dried was a huge cost savings (I got all of the 1-inch-thick white oak for $60 including planing and cutting) and the guy at the lumberyard figured that since it was going to be outside, it would just swell up anyway. I think I underestimated just how wet the wood was when I bought it. It has continued shrinking (widthwise) since I got it (you will see that through the progression of building pictures) and there are now quarter-inch gaps between the boards. I wanted nice, tight boards, but it still looks OK. Anyway, if I were doing it again, I'd definitely just spend the money for the kiln-dried wood.
The first thing we did was choose which boards would be on which sides, picking the best matching boards for the front and most obvious side.
Then we built the frame out of pressure treated 2x4s. We did simple butt joints and used galvanized mending plates to hold the boards together while we screwed them. We had the mending plates left over from when we built the raised garden, so they aren't necessary but they made it easier. Definitely check for square when assembling the frames.
Then we built the frame out of pressure treated 2x4s. We did simple butt joints and used galvanized mending plates to hold the boards together while we screwed them. We had the mending plates left over from when we built the raised garden, so they aren't necessary but they made it easier. Definitely check for square when assembling the frames.
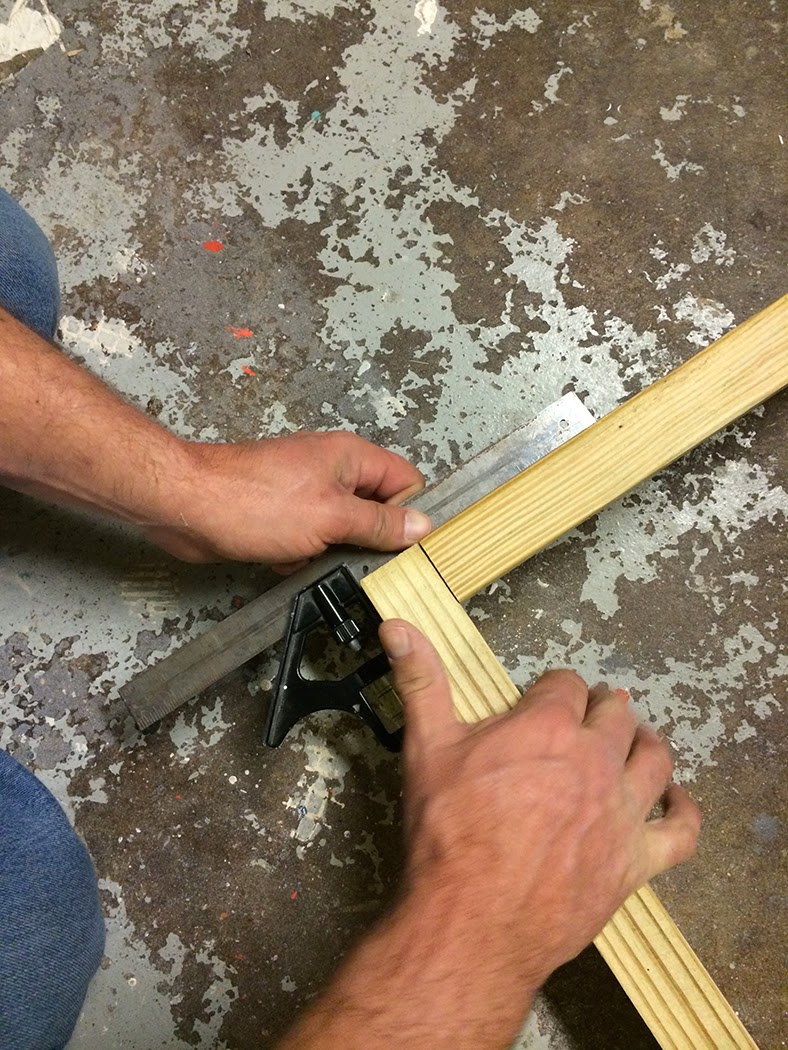 |
| Keep it square! |
We used all stainless steel screws for the construction.
On the bottom frame, we screwed in 2x4s to create the bottom for a metal insert to sit on.
 |
| A frame with 2x4s on the bottom serves as the base. Leave a gap between the boards for drainage and air flow. |
 |
| This is the process of starting to attach the boards to the frames. |
On the edges where screws would not go into the frame, we drilled in from the face and I later filled those holes with wood putty. The proper way to do it that would be to make wood plugs from leftover white oak, but I was more interested in efficiency at that point.
 |
| The planter before the curves were cut. You can see that we weren't overly worried about lining them up because we knew we'd be cutting the top and bottom. |
 |
| I used a glass to create the curve for the bottom. |
 |
| The two cardboard templates for the top and bottom curves. |
 |
| Planter with the curves cut before adding decorative details. |
Everything I did from there was cosmetic (and therefore optional if you're trying to recreate this). I really wanted the lead trim on the top (and now that the boards have shrunk so much that is even more important). I bought a roll of 1/32-inch thick, 12-inch wide lead here and cut it vertically into four 3-inch-wide pieces. Lead is so soft you can cut it with almost anything, but I used tin snips. Then I got 1-1/4-inch wide strips of wood from Home Depot and cut slits into the back of each strip of wood. In order to be able to bend the wood to the curve, I made cuts about every inch and cut about three-quarters of the way through the wood using a Dremel Multi-Max cutter (you could also use a coping saw). On a couple pieces I went too far, cutting all the way through the wood but that was easily fixed with just some tape to hold it together until it was wrapped in lead.
 |
| Trim wood with cuts to help it bend. |
Since the curve on the top of the container is straight for two inches in the corner, I cut a piece of wood off for that, then started the cuts for the curve (having measured the length of it ahead of time, of course).
 |
| Here you can see how I completely cut the first 2 inches of the wood strip, which lays flat on the planter. Then the scored wood follows the curve. I left a small gap between the cut off and the score wood to ease it down the bend. |
With all my cuts made, I laid the wood strip, uncut side down, in the center of the lead and then started bending the lead up around it. A note about this: please wear gloves when handling lead and wash your hands well when you're finished.
Once I had the sides bent up, I used E6000 craft adhesive (I bought it on Amazon, but I would think a hobby shop would also have it) to glue the lead to the wood by putting some glue on both the lead that would fold over and the wood strip. There was a bit of wood exposed in the middle, but that's fine because I was gluing it to the planter anyway. In the corners, I trimmed the lead away (see photo) and then folded the flap over and glued it down. When it was finished, I used a rubber mallet to crisp up all the edges and tuck in all the bits on the end (lead is extremely forgiving).
 |
| This is how I trimmed the ends before gluing it down. |
 |
| After shaping it with a rubber mallet, the corner lays flat and loses all its sharp edges. |
 |
| I weighted down the lead strips to keep them in good contact with the planter while the glue dried. |
While the planter itself was finished, there was still the issue of how to protect it. Obviously if you plant directly in a wood planter, it's going to rot faster. My intention from the beginning was to use a metal liner, and we actually built the planter to accommodate a galvanized liner from Restoration Hardware. There were two problems with that: it was backordered until the end of July and no one at RH could tell me the actual dimensions of the liners. All of them were the same dimension as the planters they were supposed to fit in, which obviously was incorrect.
 |
| The steel insert is super sturdy and has a lot of drainage holes in the bottom. The handles on the side will help me remove it if I need to. When I planted it, I just covered those holes with paper towel to keep the dirt from falling out. |
Instead, Mr. MMP had a local steel worker build a box to our specifications, so it fit perfectly. I had handles built in to the sides to make it easier to remove and had several drainage holes (I feel pretty strongly that a large container needs more than one drainage hole) drilled into the bottom. I primed and painted it with spray paint to help protect it because it was not galvanized and therefore will rust.
And this is where any concept of this being an inexpensive project blew out the window. Although he would not appreciate me saying it, Mr. MMP doesn't have the best hearing. So when he talked to the steel guy he thought the quote was for $50, but when he picked it up, he found out that it was actually $150. Ouch. The good news is that it will probably outlast the planter itself so we can do this all again in a few years.
So that's how we made it. And here's what it cost:
Budget breakdown:
- White oak (not dried, rough cut): $60
- 3 pressure treated 2x4s: $9
- Stainless steel screws: $30 (we have some left over)
- Sheet lead (including shipping): $35
- Drapery finials: $20
- E6000 glue: $8
- Casters: $20
- Steel planter insert: $150
-----------------------------
Grand total (gulp): $332

OK, that's not at all inexpensive. And honestly it's about three times as much as I planned on spending. But there are ways that you could make this and have it be much less expensive. Obviously, you could line the inside with a thick plastic membrane or do something else for a liner. You also skip the decorative details like the lead and finials. And you could reduce the size and it would all cost less.
The bottom line? I don't think I could have found something I like as much for the price it cost us to build it. I would, however, be much happier with it if we didn't have the wood shrinkage problem and if we were going to be spending that much, paying a bit more for the wood wouldn't have been a big deal.
The plants are a bit dwarfed right now, but they are growing quickly (they've actually grown quite a bit since I took that photo) and I think soon it will be looking great.
The plants are a bit dwarfed right now, but they are growing quickly (they've actually grown quite a bit since I took that photo) and I think soon it will be looking great.
Labels: containers, DIY, planter
posted by Erin @ The Impatient Gardener at
9:49 AM
2 Comments