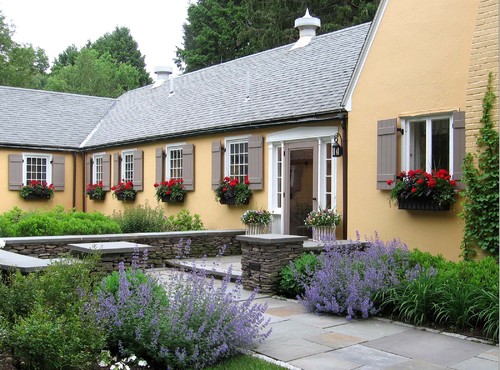
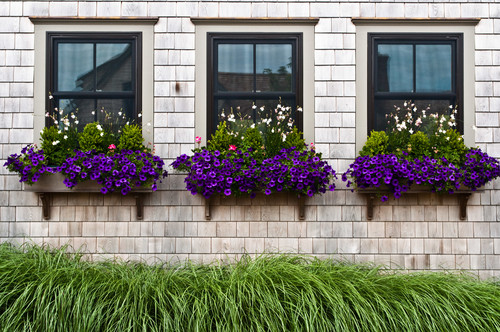
Designing containers is one of my favorite parts of gardening. There are so many options and there's so much less commitment than designing a garden: You get to redo it every year.
Pretty much everyone knows about the thriller, spiller, filler method of designing containers and although this isn't the only way, it's a pretty fail-safe method.
Except when it comes to window boxes. I love window boxes because I think they do more for curb appeal than almost any other kind of container, but they don't follow the same rules of design.
To create a great window box design, start with the right box. Always make your window box bigger than you think, both for ease of design and to reduce the amount of time you need to water. You want a window box to anchor your window, so make it longer than the base of your window, extending out at least to the window trim if not a few inches longer. Undersized window boxes never really look right. I upsized quite a bit when I bought our window box and I wish I had gone even larger.
Window boxes are the exception I make to self-watering planters. Generally, I'm not a big fan of them: I prefer to control the moisture level myself and when you plant in large containers, it's not that big of a deal to quickly water everything every couple of days or once a day in the heat of summer. It's a good chance to do a little deadheading and check on the condition of the plants. But window boxes can be difficult to water, so I use a self-waterer in mine. That allows me to go four or more days without watering it.
The design of a window box depends on a lot of factors including if your eye reads multiple boxes as one or more.
MULTIPLE SMALL WINDOW BOXES
If you have several window boxes under separate windows on your house, unless the boxes are very close together, your eye will read this as individual boxes. For these, it's important to be mindful of not making a design too busy. The window boxes will have a much greater overall effect if they each have the same design. Two or three varieties of plants, planted en masse will be stunning.
MULTIPLE WINDOW BOXES ON THE SAME LEVEL
 |
| This window box on Mackinac Island is actually three or four boxes but because the planting continues seamlessly it reads as one long box. |
 |
| Designer Jack Barnwell bridged the gap between boxes with vines that meet in the middle. |
 |
| These window boxes in Charleston are all separate but they have identical plantings that read as one long box. |
If window boxes are all on the same level, say under a row of windows, and don't have a lot of space between them, design them as though they are one large window box in which the design continues from one box to another.
CLEARLY SEPARATED BOXES
If there aren't a lot of window boxes, perhaps a pair of matching boxes clearly separated, mirror the design in each box.
And keep in mind the actual window situation when you design them. If the window box is outside of casement windows (as mine is), you either have to mount the box low, which can be a bit odd looking when it's not fully in bloom, strategically place plants around where the windows will open, or accept that you'll only be able to crack the windows and not open them fully.
That's the rough design guidelines for window boxes. Here's where we get to the specific design. Thriller, spiller, filler in the traditional sense doesn't work for most window boxes because the proportions are off if you have something tall and spiky in the middle. But a variation of thriller, spiller, filler, does have some merit if you look at the window box from the side. In other words, tall plants in the back, medium plants in the middle and cascading plants in the front.
TEXTURE IS KING
 |
| My window box from a few years ago. It's pretty, but it's not stunning. Notice how there is no variation in texture? |
What I've found in designing my own window box is that, more than any other kind of container, texture is king. It matters more than absolutely anything else. One year I did a really beautiful window box design that was filled with gorgeous colors that repeated themselves through the box. It grew beautifully but something was off. It wasn't until the end of the summer that I figured out what it is: everything in the window box had the same texture. Superbells had half-dollar sized leaves with half-dollar sized flowers. Lysimachia (creeping Jenny) had coin-sized leaves spilling over the front of the box. Lobelia was slightly smaller, but pretty close in texture. It all fell flat.
When I started paying attention to the elements that I loved in a window box, I realized there were always bold forms and delicate treasures. That's the way texture works though, you only really notice texture when it stands in opposition to other texture. It works the same way that complimentary colors do.
There are so many wonderful annuals out there now that unless you are really stuck on a specific color theme, I think it works best to pick one plant that you really like to work off of. Make a mental note of its texture. Then choose a second plant with a different texture. Then choose a third plant with the exact opposite texture. Remember that factors other than leaf and flower size determine a plant's texture. I like using Blue Mohawk grass in containers because of its spiky nature. Consider airy plants that read a little softer as well.
 |
| This spring container in Charleston has a nice balance of textures. The flowers and round leaves of the cyclamen have a bold texture. Spiky leaves in the back have a good contrasting color as well. Airy asparagus ferns add softness, and smaller texture flowers frame the front. |
KEEP COLOR IN MIND
I have a horrible time sticking to a limited color palette, but in most cases, it's for the best. Of course if you go back up to the top photo, you'll see every color under the sun and it still works, I think because it's such a huge planting. Let's say that's the exception though. For most home window boxes, you're going to have much more impact with fewer colors.
 |
| Deborah Silver used a restrained color palette in this wild and wooly window box. Lime, white, lavender and a tinge of pink. That's it. Deborah Silver photo |
If you have good contrasting texture, you can make a huge impact with seemingly no color (although of course green is a color too. Check out this amazing box, again from Deborah Silver.
PLANT PLACEMENT
I started this all by saying that window boxes offer a chance to break from the thriller, spiller, filler mode. Take a glance at the photos above and you'll see that there are plenty that don't subscribe to that planting theory. In general, the smaller the window box, the better a thriller, spiller, filler scenario works. Keep proportion in mind. If you have a single tall plant in the center of a very long window box, it just doesn't look right (I'm certain this has to do with a rule of thirds). But if you put a series of tall plants in a long window box, that can work.
 |
| An example of a small window box with small "thriller" in the middle. Take note at how the color of the pansies echoes the color of the box itself. |
In the photo above, this small window box in Charleston using a cyclamen as a thriller. Normally that would be more a filler, but it's the tallest thing in the box and the whole thing works because it's a small box and the white of the cyclamen is tied in to the white alyssum on the ends.
Spillers are hugely important in window boxes and I love it when a window box planting looks like it's just dripping. For a lone window box like mine, I always try to plant a trailing plant near the corner as well as plant that will stick out a bit on the sides right at the end. I don't like to see bare ends on window boxes.
You don't have to have a thriller at all. Mounded plantings can be beautiful and I think they are particularly effective the closer the box is to eye level. And just to bring this full circle, the above container is an excellent example of how important texture is in a container. That window box would be far less interesting were it not for the wide array of textures.
All of which makes designing a window box so much fun. So go forth and design!
It is no secret that I think Deborah Silver is the container design guru. If you want more window box inspiration, go to her Pinterest page to see more of her work.