The Impatient Gardener

02 November 2017

VEGGIE GARDEN GOALS

You might have noticed that I didn't write much about the vegetable garden this year. That's not because I didn't grow vegetables, but it wasn't my best year in the vegetable garden.

It's been my pattern to really let a garden slip after I've developed a plan in my head for how I'm going to change it. The most recent example of this was the circle garden, which looked like utter garbage for at least two years before I ripped it all out last fall and redesigned it.

As you can see, the vegetable garden is still a mess. That's the state it's been in most of the summer. But plans are in the works for this area. 

The vegetable garden has been on my mind for a few years now and I've been gathering inspiration on every garden tour I've been on and all over the Internet. And here's my conclusion: I want a vegetable garden that is as beautiful as it is practical. Veggie gardens do not have to be particularly pleasing to the eye, and one might argue that the most productive vegetable gardens are anything but. But I crave that perfect balance of producing food in the midst of a gorgeous garden.

I know my dream is perhaps a little unrealistic, especially for a gardener who has never been good about perfect spacing and daily maintenance in a vegetable garden. But if I aim for veggie garden utopia, I imagine I can land somewhere around "really pretty garden."

I was hoping to share this idea with you when it was either in the works or very close to it. I was also hoping to plant garlic this fall in the first stage of a new vegetable garden. None of that happened because sometimes that's how life goes.

The primary holdup has been a couple of enormous spruces. These are some more trees on our property that have been scalped on one side by the power company and don't offer much in the way of screening or aesthetics. They are also blocking a lot of sun to the existing and future site of the vegetable garden. Right now I'm getting away with a part-sun vegetable garden. More sun than shade but by no means full sun. And I do OK in that situation, but we all know that most edibles appreciate a lot of sun and if I'm going to make the investment in an upgraded vegetable garden, I want what I plant there to grow well. In other words: Those trees have to go.


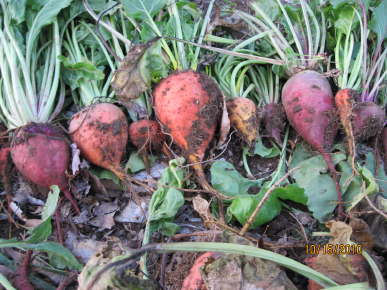
I've also come to the realization that I'm sick of being limited to growing only certain plants outside of the raised bed that has a fence incorporated in it. Some years I get away with it, but this year, for instance, the kale never stood a chance thanks to the pair of young deer with indiscriminate tastes. (Kale has never been an issue in the past until last in the season.)


For me, raised beds are the only way to for growing edibles. It's just that I need a lot more of them. Although I have enough space in my current vegetable garden setup to grow small quantities of several different edibles, I don't have the space to properly rotate crops like I would like, so I'm constantly fighting disease issues, particularly with tomatoes.


Here's a cocktail-hour sketch I made this summer of how I envision the new vegetable garden might look. And if you think I can find this piece of paper now, you are obviously a far more organized person than I am. 

So here's what the dream vegetable garden would look like, all encompassed within a fenced area:

  • A series of raised beds, preferably a minimum of 20 inches tall, that would allow for easy crop rotation from year to year. 
  • A handful (possibly four) of smaller raised beds for cutting flowers that would add color as well as attract pollinators, not to mention provide fresh cut flowers all season.
  • Skinny fruit gardens on the east and west sides of the garden to plant espalier fruit and smaller berries.
  • Brick pathways. 
  • Gravel in between beds and everywhere there isn't brick, so there is no need to mow grass in this area.
  • A small arbor at the entrance over which to grow climbing roses or another flowering vine.
  • A Belgian fence along the back (south) "wall" of the fence.
  • A back door in the fence that would allow easy access to the compost bin just out the back of the garden.
  • A small seating area, either a bench or a little bistro table with a couple chairs. I know better than to think that I'll be lounging there much, but it would be a shame not to have a seat to sit back and enjoy it for a little bit. 
  • A center focal point. My favorite idea right now is a small, containerized water garden.
Earlier this summer, this WAS the plan. Then I did the math and it didn't really work out in my favor. So it seems likely that this is a project that is going to have to be developed in stages. Brick paths, gravel and espalier trees can wait, even if it makes me sad. The immediate need is level ground, raised beds filled with soil and a fence. 

I was hoping by now that some of that would have been accomplished, but it seems this has fully turned into a spring project at this point. But goals are good, right?


Labels: ,

15 March 2017

THIS YEAR'S MASTER SEED LIST

Since I started growing plants from seeds in earnest a few years ago the amount of plants I produce has increased almost exponentially. That is only problematic from a space standpoint. I plant or have homes waiting for all of the plants so none go to waste and I think my garden is better because of this exercise.

Tiny basil seedlings pop up giving hope for delicious herbs to come.  A few days past this stage I'll thin out two seedlings so just one is left in each soil block or cell.

Last year, as I spent every day after work tending to plants, watering, moving trays, transferring things from the growing area in the house to the temporary greenhouse I set up to grow on and harden off plants I swore I wouldn't grow so much from seed. You can guess how that turned out.

This year I'm growing more different plants than ever from seed, and an increasingly large number of flowers. I'm trying to limit the amount of each thing I grow (I don't really need 15 parsley plants) and made a conscious effort to add flowers that can easily be direct sown.

Here's what I'm growing from seed this year (links take you to the specific seeds I ordered):

Baby nasturtiums

VEGETABLES
  • Peppers *
  • Tomatoes (multiple varieties from several sources)
  • Eggplant
  • Kale
  • Cucumbers (multiple varieties, multiple sources)
  • Lettuce (multiple varieties, multiple sources)
  • Peas
  • Arugula
  • Carrots (maybe)
HERBS
FLOWERS/ORNAMENTAL
* Some seeds from Renee's Garden Seeds were given to me free as part of a garden writers trial program.

When you're starting that many things from seed (and trust me, seeing the list in print makes me realize I've really gone overboard this year), you need a plan. And that's where my geek flag starts flying. I'm not a big spreadsheet person, but it's the only way I've figured to efficiently manage this seed-starting operation. I keep it pretty simple, using a combination of information from the back of seed packets, Annuals and Tender Plants for North American Gardens by Wayne Winterrowd (out of print but I found a used copy on Amazon) and online resources including Margaret Roach's seed starting calculator

Plants grown in soil blocks are ready to pot on or transplant when the roots are coming out the sides.

When I get a seed starting date (X number of weeks before the last frost), I count back from what I think will be our last frost. That part is a bit of a guessing game, but because in general things have been warmer than usual here (well they were until we got a foot of snow this week), I used the 50% frost free date, meaning based on past data, there is a 50-50 chance the risk of frost has passed for the year. This year that date is May 14.


Once I figure out dates, I include notes on germination requirements, how to plant the seeds, germination time and anything else that's necessary to know for the seed starting portion of growing. That way I don't have to look up each thing when I'm planting. Here's a copy of my spreadsheet that you can download. Keep in mind this isn't anything fancy and all of the timing is based on my frost free date of May 14. You'll have to adjust it for your date. 

I use large rolling shelving to start seeds on, making it easy to adjust the height of lights. In the off season the rack serves as storage in the basement.

Here's a list of equipment I use for seed starting. Keep in mind though, that these things are nice to have but not necessary. Seeds WANT to grow, so if you give them some warmth and light they should do their thing. You will, however, have a lot more success if you can optimize their growing conditions, which is where this stuff comes in handy. The links below are affiliate links, which means that if you make a purchase I get a small commission. You pay the same either way. Thanks for your support!


For more information on how I start seeds, check out these articles:

What are you growing from seed this year?

Labels: , , , , , ,

18 August 2016

IT'S FRESH VEGGIE TIME!

The poor vegetable garden has gone mostly unnoticed on the blog this summer. That's a shame because at this time of year it really does provide an incredible abundance for us.

Part of my lack of excitement about is that I've been stewing over a plan to redo the entire vegetable garden area for a couple years now and that's really where my head is. By this time of year the veggie garden is never looking its best, but it's always doing its best.

As usual, my focus this year was on tomatoes. I can't help planting more than I should because I'm no sure it's possible for me to have too many tomatoes. I grew them from seed this year, some more successfully than others.

I see some ripe tomatoes I need to go in and harvest, not to mention cutting away all the blighted areas. Losing leaves now isn't a problem. The tomatoes will be ripen just fine.
As you can see, that area is suffering from a bit of neglect right now. The mosquitoes have gotten horrible, so I keep hoping I'll get home some day early enough to get in there and prune out all the bits that have succumbed to late blight (which always happens). Some plants have flopped, but they don't care. It's just not all that pretty.

As far as tomatoes go, the best producer so far this year is 'Oxheart Pink,' which we grew from seeds from the local seed library. They are relatively tasty but prolific so that makes them the current favorite in our house.

'Blueberries' cherry tomatoes are beautiful but don't eat them before they are really ripe.

'Barred Boar' is a beautiful tomato that is somewhat lacking taste for me. I was hoping it would be a bit sweeter although sometimes later fruits taste better. There's not been much production yet from any others as I'm still waiting for lots of green fruit to ripen. I will say that I'm growing 'Blueberries' cherry tomato for the first time this year and one of the things I read about it was that you have to wait for the entire tomato to turn purple before you eat it or it tastes terrible. That advice is completely correct.
'Mexican Midget' is doing great in a container on the full-sun patio. Elegant Feather in the background is growing behind it.

The star of the tomato show is not in the veggie garden proper, but rather in the container near the back door where I'm growing two 'Mexican Midget' tomatoes. These are lovely, small tomatoes that are the perfect size for munching on while passing by, which is exactly how I've consumed every one. Delicious little fruits that are a really nice size. I don't like big cherry tomatoes because they present a dilemma: bite them in half to take a proper amount but risk the dreaded cherry-tomato spray or stick the whole thing in your mouth and look like a complete pig trying to eat it.


I love me some beans, but they are sneaky buggers hiding under all those leaves.
The cucumbers and green (and yellow) beans are really coming into their own. I have to check what kind of cucumbers I decided to grow this year other than 'Marketmore.' I'm not happy with the size of them at all. I prefer cucumbers meant for pickling that you can eat when they are small and before they've developed a lot of seeds.

I'm just started to harvest beans, which are probably my favorite vegetable. These rarely make it back to the house until there are enough that I can't eat them all on the short walk.


I'm growing banana peppers for the first time this year and they've been going gangbusters. I've already pickled a few jars (I love them sliced on sandwiches). Basil is enjoying this warm, sunny summer as well.
Why am I growing so much kale? No one knows, but I see some of it is bolting.
The celeriac is going gangbusters. Yum.

Outside of the fenced-in veggie garden I'm growing entirely too much kale (what was I thinking?) and the celeriac, which I first grew last year, is doing great. I'm a fan of that one and it's difficult to find in stores or even at the farmer's market.

How's your edible haul this year?

You gotta love zucchini. I feel like it's the most optimistic vegetable.

Labels: , ,

10 September 2015

BE BRAVE, BE BRUTAL WHEN IT COMES TO LATE-SEASON TOMATO GROWING

Yikes, it seems I took an inadvertent break last week (and, um, half of this week). Sorry about that; it turns out that the "end of summer" (somebody else's term that I refuse to use) is an awfully busy time. On top of all sorts of things going on a work, an event I've been helping organize (that ended up not happening because of weather), a family picnic and more, I spent a good part of last weekend painting a wall at the office that desperately needed it (over wallpaper, gasp!) and Mr. Much More Patient and I did a massive cleanup around the house. Few things in this world bring the kind of pleasure provided by a pressure washer. The exterior of our house and the deck are gleaming!

First off, I have to announce the winner of the set of Troy-Bilt garden tools! And that lucky person is Mary M. Congrats, Mary, check your email!

Onto a bit of gardening. Whether I (or you) like it or not, summer is drawing to a close. We can hope that it is a very slow close, but it's time to start cutting my losses on the tomatoes, which have not been great again this year.

I've grown entirely heirloom varieties for several years and I think I'm going to change that up next year. I need better and earlier production. Let's be honest, there is probably nothing better than a deliciously ripe heirloom tomato, but ANY home grown tomato is better than the imposters they sell at the grocery store. I guess I'd rather have more home-grown tomatoes that taste pretty damn good than a handful of tomatoes that taste amazing.

Regardless of the kind of tomatoes you grow, you can follow the same steps to make the most of the end of season fruit. And the trick is to be relentless.


My tomato vines are pretty well stocked with tomatoes, but they are very, very green. So I need those vines to focus all their energy on ripening the tomatoes that are there, rather than making more tomatoes. So the first thing I did was to cut off the vine above the top of the highest branch with fruit on it. Just chop that sucker clean off.


Then it's time to get really brutal. Tomatoes don't need leaves on the plant to ripen. What they need is the most sun they can possibly get, so I went through and cut off most of the leaves to really open up the vines.


When you're trimming, you have to be really careful because it's easy to accidentally snip off a branch with fruit on it. I also try to keep the branches off the ground because the slugs are getting relentless and it is really disgusting to cut into a tomato and find a slug staring back at you.

I know it's hard, but the goal now is to get those babies to ripen. The world only needs so many green tomatoes.


Labels: ,

05 May 2014

THE POTATO TOWER EXPERIMENT

I grew potatoes for the first time last year at one of the community garden plots my mom and I share. Despite the fact that I had no clue what I was doing and the soil in the new plot was very, very poor, we got a small but delicious crop of fingerling potatoes. The harvest was that much more appreciated since I've been trying to avoid non-organic mass-produced potatoes ever since I read "The Botany of Desire." Great, interesting book by the way, but not recommended if you want to keep eating the reasonably priced potatoes at the store.

Last year's success was enough to make me give it a go this year. The problem with potatoes is that they take up a fair amount of space in the garden and they are prone to disease, which makes moving them every year, important. Complicating the issue is that they can pass illness to their cousin the tomato, so you have to avoid rotating them with tomatoes as well.

I've been intrigued with some of less traditional ways of growing potatoes, including in grow bags and even garbage bags. But to me, the potato tower idea made more sense.

There are several methods for creating a potato tower. I read about a lot of them, including several on Pinterest and one from Fine Gardening magazine, and came up with an amalgamation.


I started with a metal fence support, just the green kind that you pound in to the ground. Then I used plastic wire ties (aka zip ties) to attach a circle of fencing to the post. The instructions I read all used different types of fencing. I avoided hardwire cloth, which typical has half-inch squares because it seemed like that would be hard for stems and leaves to sneak through. Instead, I bought rabbit fencing, which has 1-inch by 4-inch holes on the bottom and 4-inch square holes on the top. I did a double layer of fencing, flipping the bottom to the top on the second layer, just so the holes weren't so large.

The sprouts or eyes on the potatoes faced outward. Some layers got three potates, but then I was running out of room, so I put a few more in on upper layers.
Then I started the layering. I did four layers in each of my two towers. Each layer is constructed by putting down a bed of straw and lining the edges with about a 2- or 3-inch thickness of straw, then putting in a "core" of soil in the middle. For the soil, I used a combination of purchased top soil and mushroom compost or leaf compost. On the soil layer, I threw in about 4 or 5 inches of blended soil, then put in the seed potatoes, a few inches in from the edges with the eyes or sprouts facing outward. I covered it with an equal amount of soil and watered it thoroughly. That completes a layer.


Then I just repeated that process in each tower. Since I was doing two towers, I found it easier to do a layer in each tower before moving onto the next tower. The key is to keep the straw on the outside packed pretty tight to keep the soil in and the light out.

When I got to the final layer, I left some room at the top of the tower to add more mulch as needed to continue covering the shoots. I also watered the entire tower really well. One of the negative comments about potato towers is that they dry out too much and it's difficult to keep the potatoes properly watered, so I intend to keep a close watch on that.

You can see that things got a little messy and I'll need to do a little raking. The chopped straw was difficult to keep in, but I think it was nicer looking than the straw from bales, which is the top half of each tower.

If all goes well, the towers should be covered in leaves as the potatoes grow (which I sincerely hope because they are not the most attractive things) and when it's time to harvest, I should be able to just knock the towers over, pull out the potatoes and compost everything else.

I'm willing to experiment a little to get some great potatoes, but I think it's safe to say this is probably not one of those money-saving things. I had to buy everything for this project. Granted, I can reuse almost all of it in future years, but there was definitely an upfront cost. And obviously I didn't need an entire roll of rabbit fencing, but I had to buy a whole roll to get what I needed so I'm including the entire roll cost in my tally.

So here's the cost so far:

  • Metal stakes: $2.80 for two
  • Roll of rabbit fencing: $28
  • Straw (I had a bag of the chopped up stuff for seeding lawns plus purchased a bale): $1.50
  • Soil: $25 (approximate)
  • Potatoes: $25 from here (There are definitely less expensive potatoes, including organic, out there, but for various reasons that's what I went with).
Grand total: $57.30

Let's say organic potatoes cost $2.50/pound (I usually buy fingerlings which are more expensive). That means I need to produce about 22 pounds of potatoes to break even. We'll see what the season holds, although I think it's worth pointing out that I rarely grow my own food for economic reasons. The taste and satisfaction I get from growing food is generally worth whatever it costs.

Don't worry, I'll keep you updated on how the towers work out.

Interested in how this turned out? Check out the end-of-the-summer results here


Labels: ,

28 April 2014

FIRST PLANTS IN, MORE SEEDS TO COME

It was a great weekend in the garden: two marathon days that left the garden in pretty good shape and my body in pretty bad shape. There is something so satisfying about the pain one feels after long days in the garden.

I put some row cover over the peas and lettuce seed, if only to protect them a bit from the torrential rains predicted for this week.

A highlight of my work in the garden this weekend was planting my first veggies in the garden. Kale, lettuce, peas and onion seedlings (purchased) all went in this weekend. Some of the kale and the peas were among the seedlings I started inside.

By and large, the seeds have been doing well. Everything germinated and grew very well. As seedlings got their first sets of true leaves, I pulled out or snipped off all but the strongest seedling in each plug of basil and kale. I let the bunching onions get bunchy and I had already thinly sowed the nasturtiums.


On Friday I potted up the basil into 3-inch pots. They have a long way to go before I'll plant them outside. In a normal year I wouldn't plant basil outside until the last week in May at the very earliest. With the way the weather is going this year, it could be a couple weeks into June before it is warm enough for them. Most of the pots are back inside and will be moved to the mini greenhouse (essentially a cold frame) when it gets a little warmer. A few pots didn't fit in the tray, so they are outside in pots protected by row cover fending for themselves as a bit of an experiment.

I've been hardening off the kale for the last week or more and planted out the plugs directly into the garden on Sunday. I also planted some kale seeds as well. I will plant more kale in coming weeks as well.


The bunching onions aren't doing much. They seem to be stalled in their growth. I may harden them off and move them out hoping to spark some growth.


The nasturtiums are growing really well. In fact, when I picked up the tray the other day, I noticed roots were jumping out the bottom, so I also potted them up in 4-inch pots, two plants per pot, on Friday. I pinched them back at the same time, hoping to encourage nice bushy growth.

The roots of the peas were already coming out the bottom of the biodegradable pots.

Peas planted in their pots in the garden.

I read that while peas like cool weather to grow, they germinate best at 70 degrees, so I sowed some snap peas in a cardboard seed tray. They germinated quickly and I immediately started hardening them off. Sunday, I planted out the trays intact into a corner of the garden where they will quickly disintegrate (the roots were already coming through the bottom). I hope to have a better pea harvest than most years, as I'm using first planting seeds outside at this point.

The biggest challenge so far has been keeping the cat away from the seedlings.

With some room in the seed trays and under the grow light, I was able to sow a few more seeds.

I planted an entire tray of kale. Yep, more kale. I intend to plant most of these in the ornamental gardens where they will be beautiful foliage (that we'll nibble on when we're too lazy to walk to the veggie garden). Once those germinate (i.e. move off the heat mat), I think I'll start some zinnias and some more nasturtiums, or perhaps some parsley. I'm so impressed with how the basil is doing (it's already at the size I have purchased plants at in the past) that I'm inspired to give parsley (which I never have enough of) a try.

Some ciopollini onion seedlings also went in and plenty close as they stay small. Also, you're getting a sneak peek at another project I'm working on in the background.

How is your seed growing going? Did you get to plant anything in the garden this weekend?

Labels: , , ,

11 October 2013

This year's veggie garden: A lot of flops and one huge success

Vegetable gardening is all but finished for the year. The occasional tomato ripens up and we're still eating onions from the garden, but for the most part, it's all over. I'll have to start buying vegetables from the grocery store within a week. That makes me so sad. (You can read about the varieties I planted here.)

Overall it was a lousy year in the vegetable garden. The tomatoes were mostly a disaster. It was so cold so late into summer that they got a really rough start. Last year I froze tons of them. This year I didn't even have enough to give away to neighbors.

The cucumbers were awful. I might have planted them too late, or maybe it was just bad weather, but I grow them almost exclusively for pickling and I didn't enough to even make one batch of pickles. We ate a few in salads and they were delicious, but if I'm going to be pickling, I need enough to make at least a few jars at a time.

 The zucchini were OK. Not great, and I never had to resort to making zucchini bread to use it up, but what we had was delicious.

The green beans were a disaster. I think green beans are probably my favorite vegetable. I didn't plant nearly enough of them and they just didn't keep producing. I had enough to make green bean soup (a summer favorite) just once and the rest were consumed in the garden. I love them raw!

Three crops that I planted at home did really well this year. The Swiss chard was amazing and just keeps on producing, to the point where we almost can't look at it anymore. The beets were so delicious, but I only really had enough for two dinners (with some leftovers to put on salads).


But the real standout was a new crop for me this year: kale. I'll be honest, I didn't like to eat kale in spring. I do love it as an ornamental. But I've learned that if I grow something, I'm much more likely to eat it and I was hoping that would be the case with this nutrient-packed superfood.

When it became clear that I planted way too many seeds in the new raised bed, I transplanted the thinned seedlings to bare spots in the circle garden by the house. To my surprise, they almost all grew and not a single critter (wild or domesticated) bothered them one bit. I still think they are gorgeous and worth planting just for that, but it turns out I love eating it too.

I planted three varieties: Redbor Kale, Rainbow Lacinato Kale and Nero di Tuscana Kale

For eating purposes my favorite has been the Nero di Tuscana, which has slim, dark leaves.

I know that kale chips are all the rage, and trust me, I've tried them. I think I tried them five separate times and every time I hated them. They sort of turned into salty dust no matter what I did.

And then I found this recipe and I'm hooked. I crave this salad all the time. It's so good. In fact, since I discovered it, this is the ONLY way I've eaten kale. I've also taken it to a couple parties where it was a huge hit, and I don't think kale is known as a big people pleaser. My recipe is a version of this one although I've changed it so much it doesn't really resemble that one much anymore.

The Impatient Gardener delicious kale salad

A BIG bunch of kale (my favorite for this is Nero di Tuscana, but other varieties work too)
About 3 ounces good parmesan cheese, shaved
One shallot
Juice from one lemon
Teaspoon of lemon zest
1/4 cup olive oil
Salt
Pepper
Toasted pine nuts (optional)

Rinse the kale well, remove the back rib and chop crosswise into half-inch wide strips. I wash it again in a salad spinner to make sure no bugs have come along for the ride and that it's very dry.

Chop a shallot finely and combine it with the lemon zest, lemon juice, olive oil and salt and pepper to taste. You can play with the amounts, but I generally like more acid in my dressings so I do at least 50-50. Combine it all and put it in the fridge. I find that the dressing is best if you can let it sit for an hour or more to mellow a little.

Combine the kale with the shaved parmesan. I use my vegetable peeler to get wide strips of cheese. It will seem like a lot of cheese, and in fact it is, but everything else in this salad is super healthy so go for it.

Toss it all together with the dressing (go a little heavier than you would for a regular lettuce salad) and let it sit for 15 minutes or so so the kale gets a touch softer (don't worry, it won't go limp on you). Toss with pine nuts and serve.

If you try it, let me know what you think. 

Labels: , , , , ,

03 April 2013

The ever-expanding garden

I have been debating expanding my vegetable gardening space. Again. It's funny how gardening works. You start with a garden of a certain size and you can't imagine ever needing more space. Until you do. And then you add another garden or make the first one bigger and you think, "Well now I'm set for life." Until you're not.

The main vegetable garden that we built four years ago offers 70 square feet of gardening space. Given that there are only two of us (plus two dogs who love whatever veggies we throw their way), that's a good amount of space. But those first two years the zucchini took over at least a quarter of one side (and made walking past it very unpleasant). So a couple years ago when I added a raised bed outside of the enclosed veggie garden, the zucchini got kicked out there. And since I had to limit that bed to things that critters wouldn't eat, I also threw some onions in there. Somewhere along the line I realized that I really like growing the food we eat.


Well it turns out I love growing onions and one zucchini variety of squash isn't enough for me. So I've been thinking about expanding again. Keep in mind, all of this is in addition to the plots my mom and I share at the community garden in the next town over where we grow mostly tomatoes because in early summer it can be 15 degrees warmer over there than it is in our home gardens near Lake Michigan.

Rather than end up with a lot of little raised beds all over the place, I started thinking I might just buy a slightly bigger one so we are set on garden space for awhile. The worst thing about adding a raised bed, at least for me, is soil. It takes more soil and compost than you might think to fill up a raised bed and every time I add a garden I think, "Oh I'll just pick up a few bags of topsoil and throw in some homemade compost" but that's never enough. Plus I hate buying compost, soil and mulch for the garden by the bag. All that plastic is disturbing to me. Almost equally as disturbing, however, is the delivery charge for bulk goods (usually about $100 by me) and the massive pile of stuff that sits in the driveway while I get around to putting it in the garden.

So that's why I've been spending an inordinate amount of time gazing at the veggie garden situation, and walking around drawing out beds in the snow (which, I'm happy to report, is finally melting) trying to decide if I really need more vegetable gardening space and if I really want to deal with getting the soil to fill a new one up.

If do go for it though, I'm thinking about getting an L-shaped one like this.


So what about you? Do you find yourself constantly adding gardens or seeking out more gardening space?

By the way, in case you missed it, Monday's lavender kitchen cabinet post was a total April Fool's joke. But there is something unexpected happening in the kitchen. Hopefully an update on that tomorrow.

Labels: ,

22 March 2013

This year's seed order

Since it seems like so many people are dealing with less-than-stellar spring weather, I'm making a concerted effort not to spend too much time complaining about it. So instead of mentioning that there is still a 5-foot tall pile of snow in my yard, or that I'm behind on pruning things because I can't get through the snow to actually get to them, I decided to talk about what I've ordered so far in terms of seeds.

Here's what I've ordered so far (I still need to pick up some cukes and nasturiums):

From Dagawalla Seeds & Herbs (first time ordering from them):

Huichol Nicotiana: I'll admit that I ordered these on a bit of a whim. Margaret Roach wrote about interesting Nicotianas  on her A Way to Garden blog and I feel hard for them. I figured it was worth a shot.


The seeds arrived yesterday and what I found when I opened the envelope pretty much charmed the pants off of me. Check it out ... a hand-written note (and a free pack of seeds)!


From Fedco Seeds (my first time ordering from them):

Beans: I love beans and usually eat them straight out of the garden. I never have enough beans because I get stingy with my garden space. This year I'm hoping to actually have enough. I grew Velour last year and loved it although the beautiful green color doesn't stay when you cook it.

Jade Bush Green Bean
Velour Haricots Verts
Golden Rocky Bush Wax Bean

Peas: I love peas too and this year I'm going to try to get them in on time, which never, ever happens. Cascadia is a bush variety and Sugarsnap is a taller variety that is supposed to produce really well.

Cascadia Snap Pea 
Sugarsnap Snap Pea

Beets: I didn't grow beets last year and I missed them. So they are back for this year. Margaret Roach says this is the best beet mix there is. Good enough for me.

3 Root Grex Beet


3 Root Grex Beet mix


Scallions: I never have a lot of luck with these but then again I don't treat them very well either. They are cheap and don't take up much space so I figure it's worth a try.

Evergreen Hardy White Scallion

Lettuce: More than almost anything, I love lettuce from the garden. Nothing you could ever buy in the store tastes like homegrown lettuce. I think these are mostly made up of leaf varieties, so I just cut as needed. The key is to do lots of plantings which I usually forget to do.

Lettuce Mix
DeLuxe Lettuce Mix

Swiss Chard: I have grown to absolutely love chard and I grow this one as much for the taste as for looks. This produced all summer for me last year.

Bright Lights Chard


Swiss chard 'Bright Lights'


Broccoli: I kind of hate broccoli, but I do use rapini and broccolini in a couple of recipes and I don't mind it. I've found that the best way to learn to love a vegetable is to grow it yourself. Funny how things taste better when you grow them. This kind is a non-heading variety.

Piracicaba

Kale: I love kale as an ornamental. I am always amazed at the beautiful containers Deborah Silver creates with kale. But kale is also really, really good for you and it's another vegetable I'm trying to make a concerted effort to learn to love. Whether I learn to love to eat it or not, I will certainly enjoy its beauty. And the dogs absolutely love kale (and all other leafy vegetables) so I can always feed it to them if I have too much.

Redbor Kale
Rainbow Lacinato Kale
Nero di Tuscana Kale


Redbor kale

Other than the aforementioned cucumbers and nasturiums, I think that's about it for me for seeds this year. I also grow onions from slips, and tomatoes and zucchini from plants, but mostly because I just don't need tons of those so growing from seed doesn't make a lot of sense. 

I'm excited to get growing. Now, if I could just find the vegetable garden under all this snow ....

Labels: , , , ,

17 August 2012

Cracking up

I think most gardeners sort of lust for the perfect tomato (not ALL, since we know that oddballs like Kylee at Our Little Acre and Steve aka The Grumpy Gardener are proud freaks tomato haters). And I'd say I probably do grow a perfect tomato every summer. But I'm not content with one perfect tomato. I want bushels of them. This year I have nine tomato plants growing in three areas and despite the fact that we've had a hot summer, which the tomatoes should have loved, I'm disappointed with the yields I'm seeing so far.

What's even more disappointing is a rather mysterious thing that is crashing my perfect tomato party. In almost every case, I've picked a perfectly lovely tomato, admiring its ripe red skin and perfect form (or if it's less than perfect and one of those oddball tomatoes then I admire its uniqueness) but by the time I get it to the basket in the house its skin is split. Sometimes these splits show up longitudinally and sometimes in a pattern that looks like a bloodshot eyeball.

This Black Krim was darn near perfect when I picked it off the vine. Five minutes later it had cracked almost all the way around its equator.
It's not the end of the world, of course. The tomatoes are still perfectly good for eating. But you can't really keep them and you certainly can't share them with friends, so it's another excuse to hurry up and eat them quickly. That's not really a problem now when they are taking their own sweet time ripening, but if they all decide to ripen at once this could become a big problem.

So what's behind this cracking skin? Watering. Inconsistent watering makes for weak-skinned tomatoes and with the drought we experienced in the middle of summer, the watering of the tomatoes was as inconsistent as it could have been. This is the same reason that tomatoes crack on the vine. Basically they suck up all the water they can, expand and their skins just crack under the load. But that doesn't really explain why they crack within 10 minutes of picking them as mine have been doing.

I have an unscientific theory: As soon as the nutrient and water source to the tomato is cut off (that is, once it's removed from the umbilical cord of the vine) the skin loses just a tad of moisture content, causing it to shrink. And with its plump, juicy, meaty tomato guts lurking inside, the skin just can't contain all that without cracking.

An interesting note is that the one tomato that has not cracked yet is the one my dog Hudson is growing in a container on the patio, which has received extremely consistent watering (virtually every day).

My mom told me to try cutting them off the vine and therefore taking a bit of stem with the tomato but I've not noticed that this made much difference. I've now resorted to trying to pick tomatoes before they are completely ripe—which most tomato scholars insist is just find as they will ripen fully off the vine once they get to a certain point. I've not had any skin cracking on the tomatoes picked before their peak.

So the dream of a haul of perfect tomatoes isn't dead yet. I'll just have to be a little more patient instead of biting into them in the garden. 

Labels: ,

27 July 2012

WANTED: Zucchini robber

I went away for five or six days over the weekend (you probably noticed since, unlike much more organized bloggers, I can never seem to stack up posts to automatically go up when I'm not home) to do a bit of sailboat racing. It's always interesting coming home after you've been gone for a bit. Gardens, more than almost anything else I can think of, change all the time, but we rarely notice these changes because we're always puttering around in them and miss the subtle changes. But those changes are not so subtle after you're gone for a bit.

We have great housesitters, but their primary job is to take care of the animals and water the containers. I expect the garden to mostly manage itself in my absence (and I watered darn near around the clock to prepare for my departure). So I expect the garden to be a bit unkempt when I return from a few days away.

What I didn't expect to find was an empty spot where my zucchini plants were growing when I left. I kicked the zucchinis out of the raised veggie garden when I won the white cedar raised bed from Earth Easy (through a North Coast Gardening contest). I assumed no creature would be interested in the pokey leaves of a zucchini and the take up way too much room in the garden to get premium placement in the main veggie garden.

A week ago, the zucchini plants occupied the now empty spot on the end of this bed. You can see the cage that I half had up on the corner (just to keep the dogs from stepping in the bed) hasn't been disturbed.

When I left last week, I had harvested my first zucchini and there were several more growing. And now there is nothing. Not even a sign that the plants were every there. If I hadn't eaten that one delicious zucchini I would have thought maybe I imagined planting them.

I asked the housesitters if they had any ideas as to what might have happened to the plants, but they knew nothing.

So here's what my super investigative brain deduces:

The motive
Some animal thought the ripening zucchini looked pretty tasty and dug in for a taste. In the process of trying to pull the fruit off the vine, it actually removed the entire plant. The soil in that bed (as well as everywhere else) is dry and very finely textured, so I think it's possible that a good tug could pull a whole plant out roots and all. What I don't understand is where the plants went after that as they are nowhere to be found.

The suspects
Suspect No. 1

The deer were very active while I was gone. The hydrangeas have been trimmed, as were some of the petunias in the big container. The drought has them trying almost anything I think.

Suspect No. 2


We have a burgeoning raccoon population at our house this year. I'm not sure what sort of damage raccoons might do to a zucchini plant, but I know they massacre corn.

Suspect No. 3


While I've not seen a woodchuck around, I know they really can wreck havoc in a garden.

Suspect No. 4

Sadly, this cute face (aka Hudson, aka dog No. 1) is a bit of a garden thug. The boy likes his veggies (so much so he has his own tomato plant) and if he getting into the fenced-in garden he eats everything he can get to (mostly lettuce and Swiss chard).

Being called in for questioning


The only problem is that he's not talking.

Of course, as someone  mentioned on the Facebook page, there is one other possibility: it's the work of the Anti-Zucchini League.

Labels: ,