The Impatient Gardener: April 2017

26 April 2017

ORC WEEK 4: EASY + BEAUTIFUL DIY FLOOR

I knew the floor would be the single biggest change in our basement renovation. The old floor was just so terrible that it absolutely could not stay, not to mention we needed a floor to not just change the look of the space, but add warmth, sound dampening and be durable.


I can't tell you how happy I am with the change our new cork floor made. But that is jumping ahead in the story because we installed this baby ourselves!

Globus Cork provided the materials for this floor so that I can share the process of selecting it and installing it with you.

Before we finalized the design, we laid out one row of tiles and took a panoramic photo to see the whole room at once. You can see we make a few changes to the planned design.
So in Week 2 (back when I was an optimistic person who wasn't completely freaking out about finishing this project on time), I walked you through the process of selecting the floor, which was no easy feat when the options are pretty much only limited by your imagination. We decided on a random stripe pattern in using Bleached and Alabaster colors, both in the nugget texture.

We installed click and lock bamboo floors in the bedrooms several years ago when we did our big renovation and I remember there was an issue with the delivery truck actually getting the flooring to our house. It came in several boxes and technically we should have had a forklift to move it. So it was a lovely surprise when the cork flooring showed up delivered by a regular carrier, possible only because it's so light.
I made a list of the order in which the stripes went that we checked off as we went so we didn't lose our place!

Globus Cork has a really thorough installation tutorial on its website which was hugely helpful but honestly, we were overthinking it. We opened the boxes and let the cork acclimate for a few days while we prepped the floor. The key thing is that the cork, which is laid used a contact adhesive (the back of the cork tiles are pre-coated and then you apply glue to the floor) needs to go on top of clean plywood or uncoated concrete. We had our tile installer friend (a good friend to have!) do a self-leveling skim coat on top of the concrete to make everything smooth and give us a nice surface to work on.

As with any floor, the hard work is in the prep, and it's important to make sure that everything is square. Using a chalkline, we mapped out the center, perpendicular lines and a starting line for our first row that was based off the centerline, not the wall (there isn't a straight wall in this house).

From there it's just a matter of rolling on the adhesive, letting it dry clear (it took about an hour with a fan blowing on it in our cool basement), and then sticking on the cork. In order to avoid stepping on the adhesive, the first few sections, each about 3 feet wide, took a bit of time. The first row is the most important, so we took a lot of time lining it up with chalkline and a square, making sure to not allow it to touch the floor until we were ready for it to stick.

Line up the inside corner of the tile first, then the long edge, followed by the short edge and lastly the freestanding corner. I applied firm pressure for a nice tight seam.

It's important to line up one corner at a time and just lightly let it touch (if you have to pull it up you still can, albeit very carefully, so long as you don't press down) and then gradually get the other corners set. Set the next tile by butting it up right next to the first tile, again one corner at a time. The nice thing about the cork tiles is that they have some give, so you can really get nice tight joints by firmly butting up to the previous tile.


Pound the tiles with a rubber mallet to seal the adhesive. We paid special attention to edges and corners.

With the first row set, we made our way across the room, checking off each row on my cheat sheet, because it would have been easy to lose our place with the random stripe pattern. When a section was done, we pounded it down with a rubber mallet. I'm not going to lie: This was the only onerous party of the process. You have to pound the cork (not roll it) to seal the adhesive, and that's a lot of pounding. Bonus: You can skip your regular arm workout.

Use a drywall T-square, a solid cutting surface (NOT your floor!) and sharp utility blades to trim the cork tiles. We cut them upside down, but I don't think it matters. Way easier than the saw you'll need with just about any other kind of floor!

There's a few other tips and tricks we learned to installing cork flooring:

  • Unless your pattern requires them to be lined up, offset your seams.
  • Use a drywall T-square and a sharp utility knife (change the blade often) to cut cork. 
  • Take your time with the first few rows and then you can fly pretty quickly.
  • A scissors or utility knife also works for cutting around odd-shaped corners or obstructions.
  • Pull tiles from several boxes to account for any color variation.
If you look closely you'll see a bump where we failed to make sure the self leveler was completely smooth. 

There's one don't to share with you as well. Globus Cork is clear that the floor needs to be perfectly smooth before you lay the cork and in almost every spot it was. But there was one place where the self leveler didn't level very well and there was a bit of ridge. I meant to sand that area down, but I completely forgot about it, and now there is a raised spot visible through the cork. It's not a big deal and I doubt that anyone else will really see it, but it could have easily been avoided. So learn from me: Make sure you don't skip that step! Cork is a forgiving floor because it can handle a floor that slopes (don't try that with tile), but its flexibility also allow bumps under the tile to show.


After the floor is installed, a final coat of sealer goes over the top (the cork is already sealed, but this final coat helps seal the joints and make the cork even more durable). It was easy to apply with a foam roller but took a little longer to dry than we expected. The only problem with that was that we had to wait a little longer to show off our new floor!


I can't begin to explain the difference this floor makes in this space. But maybe I don't need to. I think the pictures speak for themselves. What you can't tell from the pictures is how much nicer it is down there. It's hard to explain, but it goes beyond just looks. It's warmer, quieter and cozier. And I really do think the stripes combined with the off-white paint on the walls and ceiling have made the room feel far more in proportion than before. Almost like it's magic. Yeah, let's go with that. It's magic. 


I'm (crazy enough to be) redoing the basement as part of the One Room Challenge. Check out the progress week by week here:
And make sure to check in on the hundreds of other guest participants and featured bloggers. Things are gonna get hairy from here on out!


Labels: , , , , , , ,

THE SEED-STARTING TRAIN KEEPS ON CHUGGING

This is the hardest part of growing plants from seed, if you ask me. I started my first seeds at the end of February and I was so into them. I tended them lovingly. I checked on them four times a day.

And now, well the relationship has changed. There are still plants to be started and hundreds to be tended. But there are far more pressing and exciting jobs to do in the actual garden. Frankly, I get a little sick of my seedlings by now because they are just so needy. Well not really, but they apparently want water, light and warmth.

I jest. A little. But I will admit that I don't approach the care of my little baby plants with the same zeal that I did two months ago. Still, I've put a lot of effort into them so far. This is no time to shirk my responsibilities.

The tomatoes have grown about another four inches or more since I shot this photo.
Let's start with the tomatoes. I never used to start my own tomatoes from seed but you can grow so many interesting varieties that you just can't find if you buy plants. I planted 80 tomato seeds from eight varieties, two in each soil block, just in case one didn't germinate. Guess what? I had 100% germination! After thinning, that means I have 40 tomato plants. In case you were wondering, I have room to grow about 10 tomato plants in total, and my mom is growing a few different varieties that I'd also like to try. All will find homes, but seriously, next year, someone tell me to control myself!

Anyway, the tomatoes are growing far better than any other year. I can't explain why, but I did start feeding them about once a week with a very dilute fish fertilizer after I transplanted them to 4-inch pots. But the fact that they are growing so well is becoming a problem. It's still too cold for them to be outside in the temporary greenhouse (nights are still cold here), but they have outgrown all my lights. I may have to start adjusting the height on my racks inside to accommodate them.

Nicotiana in the back with tiny Plectranthus in the front.

Peppers and eggplant under LED lights.

Everything else is growing well, although not as rapidly as the tomatoes. I've had two relative disasters: gomphrena (only two germinated out of 16; something I blame on not soaking the seeds long enough before sowing) and zinnias, which continue to be a thorn in my side. I plan on direct sowing zinnias later, but I like to start a few ahead as well, especially the Profusion zinnias that I like to use in containers. Only about four the Profusion seeds germinated in each of the two colors I planted. I'm really sad about that and I have no explanation for it.

Out in the greenhouse, the foxgloves, poppies and parsley are trucking away, seemingly not minding the cool nighttime temperatures.

And believe it or not, there are seeds yet to be sown. I wanted to start a few cucumbers and lettuce inside ahead this year, just to extend the season a little bit. I'll direct sow each as well. I also went to get more decorative with my lettuce planting, which will be easier to do with plugs rather than seeds.

I did a quick Facebook live video Monday night after work where I sort of ran around the garden looking at seeds, so for the complete rundown of what's happening in seedling land, check that out below (worst freeze frame ever; it's like Facebook purposes picks horrible scenes).


How are you feeling about your seedlings now? Are you still as fired up as you were in late winter?

Labels: , , ,

25 April 2017

PROGRESS ON THE CIRCLE GARDEN

There are so many things happening in the garden at this time of year that it's nearly impossible to report on it all here. But it is certainly blog-worthy when actual progress is made on a project!

Most of the weekend was dedicated to working in the circle garden, to the detriment, of course, of the rest of the garden, which is sorely in need of attention. But there is real pleasure in getting some actual gardening done in this area, which I've been renovating since last fall.

When we last left the circle garden, I had ripped out the existing paths and created new ones with metal edging and paver base, which will be topped with decorative gray gravel when all the planting is finished, weeded it like crazy and shared the design plan.


Somehow there was a lot of excessive soil after the path project last year but I left most of it in the beds assuming it would settle a bit. As it turned out, it didn't, and the better part of three hours was spent hauling very nice soil to a pile. I'm guessing it was about a yard and a half if not two yards just judging from the size of the pile.


Then I was able to get back to my beloved, if not quirky, chive hedge. I dug up everything that was already planted on the edges, just to inspect it and make sure it was weed free (a worthy effort judging by the pile of weeds I had), and then divided everything to outline every section of the garden in chives. I don't know that they'll grow together this year yet to form a proper hedge, but probably next year.

Rhubarb from grandma's garden that probably originally came from her parents' farm.
The next day I picked up four boxwood ('Baby Gem' which is a cultivar I've not used before and not the one I went to pick up—I had been planning to buy 'Winter Gem'), one for the center of each section. Then I laid out all my stakes and string again and created each planting area. I rehomed some rhubarb from my 100-year-old grandmother's house for the rhubarb area, but I'm sad that I won't be able to harvest any this year. And I also replanted the Egyptian walking onions I overwintered last year. I'm a little light on those so I'm hoping to find someone in my master gardeners group who can spare a few.


From here on out, it's really just planting left to do in that garden and I'll take on that project as I get plants or as things are ready to transplant. It's lovely to see progress though. And for a few precious moments I know that there is one weed-free spot in my yard.


Labels: , , ,

21 April 2017

FRIDAY FINDS

Gosh, it's a little crazy being post-Easter already! The next big holiday is Memorial Day! Crazy. Anyway, here's what I'm digging this week.

I like seeing interesting floral arrangements. I sort of aspire to have a clue about flower arranging, which I don't, but I figure practicing will help.


But I was confused why the water in one of my Easter table arrangements was turning blue. The other day I figured it out (see above). By the way, there are no real photos of my arrangements because Easter was mostly a fire drill. Once again, my oven misbehaved. We figured out that it works fine when there's just one thing in it but when you load it up, it runs very low. Grrr.

Well, now I have to go to HomeGoods.

This is a joke, right?

This, definitely is a joke. Well it would be for me anyway.

I bet the No. 1 thing people go to a nursery looking is screening or blocking a view. Here are some ideas.

I'm so envious. I want to go to this nursery for a behind-the-scenes look!

I was so busy last weekend that even though it was beautiful weather, I didn't get into the garden at all! So this weekend I will make up for that. On the agenda is some serious weeding and general clean up, a bit of plant division, a whole bunch of chive hedge work and a horse manure run. Glamorous stuff, I tell you!

Will you be gardening this weekend?

Labels:

20 April 2017

ORC WEEK 3: CHA CHA CHANGES

Ah yes, Week 3 of the One Room Challenge. I remember this week from when I did this last year. It is when the panicking properly starts. Because right now it does not feel like I'm even remotely halfway through this basement project.

You can catch up on Week 1 and 2, but most of the work is happening on the computer. I've made a list of the items I need to purchase for this renovation and I've been working hard to check things off. That's ironic since I've mentioned on more than one occasion that this is a low-budget affair. But when you're doing a space for the first time—and that's really what this is as we just sort of stacked stuff down there before—there are a lot of things that you need to collect.

This is a pretty terrible photo, but it illustrates how we basically painted everything the same color, from the ceiling to the walls to the trim.

The biggest change in the space is also the simplest: paint. I'll never know what I was thinking when I decided to paint the walls down there raspberry and baby blue, but I'm far more in my comfort zone going with a cream color. We chose Benjamin Moore Mascarpone, which I've used for the trim and some of the walls in most of the rest of the house, for two reasons: 1. We had a lot of it left over from other projects so I didn't need to buy much, and 2. I just didn't have it in me to go through the whole "Which shade of off white should I pick?" thing. Honestly, it's a little warmer than I might have liked, and interestingly, the less expensive paint we went with for the walls, which we did have to buy, is far more yellow than the trim paint that we already had, even though they are all Benjamin Moore formulations, but it's OK.


I also changed out the door hardware from the bright, cheap gold to a more classic black. I originally decided on black accents in that space for the same reason I chose the paint color—ease—but I'm very happy with the decision. It's not just simple, not to mention black is often a less expensive finish than some others, it also works well with the space.

I chose these simple door knobs with a square rosette for the closet door and the louvered doors to the other half of the basement. (Here's an affiliate link for them.) Sidenote: Painting louvered doors is like visiting the seventh circle of hell and I don't recommend it.


And of course, my favorite bit so far is the industrial lights I made for less than half of what I could have purchased them for. It was a much easier project than I anticipated and I detailed the whole how-to here.

Next week is a big one: Floor time! I'm certain that more than anything a new floor is going to transform this space.


Make sure to check out the featured One Room Challenge participants as well as the hundreds of guest participants making huge changes to one room in their house in this crazy challenge.


Labels: , , , , , , ,

18 April 2017

HOW TO POT UP DAHLIAS FOR A JUMP ON SUMMER

It should come as no surprise to anyone who reads this blog or follows me on Facebook or Instagram that I have a dahlia addiction. This has been an ongoing problem and my collection seems to keep growing (although I continue to play with different methods of saving tubers from year to year and have yet to hit on one I am happy with).

I garden in zone 5b, but there's a lot more to it than than. Because we are about 500 feet from Lake Michigan, it is very slow to warm up here. In fact, it was a gorgeous weekend, but each morning at my house was foggy and overcast and it wasn't until later in the day that the sun was shining. On mornings like that, when I drive up the hill near our house, less than a quarter-mile away, every window in the car fogs up and I have to pull over to open up the windows and turn on the defrost until the car acclimates to the 20-degree (or more) temperature change). The air temperature at the top of the hill is about 70 degrees. The air temperature at the house struggles to reach 50 degrees, thanks to the influence of the enormous 40-degree lake we love to look at from the window.

That means that zones that are much cooler than ours are actually much warmer in spring (although we are warmer in fall and winter). It's a funny little microclimate, and a good reason why you really have to know your own garden and not rely on just the USDA hardiness zone map. But the practical application is that I can't plant things as early as many of my neighbors to the west and even north can.
'Cafe au Lait' dahlias are some of my favorites. They change color throughout the year. By autumn they were all lovely, buff and cream.  

And dahlias fall into that category. Dahlia tubers absolutely will not stand cold soil. Cold, wet soil is likely to make them rot in the hole, and spring in my garden adds up to a whole bunch of cold, wet, soil. That leaves me with two options: Wait until the soil is sufficiently warm to plant tubers in the garden, or get a head start on growing dahlias by potting them up for a bit.

There are pros and cons to each method.

The benefits of just waiting until the soil is warm enough to plant tubers directly into the ground probably start with it being easy. You plant them once and forget about it. But there are a lot of cons: You get a later start on the season so blooms will come later; it can be difficult to store tubers properly that long (especially if some that you buy have already sprouted); and it's easy to forget where you planted them in the garden and you may accidentally dig them up or plant something else too close.

Planting in pots has obvious benefits that counteract most of those cons. You can get tubers out of storage sooner, get plants going so they have a healthy root system and good amount of top growth by the time they can be planted out, and you'll never forget where you planted one because you can see it. But that all comes at a price. You will need a lot of gallon-sized nursery pots (I save all my nursery pots for planting up dahlias and seedlings but did have to buy some to supplement my collection a few years ago), a lot of potting mix (I probably went through 3 cubic feet potting up my dahlias), and there's a lot more time in the planting and ongoing tending of the dahlias.

'Art Deco' gallery dahlia.

When you're as in love with dahlias as I am, the choice is pretty clear, but just planting them straight in the ground may work better for people with warmer springs.

You can see some of the dahlias I'm growing this year here.

Dahlia tubers all potted up. And no, I didn't count them. Some things are better left unknown.

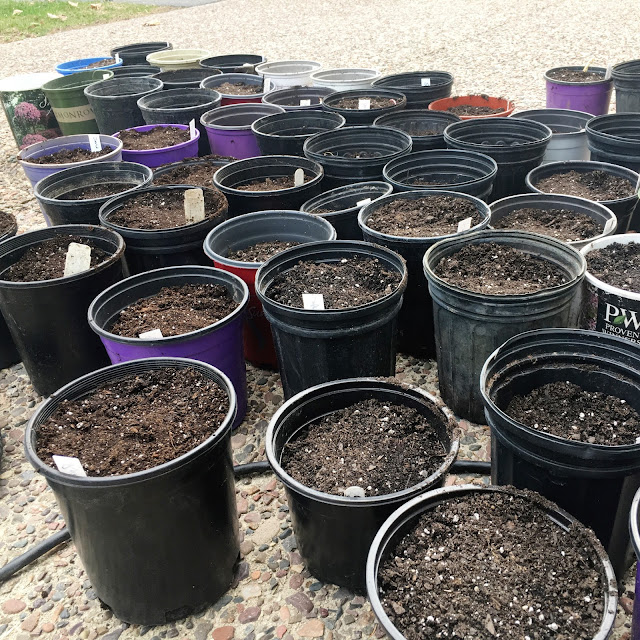
Planting them in pots couldn't really be simpler. I just put a few inches of potting mix—I never use potting mixes with fertilizer added. It's like baking with unsalted butter to me; I like to control my ingredients—in the bottom of a gallon-size container, put in the tuber either on its side or pointed upward (you want the "neck" of the tuber where the eyes are pointed up) and then cover it up with more potting mix so the top of the tuber is buried at least a couple inches. I don't worry about filling the container all the way to the top with potting mix. Some tubers are smaller and don't need as much.

Then—and this is a step I learned from NOT doing it—label every pot. I know you think you'll remember that a grouping of pots all has the same kind of dahlia so you'll just label one and keep those together. That will not happen and you'll need to plant these well before you see any blooms. I finally broke down and bought a case of cheap plant labels so I will stop scrimping and forgetting what plant is what. Affiliate links at the bottom of the post will point you to those and some of the other products I like for potting dahlias.

Assuming that your potting mix is nicely moist, as it is when you open a fresh bag, there's no need to water tubers in pots right away. In fact all they need to get growing is warmth, so I just put them in bins or laundry baskets and bring them in the house. When shoots start appearing I'll water them and gradually move them outside to the temporary greenhouse. If you're potting up tubers that already have shoots, don't worry about them too much because they'll probably be heading off in odd directions. Just plant the tuber as above and cover the shoot, unless it's heading in the right direction and ends up above the level of the soil. In that case, I water the container and put it in a bright spot, usually in the greenhouse.

Then it's just a matter of giving your dahlias water and light as they grow until it's time to plant them out, which is usually the first or second week of June in my area, but depends entirely on the weather. Happy dahlia growing! Any questions, leave them in the comments.

Labels: ,

13 April 2017

ORC WEEK 2: FLOOR OPTIONS GALORE

Welcome to Week 2 of the One Room Challenge. I'm "playing along" as a guest participant in the blogging event that has people making over a room in six weeks and linking up via Calling it Home.

In Week 1 (which I just published a couple days ago) I laid out the room, the issues, the challenges and a very rough design concept. But any renovation of that room would fail if I didn't deal with the main issue in the room: the floor.

A variety of the colors available from Globus Cork that we considered for the project. Top row: Alabaster, Ocean Fog, Pisello; Second row: Slate Gray, Bleached, Sage; Third row: Cement Gray, Ocean Blue, Natural; Bottom row: Graphite, Whitewashed, Sable.

The existing floor—pink and blue sheet sheet vinyl—could be described as hideous at best. This was not something that I could just design around. And honestly it wasn't really the best kind of flooring for this space. In fact, flooring in this space has a long list of qualities it needs to have:

  • Durable. This is a hard working space because we are constantly walking back and forth through that space to get to the utility side of the basement.
  • Able to deal with water issues. We have two sump pumps in the basement—one on each side—that manage the rare water issues we have down there. That side of the basement has never had a real water problem other than the one time the sump pump failed, but it's a basement, so water can happen. 
  • Add warmth. The basement isn't well insulated and although there is heat down there, the space is naturally cooler than the rest of the house.
  • Dampen sound. Even with low ceilings, the acoustics are not the best. Couple that with the likelihood that the washer or dryer could be running in the next room, or the furnace may kick on and it's not exactly super quiet. Anything that can help dampen the sound would be good.
Vinyl (doesn't solve any other than the water issue), wood (warm but nothing else), carpeting (no way, never near a potential water issue) and tile (durable, but misses the mark on the rest of the requirements) were out. In fact there was only one kind of flooring I could come up with that actually fulfilled all the requirements: cork.

I love cork floors. Our family cottage used to have them when we were growing up and they survived soaking wet kids full of sand from the beach, wet towels left for days, several months with no heat and more. Back then cork floors were the color of cork, not unlike a bulletin board. Which is not bad, but doesn't work in every space.

But now, cork can be found in just about every color under the rainbow. I reached out to Globus Cork to work with on this project in part because they offer hundreds of color and texture combinations. The fact that their cork tiles are easy to install, meaning we could do it ourselves, was a bonus. 

Globus Cork is providing flooring for this project so that I can tell you about the process of choosing it, installing it and living with it. Of course all opinions are my own.

Globus Cork offers more than 40 colors of cork in three textures, all of which can be cut in custom patterns. You know how they say that sometimes having more options is worse than fewer? Honestly there is so much to choose from that it can be a little overwhelming, although a project gallery on the website helps spark the imagination.

The neutral options we considered (clockwise): Cement Gray, Alabaster, Bleached, Whitewashed and Natural in the middle. 

I knew I didn't want a basic solid-color floor for the basement. I felt like it would be a missed opportunity to not do something a little out of the ordinary for a space like this, so I ordered several color options to get a feel for just how bold we wanted to go. And although we played around with some of the blues and greens, I'll admit, I'm just not a good enough designer to know how to make something like that work for the long term. I think plenty of people could make a floor to die for that is very bold and exciting and even timeless, but I don't trust changing tastes enough for that.

So we quickly narrowed down the options to a more neutral palette, and one that was light in color because we need to do everything we can to make that space feel brighter and larger. Although I liked Cement Gray, it seemed like the oddball out among the neutral options we pulled, so we nixed that. And I loved Natural, but there was a warmth to it that didn't work well with the stone in the fireplace, so I pulled that out of the running as well. Then it was a decision of whether we wanted two or three colors.


I think we could have made any pattern look really nice with a combination of Alabaster, Whitewashed and Bleached, but my concern was that the floor might get too busy. So we narrowed it down to two: Alabaster, a cream color, and Bleached, which is basically bleached natural cork (the two end tiles shown above).

Here's the diagram we made showing what we plan to do with the random stripe design. Nothing like making things complicated.

As for the pattern, I thought a stripe going across the room might help the space appear a little wider than it was and, for no reason other than to do something a little different, I opted for a random stripe. The design will be about two-thirds Bleached and one-third Alabaster, with stripes of random width and placement. 

On paper is one thing, but we'll see how it looks in the space. It's liberating to be doing something a little out of the ordinary and I think it will help turn a very basic space into something a little special. 


There are so many amazing renovations happening as part of the One Room Challenge. Check out the featured participants and the guest participants (more than 200!). 


Labels: , , , , ,

12 April 2017

HOW TO POT ON TOMATO SEEDLINGS

There comes a time in every seedling's life when it must move out of its cramped confines into bigger digs that will allow it to keep growing.

Given proper heat and light, tomato seedlings grow faster than most other kinds of seeds, so they need almost constant tending from the moment they are planted. I sowed my tomato seeds—two seeds per soil block—on March 25, put them on a heat mat and within five days almost every seed had germinated. Within nine days I had a 100% germination rate (that's almost unheard of) for the 80 seeds I planted.

By April 4 it was time to thin the seedlings down to one per soil block (the same applies if you are planting in cells or modules). I made a quick Facebook live video showing the technique that you can view.


By the time I got home last weekend, it was clear that it was about time to pot on the seedlings. I find it easier to know when to pot on when using soil blocks because you can clearly see the roots. By examining a block I could see that long roots were coming out of the blocks in every direction. That plus the fact that the soil blocks were requiring more and more water was the signal that these babies were growing and fast.


Although all the plants look healthy, with dark green leaves and, in most cases, at least two sets of true leaves, I was surprised at how tall they were. The stems were thick, which is good, but they were all about 4 inches tall, which seems taller than usual. Perhaps the bulbs in my grow light aren't as strong as they were last year or some other factor accounts for that. The good news is that the problem is easily fixed.

Prior to transplanting, the seedlings had thick stems that were a little taller than I would have liked.

You probably know that tomatoes should be planted either in a trench or deeply so that roots will form along the buried stem. That same advice holds for potting on seedlings. I choose to transplant the soil blocks to round 4-inch pots that are deeper than many square pots. I save almost all my pots from plant purchases for this purpose and just rinse them out. I know that you are supposed to sterilize pots in between uses, but I'm a lazy gardener and I've never done this.

Transplanting is simple: Just put a small amount of potting mix—I move on real potting mix at this stage of life, although I do not use those with fertilizer already mixed in—in the bottom of the container, rest the soil block on top, then fill the rest of the container with potting mix just very lightly settling the soil on top. There's no need to firm it down as watering will do that naturally. I left only about a half inch to an inch of stem sticking up above the soil level. The buried stem will create more roots and should help the plant thrive.

When potting on, I put a small amount of soil mix in the bottom of the pot, set the soil block on top and filled with soil, burying all but about a half-inch of the stem. The buried part of the stem will grow new roots.

This is where soil blocks really shine in my opinion. Because they haven't been pried out of a cell, there is basically no root disturbance and the bottoms of the roots are nicely spread out.

There is a danger of potting on seedlings into pots that are too big. When the soil-to-root ratio is high,  it can be easy to overwater them. If you're jumping up to the size of pot I chose without a stop at a smaller pot in between, you have to really keep an eye on the water and make sure you don't drown them, allowing the roots to rot. Presuming I can keep a handle on that, these tomatoes will live happily in these pots until the beginning of June when I'll transplant them to the garden.

From here on out the care for the tomatoes won't change much from what I've been doing. They will stay under grow lights inside for several more weeks before I move them out to the outdoor greenhouse and then gradually harden them off before planting. Because tomatoes are so sensitive to temperature, I transition them very gradually. It can take them weeks to recover from a temperature or light related shock and when you're growing tomatoes in the upper Midwest, every week is precious. From now on I will also fertilize with a very dilute fish fertilizer.

The stronger I can make my seedlings now, hopefully they better off they will be when they finally get in the garden. And that means healthier plants and more tomatoes!


Following are affiliate links to some of the products I use to grow my tomatoes (and the rest of my seeds). If you make a purchase through my link, I receive a small commission, but the price you pay never changes. Thank you for your support!

Labels: , , , ,

ONE ROOM CHALLENGE: A DO-IT-ALL SPACE DESIGN

I've mentioned the basement project here before, but only in an introductory fashion. Frankly, not much has happened with it, but there's one sure way to make sure it gets done: Put it on a ridiculous schedule for the world to see. Enter the One Room Challenge, which technically began last week but I got a little behind on so you're first being introduced to it today.

Last year we redid the first-floor bathroom as part of the One Room Challenge and two things came of it: I swore I'd never try to get a room finished in six weeks again, but I got a room finished. 

We are asking this room—the finished half of our full basement—to be a bit of everything. Its main function will be to serve as an office for Mr. Much More Patient, who started his own business at the beginning of the year. There will also be a sitting area that may some day become a small workout area and room for storage. It needs to be bright (did I mention it's a basement with teeny windows?) and durable because we'll be in it and walking through it to get to the business end of the basement. And it needs to be done on a budget.

The budget, actually, has budged a bit since I introduced this project. Pennies, which was the original budget, was not exactly realistic, so we've found a bit more to dedicate to it. But the plan is still to DIY everything, reuse furniture and materials wherever possible and call upon a few main features to carry the design. 

Speaking of design, the mood board above gives an idea of where the space may be headed. The overall palette is cream with black accents. The floor will be warm and cozy and still very functional and with the exception of the office furniture, will use pieces we have on hand to fill the space.

And frankly, it can only get better. Remember this before picture? Ouch. It's so painful.


To review, here's what we're dealing with: A long, skinny room  with three small glass block windows, a cold floor and a low ceiling that also houses essentially like the electrical panel and a sump pump. But it does have a beautiful fireplace so it's not devoid of character.

Can we make something of it? Stayed tuned over the next five weeks to see it come together and find out what we can do on a tight budget entirely done DIY.
And don't forget to check out all the amazing projects linked up and participating with the One Room Challenge hosted by Calling it Home. Since I got a late start on this, I'll be back with more in a couple days!

Labels: , ,

10 April 2017

I'M BACK: DISPATCHES FROM TRAVEL HELL

Holy smokes. I'm finally sitting down to reach out to you all to just let you know I'm still around a little bit about what's been happening.

I tend to do little personal updates as part of Friday Finds, but there was no getting to a computer on Friday. Last week I traveled to Savannah, Georgia, for a fun event with all the Troy-Bilt brand ambassadors, a group I'm happy to be included in.

Unfortunately we all got caught up in the Delta airlines mess related to storms on Wednesday. I won't bore you with the whole horror story, but I left my house at 5 a.m. Wednesday and didn't get to the hotel in Savannah until 10 a.m. Thursday. And as if that weren't bad enough, flights were screwed up when I was supposed to fly home on Friday as well, so I didn't get home until Saturday night.

The whole group of garden blogger brand ambassadors. Of course they took this photo AFTER we gardened all day!

This cute herb garden was beautiful but we also added a few plants and cleaned up some beds here as well.

The good news is that I did manage to get to Savannah to help rebuild and expand a children's garden at the Savannah Area Council of Garden Clubs Botanical Garden that was damaged in Hurricane Matthew. Along with Planet in Action and some local Troy-Bilt representatives, our group of 10 brand ambassadors put in several new gardens that should develop into really lovely places for kids to enjoy. I'm proud to be associated with a company that really reaches out to help and not only did Troy-Bilt organize the whole garden makeover, but they left behind a collection of equipment to help maintain the garden and gave the organization another $5,000 to help support the garden.

Officials from Troy-Bilt, Planet in Action and the botanical garden celebrated Troy-Bilt's donation. 

The other good bit was that although I missed out on seeing so much of Savannah, I met some more great people including Amy from Get Busy Gardening who ended up being my travel partner for most of the trip as somehow the two of us kept getting stranded in the same places. After countless hours in airports, about five hours in a rental car, two hotels and a handful of bars, Amy and I got to know each other pretty well and I can assure you, she's a good person to get stuck in a bad situation with.

All of this means that things on the blog got completely backed up because believe it or not, all that travel mess didn't really allow for much time to actually work on things. (It's difficult to type when you're standing in one line after another.)

Allow me to catch you up. First off, the latest One Room Challenge started next week and I'm going to do it again. So later today (or possibly tomorrow) you'll see a post introducing my project (technically you've already seen it but I finally have some more focus on it and it's completely different from the bathroom I did last year.) I'll post the update on Thursday to get on schedule with the official guest participant posts.

With all the travel delays I felt like I was gone for ages but it was really only four days. Still I was shocked to see how much the garden had changed in that time. Daffodils are up all over the place. Garlic mustard weed is popping up all over (and now is the best time to deal with it). In between other projects on Sunday I pruned roses and a few more clematis, set up the temporary greenhouse (affiliate link) and suddenly felt overwhelmed with all there is to do.

More coming, but I just wanted to let you know, I'm still around and not planning to fly anywhere soon!

I am a compensated brand ambassador for Troy-Bilt. But I mentioned this project here because I thought you'd be interested, not because I was paid to. And of course, all opinions are my own!

Labels: ,

05 April 2017

DEALING WITH DISEASE: VERTICILLIUM WILT

Given that I delayed a lot of garden work in fall, it's no surprise that the first real job I did in the garden this spring was a task I should have taken care of several months ago. And it was that much more painful for having waited.

Last September I shared the sad news that one of my favorite plants had been hit with a nasty disease: verticillium wilt. I watched as my Lemony Lace elderberry (Sambucus racemes) wilted one chunk at a time, and just when it was finally getting to a good size after three years in the ground.

Verticillium wilt is a nasty soilborne disease that affects many plants (here's a list), including elderberries. Last year I cut off the affected branches, making sure to disinfect my pruners) but I knew when I did it that wouldn't solve the problem. The only real remedy for dealing with it is to dig out the plant and a large area of soil around it.

With those beautiful fat buds, it was even more difficult to dig my Lemony Lace elderberry out last weekend. 

Taking that step last weekend was even more difficult because there were lovely fat buds on the branches that I knew would turn into gorgeous feathery leaves. And they would look good for a little bit but it's likely that they too could succumb to the disease. Or maybe not. According to the Missouri Botanical Garden, the symptoms might not show up this year: "The initial symptoms may occur on only one branch or may involve the entire plant. Oddly, following the initial symptoms, there may be no sign of the disease for several years even though the infection continues to reduce plant vigor."

There aren't a lot of good ways to get rid of verticillium wilt once you have it. You can attempt to solarize the soil by covering it with plastic and "cooking it" it several months—six or more, which isn't a very practical solution in a packed garden. I decided to dig out the entire plant and as large and deep of an area of soil that I could. All of that went immediately to the burn pile.

I don't see solarizing that area as practical for me, but I'm considering giving it a good burn with the weed torch. I don't know that that will work, but I don't think it can hurt.

The elderberry looking gorgeous last year with freshly leafed-out foliage.
I have another Lemony Lace elderberry in another part of the garden that was much more immature but by the time I went looking for it last spring it looked like there was a chance it too had the disease. I haven't yet dug that one out. By the way, I asked the folks at Proven Winners who developed that plant if it was particularly susceptible to verticillium wilt and they said no more than any other elderberry. So I wouldn't hesitate to plant it if you don't have problems with other elderberries.

One of the plants that is susceptible to the disease is Viburnum and my garden is full of them. In fact there is a group of three large Viburnums not far from the elderberry I dug out and one was looking not quite right last year. I'm keeping a close eye on it but already I can see it doesn't have the same flower buds that the others have. I'm crossing my fingers it's not verticillium wilt that's causing the problem.

The optimistic gardener would look at this as an opportunity to plant something new in that spot that is resistant to verticillium wilt. I'll get there eventually, but I'm still sad this beauty had to go. 

Labels: ,